Automatically publishing files provisioned with Sandboxed Solutions
Sandboxed Solutions are a new capability of SharePoint 2010 that make it possible to run custom code in a safe manner. The Sandbox isolation has unfortunately some trade offs and consequences, one of which is the fact the every file you provision with a Sandboxed Solution is checked out by default. Find out how you can work around this default behavior and automatically check in all your files without too much manual effort.
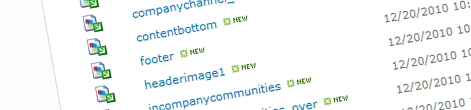
If you’ve worked with Sandboxed Solutions the following screen might look familiar to you:

It’s not a myth: by default every file provisioned with a Sandboxed Solution is left checked out. And while it’s not that bad given the new User Interface of SharePoint 2010 and how it simplifies operations on multiple files, it’s still rather inconvenient if the files are provisioned to different folders spread across different Document Libraries. So is there anything we can do about it to automate the deployment process?
A glance in the past
In the past, when working with Farm Solutions, which were the only type of Solutions back in SharePoint 2007, we could easily manipulate files provisioned by Features. All we needed to do is to open the Feature Manifest and read out the list of the files that that particular Feature was provisioning. Unfortunately, when working with SharePoint 2010 Sandboxed Solutions, things aren’t that simple.
Playing in the Sandbox
First of all the Sandboxed Solution’s WSP file or any of its contents isn’t located on the file system what means that you cannot open a file such as Feature Manifest by providing a file path on the server. On top of that, not all methods available in the SharePoint server API are available within Sandboxed Solutions. The SharePoint server API ships with the GetElementDefinitions method that allows you to read the element files from the specific Feature. Unfortunately this method is not available within Sandboxed Solutions.
Knowing where your Feature is deploying files you could of course just go and check in/publish all files in the specific location. While this approach would definitely do the job at the end of the day, it somehow feels dirty and it might break some customizations. A whole opposite approach would be to hard code the names of all the files associated with your Feature and check in/publish only those specific files. While this approach is definitely cleaner and more secure it adds some maintenance complexity to your Solution: every file you add to/remove from your Solution, has to be added both in the Feature and your code. There is however yet another approach you might want to consider.
Stamp!
Recently Vesa Juvonen wrote a great article on working with SharePoint 2010 Web Templates. One thing that Vesa suggested we all did was to stamp sites created off custom Web Templates with ID’s so that we’re able to track the usage of those Web Templates in case we need to update existing sites. So why not use the same approach for stamping files so that we can know which Feature they are associated with?
Stamping a File with a custom property is really simple. All you need to do is to add a Property element to the File definition:
<Elements xmlns="http://schemas.microsoft.com/sharepoint/">
  <Module Name="Images" Url="Style Library/mavention/images">
    <File Path="Images\someimage.png" Url="someimage.png" Type="GhostableInLibrary">
      <Property Name="Property" Value="Value" Type="string"/>
    </File>
  </Module>
</Elements>
The great thing about this approach is, that SharePoint will automatically figure out if the property should be stored as a value of a Field or a property in the Property Bag, so there is no learning curve.
Using the above approach makes is extremely easy for you to stamp all assets with the ID of the Feature that provisions them. And if you’re using the Visual Studio 2010 SharePoint Developer Tools, there is one more benefit you get: if you’re provisioning your assets with multiple Features you can use replaceable parameters and the tools will do all the tedious work for you:
<File Path="Images\someimage.png" Url="someimage.png" Type="GhostableInLibrary">
  <Property Name="FeatureId" Value="$SharePoint.Feature.Id$" Type="string"/>
</File>
Using the above approach will add the FeatureId property to the property bag of the someimage.png file and will set its value to the ID of the Feature that provisioned the file.
Having that in place we’re ready to move to the next and the last step: checking in/publishing files provisioned by our Feature.
Auto-publishing files provisioned by Sandboxed Features
Although Sandboxed Solutions have their limitations there is a big piece of the API that can be used from within Sandboxed Solutions, among which Feature Receivers. Having previously stamped our files with the ID of our Feature we can now create a custom Feature Receiver to get all our files and publish them.
In this sample approach I will use a fixed list of locations where my files have been deployed to. This will allow me to quickly retrieve and publish all of my files. If you however look for a more generic solution, you could easily extend the following code snippet to iterate through all the folders in the given Document Library and retrieve your files.
First we define a list of folders where our files are deployed to:
private string[] folderUrls = { "Style Library/mavention/images" };Then we write the body of the receiver:
public override void FeatureActivated(SPFeatureReceiverProperties properties)
{
    SPSite site = properties.Feature.Parent as SPSite;
    if (site != null)
    {
        SPWeb rootWeb = site.RootWeb;

        SPList styleLibrary = rootWeb.Lists.TryGetList("Style Library");
        if (styleLibrary != null)
        {
            SPListItemCollection folders = styleLibrary.Folders;
            string featureId = properties.Feature.Definition.Id.ToString();

            foreach (string folderUrl in folderUrls)
            {
                SPFolder folder = GetFolderByUrl(folders, folderUrl);
                if (folder != null)
                {
                    PublishFiles(folder, featureId);
                }
            }
        }
    }
}
In the receiver we first try to get the Style Library – Document Library where our files are being deployed to. The next step is to loop through the list of folders where we’re deploying files to and retrieve each folder. For this we’re using the following helper method:
private static SPFolder GetFolderByUrl(SPListItemCollection folders, string folderUrl)
{
    if (folders == null)
    {
        throw new ArgumentNullException("folders");
    }

    if (String.IsNullOrEmpty(folderUrl))
    {
        throw new ArgumentNullException("folderUrl");
    }

    SPFolder folder = null;

    SPListItem item = (from SPListItem i
                       in folders
                       where i.Url.Equals(folderUrl, StringComparison.InvariantCultureIgnoreCase)
                       select i).FirstOrDefault();

    if (item != null)
    {
        folder = item.Folder;
    }

    return folder;
}
Once we have the reference to the folder we can proceed and publish our files:
private static void PublishFiles(SPFolder folder, string featureId)
{
    if (folder == null)
    {
        throw new ArgumentNullException("folder");
    }

    if (String.IsNullOrEmpty(featureId))
    {
        throw new ArgumentNullException("featureId");
    }

    SPFileCollection files = folder.Files;
    var checkedOutFiles = from SPFile f
                          in files
                          where String.Equals(f.Properties["FeatureId"] as string, featureId, StringComparison.InvariantCultureIgnoreCase) &&
                          f.Level == SPFileLevel.Checkout
                          select f;

    foreach (SPFile f in checkedOutFiles)
    {
        f.CheckIn(String.Empty, SPCheckinType.MajorCheckIn);
    }
}
First we retrieve all files that belong to our Feature and are checked out. Once we have those files, we checked them in as major version.
And that’s it! If you deploy your Sandboxed Solution now and activate the Feature you should see the following screen:

As you can see all files have been provisioned and they are automatically checked in: and all of that done automatically!
Summary
Sandboxed Solutions are a new capability of SharePoint 2010 that make it possible to run custom code in a safe manner. Unfortunately this extra security comes with a price of a number of trade offs among which the fact that all files provisioned by Sandboxed Solution are checked out. Using the SharePoint server API you can easily create a Feature Receiver that will automatically publish all those files saving you time and minimizing the risk of human error.
Technorati Tags: SharePoint 2010,Sandbox