Easier maintaining Web Parts with Visual Studio 2010 SharePoint Developer Tools
Visual Studio 2010 SharePoint Developer Tools simplify working with SharePoint 2010 projects. By introducing SharePoint Project Items (SPIs) the tools hide the internals of creating SharePoint packages and allow you to focus on the real work. However, when you start moving SPIs around, things might get complicated and break. Find out how to prevent yourself from spending hours on fixing stuff using the standard functionality of the new developer tools.
The things that change the most
When you change the location of a SPI in your solution, there are a number of things that you have to keep in mind to keep it working. The exact number of things varies depending on the SPI template and since Web Parts are probably the most common SPIs that you’re working with, let’s use them as an example.
The things that should change
When you move a Web Part to another place in your solution, you’re very likely to change the namespace as well, to reflect the new location. However changing the namespace only is not enough. In case of Web Parts you have to modify two more things to keep them working.
The things that don’t change and which we can make change
The first thing that you have to keep in mind, after changing the namespace of a Web Part, is to update the .webpart file that registers the Web Part with the Web Part Gallery. If you won’t do this, users will get an error trying to add this Web Part to a page. When you look closer at the contents of the .webpart file provided with the Web Part SPI you will see that a part of the fully qualified name is generated dynamically by the developer tools:
<type name="MyWebPartsProject.MyWebPart.MyWebPart, $SharePoint.Project.AssemblyFullName$" />While generating the SharePoint Package, the Visual Studio 2010 SharePoint Developer Tools will automatically replace the $SharePoint.Project.AssemblyFullName$ replaceable parameter with the 4-part assembly name, so that you don’t have to worry about it. The only thing that you have to remember to do, is to change the namespace. However, did you know that you can make the tools work for you and make them generate the whole name automatically?
Making things change
Visual Studio 2010 SharePoint Developer Tools have a number of replaceable parameters that you can use to simplify the maintenance of your projects. One of those parameters is $SharePoint.Type.<Guid>.AssemblyQualifiedName$ which during the packaging process is replaced with the fully-qualified name of the type specified by the GUID.
To use it there are two things that you have to do. First you have to decorate your Web Part class with the Guid attribute, for example:
[Guid("3193f9d9-0aef-4770-866e-b2a7eb9e6945")]
public class WebPart1 : WebPart {
}
The most important here is that the GUID is lowercase and doesn’t contain curly braces. If you get this wrong, the replaceable parameter will not be replaced!
The next thing that you have to do is to open the .webpart file and in the type element replace the value of the name attribute with the replaceable parameter, like:
<?xml version="1.0" encoding="utf-8"?>
<webParts>
<webPart xmlns="http://schemas.microsoft.com/WebPart/v3">
<metaData>
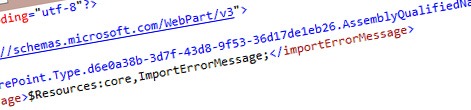
<type name="$SharePoint.Type.3193f9d9-0aef-4770-866e-b2a7eb9e6945.AssemblyQualifiedName$" />
<importErrorMessage>$Resources:core,ImportErrorMessage;</importErrorMessage>
</metaData>
<data>
<properties>
<property name="Title" type="string">WebPart1</property>
<property name="Description" type="string">My WebPart</property>
</properties>
</data>
</webPart>
</webParts>Next time when you package your solution, Visual Studio 2010 SharePoint Developer Tools will replace the whole parameter with the fully-qualified name of the Web Part class. And should you ever move your Web Part to another location or even a different project, as long as you keep the GUID unchanged, the tools will always generate the proper type name.
One very important thing to note here is, that the way the developer tools work out of the box (generating only the 4-part assembly name) is not a bug! The tools use by default a slightly different and easier approach. The approach I’ve just described demands some extra work from you, but can be very helpful depending on your scenario.
The things we can’t make change
When it comes to Web Parts updating the namespace in the .webpart file is not the only operation that you have to do after moving the Web Part to a different place in your solution. As you know Web Parts are controls and controls have to be registered as safe in order to work in the context of a SharePoint site.
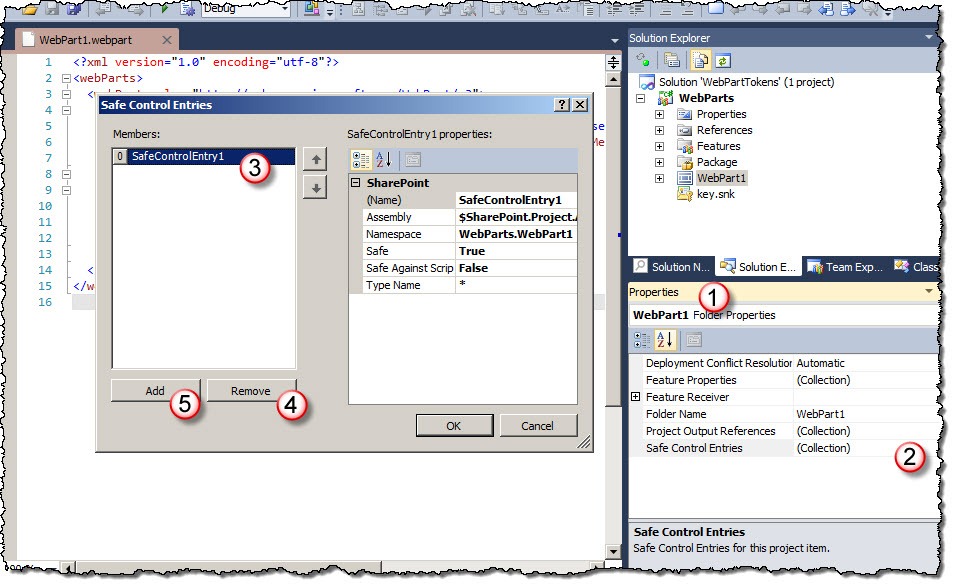
Visual Studio 2010 SharePoint Developer Tools allow you to attach SafeControl entries to every SPI. Creating such “sticky” entries is very convenient: should you ever move the SPI to a different place or package it to a different solution, the SafeControl entry will be packaged with it which really simplifies managing the packaging process.
The only limitation at this moment, when it comes to managing SafeControl entries, is that there is no way of automatically generating them. By default a SafeControl entry is generated as follows:
<SafeControl Name="SafeControlEntry1" Assembly="$SharePoint.Project.AssemblyFullName$" Namespace="WebParts.WebPart1" TypeName="*" IsSafe="true" IsSafeAgainstScript="false" />Although the tools automatically generate the 4-part assembly name in the Assembly attribute, you still have to manage the namespace itself in the Namespace attribute. At this moment there is no replaceable parameter that would automatically generate the namespace for you.
Although it doesn’t take you all the way there, the good news is, that generating a new SafeControl entry is just a matter of a few clicks. All you have to do is to browse to the Properties of your SPI, open the Safe Controls Entries property, select the old entry, click Remove, click Add and you’re done. Visual Studio 2010 SharePoint Developer Tools will automatically generate a new SafeControl entry with correct namespace for your SPI.
Summary
Using Visual Studio 2010 SharePoint Developer Tools for building SharePoint 2010 solutions allows you to focus on your work and be more productive. When you however move your SPIs to another location in your solution, there are some manual steps that you will have to do, to keep them working. Using the standard functionality of the developer tools you can minimize the effort and make the maintenance of your solution easier.