Optimizing the output of the Content Query Web Part
Content Query Web Part is one of the most powerful Web Parts provided with the SharePoint 2010 platform. To support all of its functionality however, it produces some additional HTML markup that you might not need in your website. Find out how to get more control of the output of the Content Query Web Part.
Is it a plane? No, it’s the Content Query Web Part!
The SharePoint 2010 platform includes a number of standard Web Parts that you can use as building blocks in your solutions. One of those Web Parts is the Content Query Web Part (CQWP) that you can use to create dynamic content aggregations. But CQWP offers you even more than only the ability to roll-up content. Using the CQWP in SharePoint 2010 you can dynamically filter content, display the results grouped and in columns and, once you’re done, you can publish the query results to an RSS feed! With all those capabilities it’s not that hard to image what rich solutions you can build using a single Web Part.
Analyzing the output of a CQWP
The Content Query Web Part is a very powerful building block for custom solutions. To support all of its functionality however, it outputs some additional HTML. If you ever examined the output of a CQWP that aggregates some content, you might notice some additional HTML markup surrounding what you have configured in your Item Style.
Consider the following Item Style:
<xsl:template name="mavention-TitleAndDescription" match="Row[@Style='mavention-TitleAndDescription']" mode="itemstyle">
    <xsl:variable name="SafeLinkUrl">
        <xsl:call-template name="OuterTemplate.GetSafeLink">
            <xsl:with-param name="UrlColumnName" select="'LinkUrl'"/>
        </xsl:call-template>
    </xsl:variable>
    <article>
        <h2><a href="{$SafeLinkUrl}"><xsl:value-of select="@Title"/></a></h2>
        <p><xsl:value-of select="@Description"/></p>
    </article>
</xsl:template>
Assuming the CQWP would return a few items in the query, you would expect the output similar to following:
<article>
    <h2><a href="article1.aspx">Article 1</a></h2>
    <p>Article 1 Description</p>
</article>
<article>
    <h2><a href="article2.aspx">Article 2</a></h2>
    <p>Article 2 Description</p>
</article>
<article>
    <h2><a href="article3.aspx">Article 3</a></h2>
    <p>Article 3 Description</p>
</article>
...
Instead, here is what the CQWP outputs out of the box:
<div id="cbqwpctl00_ctl23_g_d077f02d_54d2_4db4_888b_3b4c143a3559" class="cbq-layout-main">
<ul class="dfwp-column dfwp-list" style="width:100%" >
<li class="dfwp-item">
<article>
<h2><a href="http://mavention/blog/Pages/inconvenient-sandboxed-web-templates-navigation.aspx">Inconvenient Sandboxed Web Templates and Navigation</a></h2>
<p>Web Templates are the new recommended approach for templating sites. Combined with Sandboxed Solutions they empower power users and offer them great flexibility and productivity. There is however one inconvenience with regard to how SharePoint Navigation Providers deal with Sandboxed Web Templates.</p>
</article>
</li>
<li class="dfwp-item">
<article>
<h2><a href="http://mavention/blog/Pages/inconvenient-templated-controls-customized-pages-sharepoint-2010.aspx">Inconvenient Templated Controls and customized pages in SharePoint 2010</a></h2>
<p>Using Templated Controls is a great way for separating UI from functionality. Unfortunately as soon as you customize the Master Page or Page Layouts that uses a Templated Control things are likely break. So what is exactly happening behind the scenes and, what’s more important, how should you deal with it?</p>
</article>
</li>
<li class="dfwp-item">
<article>
<h2><a href="http://mavention/blog/Pages/easy-fixing-broken-publishing-pages-mavention-publishing-page-settings.aspx">Easy fixing broken Publishing Pages with Mavention Publishing Page Settings</a></h2>
<p>When working with Publishing Pages it happens once in a while that you apply a broken Page Layout to a Publishing Page and since you cannot navigate to that page to change the layout back the only option seems to either recreate the page with a different layout or fix the layout. There is however another – easier way. Find out how to easily change the layout of a broken Publishing Page using the Mavention Publishing Page Settings solution.</p>
</article>
</li>
</ul>
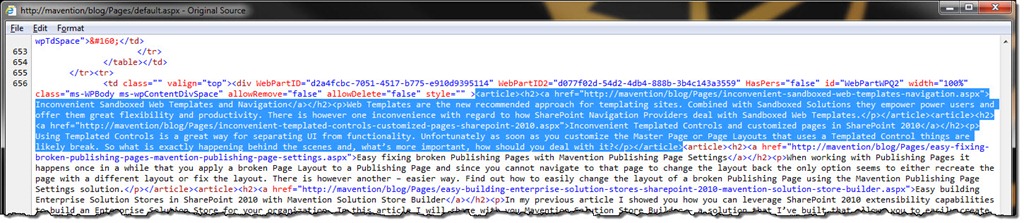
</div>Did you notice the additional div, ul and li tags added to the output HTML?
As I mentioned before the additional markup, that the CQWP outputs, is used for properly supporting rendering items in columns and groups. But what if you don’t use it and all you want is your HTML only?
Optimizing the output of the Content Query Web Part
Although the Content Query Web Part adds some extra HTML markup to the output, the great news is, that it all can be removed if you don’t need it. Because the CQWP uses XSLT to render the output, all you need to do to remove the undesired markup is to edit the XSL files used by the Content Query Web Part.
The Content Query Web Part uses three XSL files to render the results of a content aggregation: ContentQueryMain.xsl, Header.xsl and ItemStyle.xsl all of which are stored in the Style Library/XSL Style Sheets folder in the root of your Site Collection. All of the additional markup that is used, whenever you don’t use grouped view or columns, is located in the ContentQueryMain.xsl file, so this is the only file that we will have to modify.
One more thing
The Content Query Web Part can be used for many different purposes within a site. On top of that, the XSL files, that are used by the CQWP are not exclusive to CQWP and are used by other components as well. To ensure that we are not introducing breaking changes, we will customize the ContentQueryMain.xsl file in a way which supports both out-of-the-box and optimized rendering.
Customizing the ContentQueryMain.xsl file to optimize the output of the CQWP
In order to support both out-of-the-box and optimized way of rendering, the output by CQWP we have to be able to distinct which rendering mode should be applied when. One way of doing this, is to prepend the names of Item Styles with a prefix. By checking the name of the Item Style used at the given moment we would be able to determine whether it’s a custom Item Style built by us or an out of the box Item Style that could be used elsewhere on the site and which should use the out of the box rendering mechanism.
Let’s start off by defining the prefix as a global variable so that we can access it everywhere in the XSL file. Add the following code snippet in line 36:
<xsl:variable name="ItemStylePrefix" select="'mavention-'" />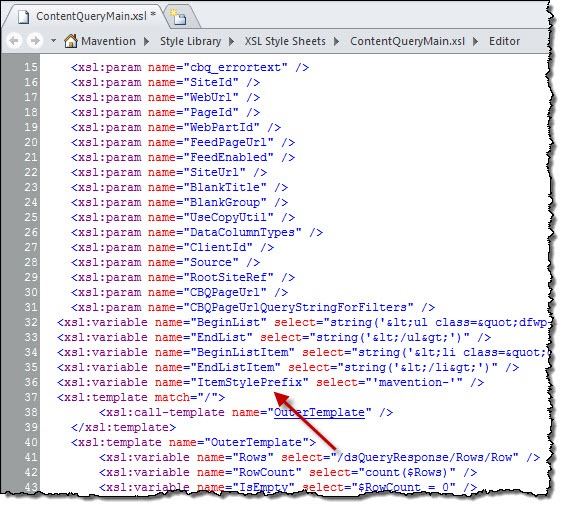
In order to check if the currently used Item Style is built by us, we have to retrieve its name. If you have every examined the XML returned by the CQWP, you know, that the name of the currently used Item Style is stored within the Style attribute on every Row node. To retrieve the name of the Item Style used by the CQWP add the following code snippet in line 37:
<xsl:variable name="ItemStyle" select="/dsQueryResponse/Rows/Row[1]/@Style" />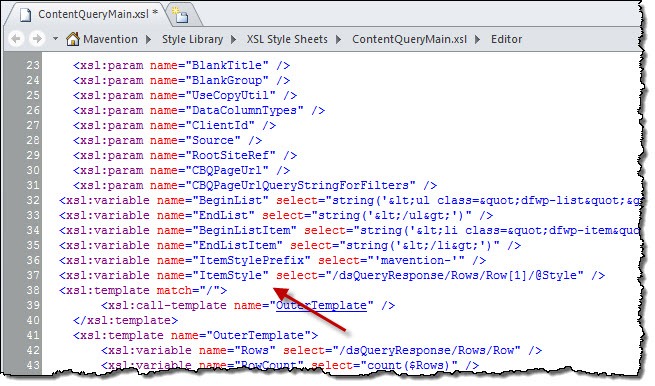
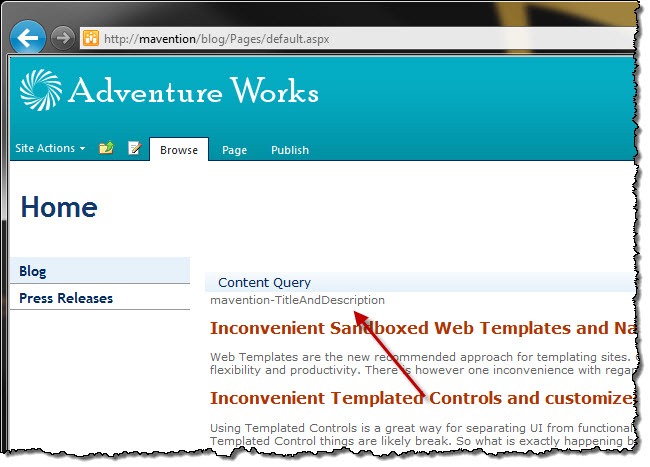
If you would request the value of the ItemStyle variable at this moment, you would see the following output:
The first place that renders some additional output is the CQWP div in line 45. To avoid rendering this extra div for our custom templates let’s wrap the lines 45-71 with the following code snippet:
<xsl:choose>
  <xsl:when test="starts-with($ItemStyle, $ItemStylePrefix)">
    <xsl:choose>
      <xsl:when test="$IsEmpty">
        <xsl:call-template name="OuterTemplate.Empty" >
          <xsl:with-param name="EditMode" select="$cbq_iseditmode" />
        </xsl:call-template>
      </xsl:when>
      <xsl:otherwise>
        <xsl:call-template name="OuterTemplate.Body">
          <xsl:with-param name="Rows" select="$Rows" />
          <xsl:with-param name="FirstRow" select="1" />
          <xsl:with-param name="LastRow" select="$RowCount" />
        </xsl:call-template>
      </xsl:otherwise>
    </xsl:choose>
  </xsl:when>
  <xsl:otherwise>
    <!-- lines 45-71 go here -->
  </xsl:otherwise>
</xsl:choose>
If the currently used Item Style is one built by ourselves we suppress the standard rendering logic and move straight to rendering the body. One exception to this is the scenario when the query returned 0 items (code snippet line 4). In such case we call the default Empty XSL Template (code snippet line 5).
Another modification that we need to apply, is within the OuterTemplate.Body XSL template: this is exactly the place where additional markup for supporting columns and groups is being rendered. To prevent the additional HTML markup from being rendered we have to wrap lines 109-160 with the following snippet:
<xsl:choose>
    <xsl:when test="starts-with($ItemStyle, $ItemStylePrefix)">
      <xsl:for-each select="$Rows">
          <xsl:variable name="CurPosition" select="position()" />
          <xsl:call-template name="OuterTemplate.CallItemTemplate">
          <xsl:with-param name="CurPosition" select="$CurPosition" />
        </xsl:call-template>
      </xsl:for-each>
    </xsl:when>
    <xsl:otherwise>
        <!-- lines 109-160 go here -->
    </xsl:otherwise>
</xsl:choose>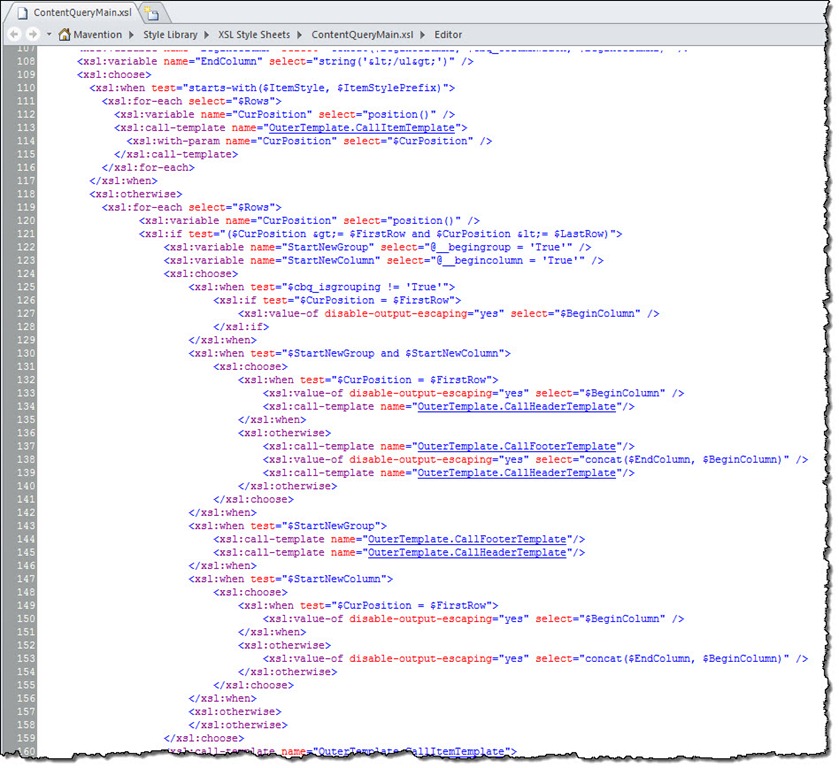
The last modification that we have to apply is within the OuterTemplate.CallItemTemplate XSL template, which by default wraps every row in the li tag. To remove the unnecessary HTML for our Item Styles let’s wrap lines 182-204 with the following snippet:
<xsl:choose>
    <xsl:when test="starts-with($ItemStyle, $ItemStylePrefix)">
        <xsl:apply-templates select="." mode="itemstyle">
            <xsl:with-param name="CurPos" select="$CurPosition" />
        </xsl:apply-templates>
      </xsl:when>
    <xsl:otherwise>
        <!-- lines 182-204 go here -->
    </xsl:otherwise>
</xsl:choose>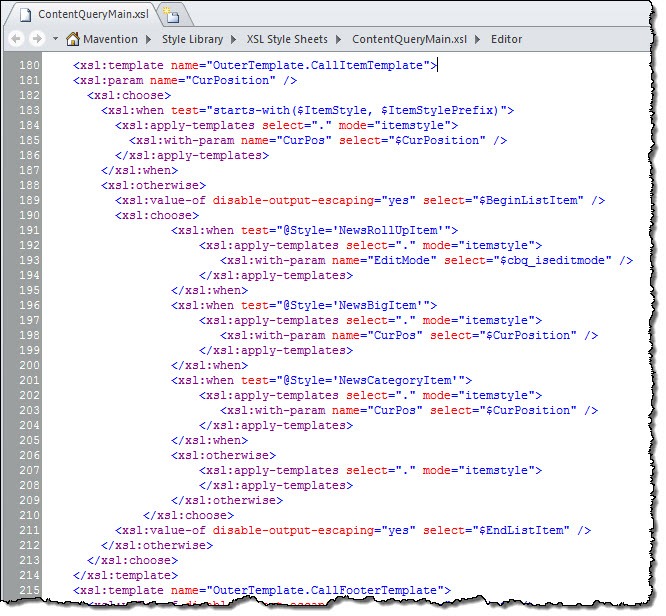
If we refresh the page now and examine the source we will see clear HTML source just as we expected.
Summary
Content Query Web Part is a rich building block that offers powerful content aggregation and presentation functionality. To support its capabilities, the CQWP produces additional HTML markup, that might not always be desired. The output produced by the Content Query Web Part can be easily optimized by modifying the ContentQueryMain.xsl file.