Automatically copying assemblies and symbols of dependent projects
Using the new Visual Studio 2010 SharePoint Developer Tools you can package your SharePoint components into WSPs with just a few mouse clicks. And although it allows you to get productive and focus on the real work, this process has some limitations like not copying dependent assemblies to the output directory.
The inconvenience
Imagine the following scenario. You’re working on a SharePoint Solution that consists of three Visual Studio Projects: Contoso, Contoso.Controls and Contoso.WebTemplates. And although they are all packed into a single WSP, you have separated them out for both security and clarity purposes.
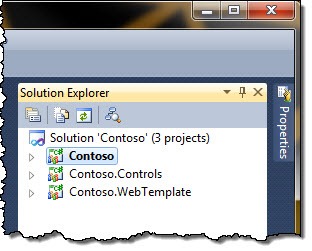
There are no project-to-project references in your solution. Instead implicit references have been created by the Visual Studio 2010 SharePoint Developer Tools right after you added assets from both dependent projects to the Contoso Package.

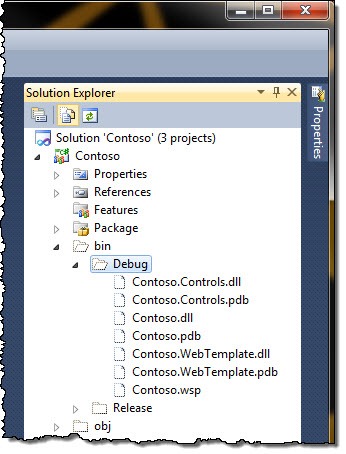
When you package the Contoso project, Visual Studio 2010 SharePoint Developer Tools will properly discover dependent projects, build them and package the built assemblies into the Contoso Package – just as you would expect them to. Unfortunately when you open the output directory, none of the dependent assemblies have been copied there.
Although this might not be an issue in most scenarios, there are situations when this could become inconvenient. Imagine for example that you were working on a shared library solution that you would hand off to another team. In order to use your code, they would not only have to have your Package so that they can deploy your code in their environments but they would also need the assemblies to reference them in their projects. And while they could extract them from the WSP, you can imagine it’s not that convenient, not to mention the missing symbols should things go wrong and they needed to debug your code.
Automatically copying assemblies and symbols of dependent projects with using a custom MSBuild target
The packaging process used by the Visual Studio 2010 SharePoint Developer Tools is based on MSBuild. The great news is that it is not only extensible but that you can also replace the existing steps which is exactly what we will do to automatically copy dependent assemblies to the output directory.
The logic behind packaging SharePoint Solutions is defined in the Microsoft.VisualStudio.SharePoint.targets file located in the C:\Program Files (x86)\MSBuild\Microsoft\VisualStudio\v10.0\SharePointTools folder. The specific target that we have to extend is called BuildSharePointProjectReferences.
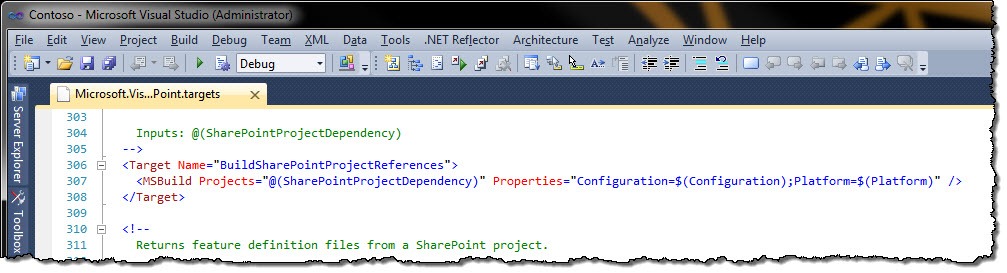
As you can see all it does is to build all dependent projects as discovered earlier by the Visual Studio 2010 SharePoint Developer Tools. To automatically copy dependent assemblies and their symbols to the output directory we will override this target with our own. What we could also do is to implement the AfterLayout target which has been designed for extending the packaging process. While it would keep the original BuildSharePointProjectReferences target intact it would cause building dependent assemblies twice.
Creating custom MSBuild targets file
In order to override the BuildSharePointProjectReferences target create a new MSBuild file called Contoso.targets and paste the following contents in it:
<?xml version="1.0" encoding="utf-8" ?>
<Project xmlns="http://schemas.microsoft.com/developer/msbuild/2003">
  <Target Name="BuildSharePointProjectReferences">
    <MSBuild Projects="@(SharePointProjectDependency)" Properties="Configuration=$(Configuration);Platform=$(Platform)">
      <Output TaskParameter="TargetOutputs" ItemName="BuildOutputPaths"/>
    </MSBuild>
    <CreateItem Include="%(BuildOutputPaths.Identity)">
      <Output ItemName="BuildOutputs" TaskParameter="Include"/>
    </CreateItem>
    <CreateItem Include="%(BuildOutputs.RelativeDir)*.dll;%(BuildOutputs.RelativeDir)*.pdb">
      <Output ItemName="Filter" TaskParameter="Include"/>
    </CreateItem>
    <Copy SourceFiles="%(Filter.Identity)" DestinationFolder="$(OutDir)"/>
  </Target>
</Project>
As you can see the first step in our target is exactly the same as in the original one which is building all dependent projects. The only difference here is, that we will store the full paths of the built assemblies in the BuildOutputPaths variable (line 5).
The BuildOutputPaths variable contains an array of full paths to all built assemblies. If we wanted to copy only the assemblies, we could proceed with the Copy task at this moment. However, because we want to copy the symbols as well, we have to first extract the output path for each created assembly.
Although MSBuild is quite powerful it misses some basic capabilities like processing strings. It is for example not possible to retrieve the file path from its full name with a simple call. Using some meta data magic however, we can get to the path information which we can then use to define filters for the copy action.
The first step to retrieve the output path for each assembly is to create items (lines 7-9). This allows us to process the string as file names, which gives us access to meta data (line 10). Using the file path meta data we can retrieve the output path for every assembly and store it for creating the copy filter.
The last step is to create a new list of items which should be copied (lines 10-12). Because we want to copy the assembly and its symbols we specify two filters, one for each extension. Finally we call the Copy task to copy the files to the output directory of the Contoso project.
Linking the targets file to the project
Now we have the custom MSBuild targets file in place it’s time to make use of it. For this, unload your project and open the project file for editing.
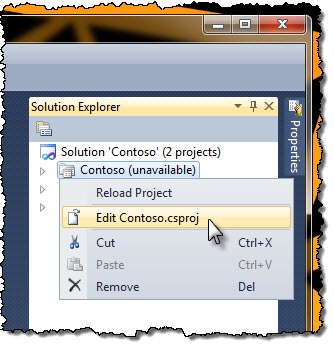
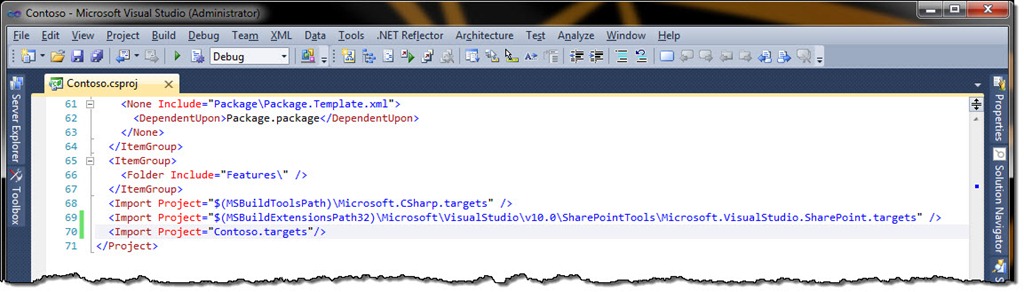
Move to the bottom of its contents and add the following code snippet just before the closing Project tag:
<Import Project="Contoso.targets"/>The changed project file should look like this:
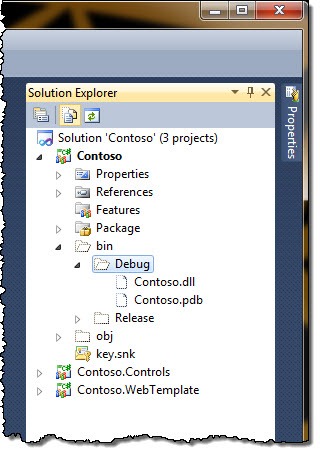
All you have to do now is to save your changes and reload the solution. The next time you will build your project, all dependent assemblies will be copied to the output directory.