
Step-by-step building a companion Windows Store app for SharePoint 2013 public-facing website
In this post you will learn step-by-step how to build a companion Windows Store app for your public-facing website built with SharePoint 2013.
This article accompanies my presentation from the SharePoint Conference 2014. The presentation video is available on Channel9 at http://channel9.msdn.com/Events/SharePoint-Conference/2014/SPC388.
Leveraging the power of the Windows Store app framework and SharePoint 2013 Search REST API
In the previous article we discussed how you can use Microsoft Project Siena to illustrate your app ideas. Although you can use Project Siena to build production-ready Windows Store apps and publish them to the App Store, if you want to fully leverage the capabilities of the Windows Store app framework and SharePoint 2013 Search REST API you will need to use your developer skills and use Visual Studio 2013 to build your app instead.
Building Windows Store apps that interact with SharePoint 2013 REST APIs isn’t challenging but there are a few things to take into account. In this post we will follow step-by-step the process of creating a Windows Store app that interacts with SharePoint 2013 REST APIs. To illustrate interacting with the data, we will use content from the mavention.com website published using the SharePoint 2013 Search REST API with anonymous access enabled.
Building a Windows Store companion app for a SharePoint 2013 public-facing website
The first step in the process of creating our sample app will be to provide an overview of the 5 recently modified pages on mavention.com on the home page of the app.

Step 1: Provide the list of the 5 most recently modified pages on mavention.com
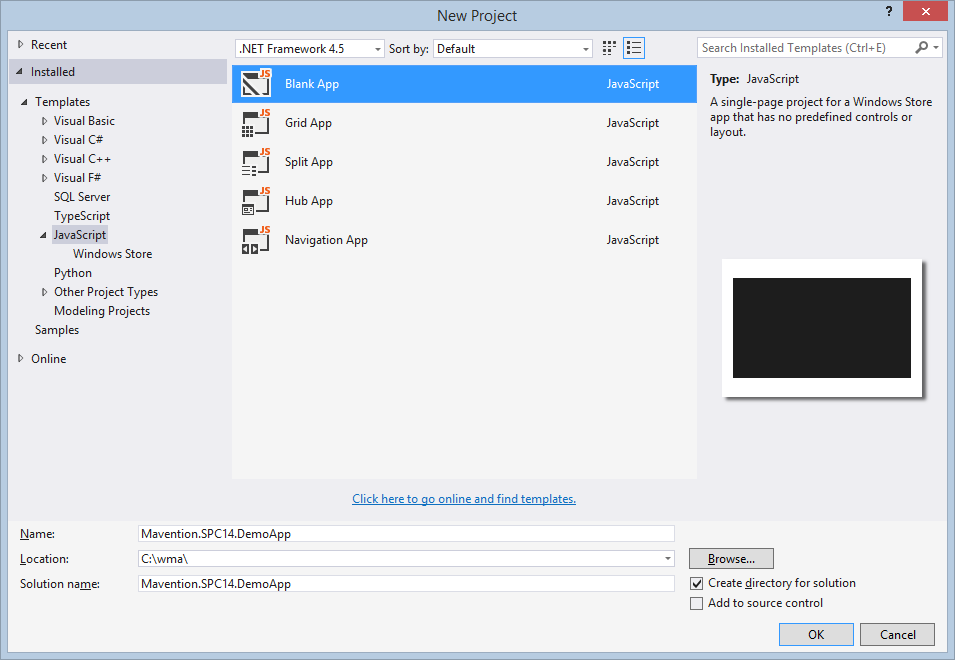
Let’s start with creating a new Windows Store app using the JavaScript Blank App template.
Before we start retrieving the data let’s create two helper functions that will make it easier for us to get the data from the REST response of the SharePoint 2013 Search REST API (we will create those functions in a new script file called mavention_spc14.js).
(function () {
    "use strict";

    WinJS.Namespace.define('Mavention.SPC14', {
        getValueFromResults: function (key, results) {
            var value = '';

            if (results != null &&
                results.length > 0 &&
                key != null) {
                for (var i = 0; i < results.length; i++) {
                    var resultItem = results[i];

                    if (resultItem.Key === key) {
                        value = resultItem.Value;
                        break;
                    }
                }
            }

            return value;
        },

        getTaxonomyValue: function (rawValue) {
            var value = '';

            if (rawValue != null &&
                rawValue.length > 0) {
                var result = /\|([^;|]+);GTSet/.exec(rawValue);

                if (result != null &&
                    result.length > 1) {
                    value = result[1];
                }
            }

            return value;
        }
    });
})();
If you recall it from the previous article, the response of the Search REST API contains content in key-value pairs. In order to get the value of the desired Managed Property you have to iterate through all key-value pairs for the particular result to get the right pair. The getValueFromResults function does exactly that wrapping the logic and making it accessible from everywhere within the app.
The second function called getTaxonomyValue simplifies retrieving the name of the Taxonomy Term used to tag a result with. We will use this function later on when we will be adding the filtering capability to our app.
Next, let’s add a reference to our newly created script file to the home page by adding the following snippet to the head section of the page:
<script src="/js/mavention.spc14.js"></script>Then, let’s add a ListView control to the home page which we will use to display the list of the recently modified pages. In the Main content section of the page add the following code snippet:
<h2 id="recent-item-title">Recently modified</h2>
<div id="recent-item-list" class="resultslist win-selectionstylefilled" aria-label="Recently modified" data-win-control="WinJS.UI.ListView" data-win-options="{
   selectionMode: 'none'
}"></div>
The last remaining piece is to call SharePoint 2013 Search REST API to get the list of the recently modified pages. In the code of the home page add a new function called _searchData:
_searchData: function (element) {
    var listView = element.querySelector('#recent-item-list').winControl;

    var xhr = WinJS.xhr({
        url: "http://www.mavention.com/_api/search/query?queryText='size>0'&SelectProperties='Title,PageDescription,SlugOWSTEXT,owstaxidMvItemType'&RowLimit=5&sortlist='LastModifiedTime:descending'&SourceID='3729136f-cfb7-4fbb-a7d5-b7d8e39c8200'&QueryTemplatePropertiesUrl='spfile://webroot/queryparametertemplate.xml'",
        responseType: 'json',
        headers: {
            accept: 'application/json;odata=verbose'
        }
    });

    xhr.done(
        function complete(request) {
            var searchResponse = JSON.parse(request.response);

            var results = new WinJS.Binding.List();

            searchResponse.d.query.PrimaryQueryResult.RelevantResults.Table.Rows.results.forEach(function (row) {
                var resultCells = row.Cells.results;

                results.push({
                    title: Mavention.SPC14.getValueFromResults('Title', resultCells),
                    subtitle: '',
                    description: Mavention.SPC14.getValueFromResults('PageDescription', resultCells) || '',
                    group: {
                        key: Mavention.SPC14.getTaxonomyValue(Mavention.SPC14.getValueFromResults('owstaxidMvItemType', resultCells))
                    },
                    slug: Mavention.SPC14.getValueFromResults('SlugOWSTEXT', resultCells)
                });
            });

            listView.itemDataSource = results.dataSource;
        },
        function error(request) {
            try {
                var dlg = new Windows.UI.Popups.MessageDialog('An error has occured while loading data', 'Error');
                dlg.showAsync();
            } catch (exception) {
            }
        });
}
This function begins with calling the SharePoint 2013 Search REST API to retrieve the list of 5 (RowLimit=5) recently modified (sortlist=‘LastModifiedTime:descending’) pages from mavention.com. Once done, it iterates through all results (line 18) and for each result it creates a new object and adds it to the results list (lines 21-29). Finally, when all results have been parsed, it binds the list to the ListView control (line 32).
The only thing left is to call the _searchData function which is done by adding the following line to the ready function:
this._searchData(element, options);If you run the app now, you should see the list of the 5 most recently modified pages on mavention.com.
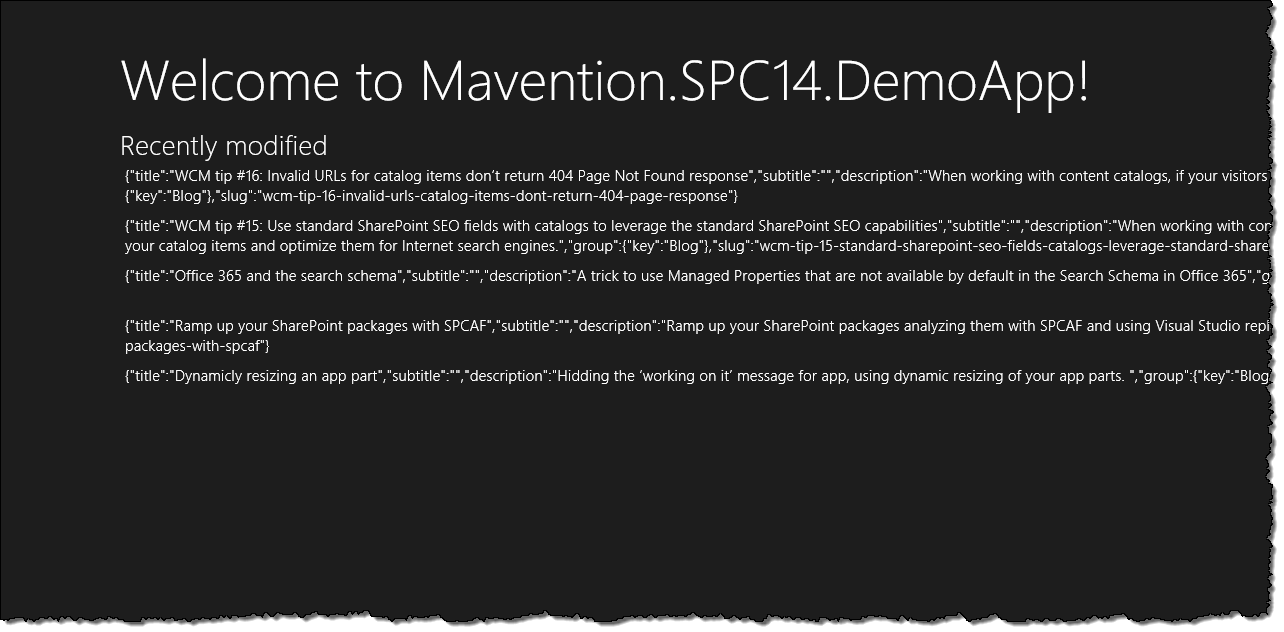
As you can see, although the data is displayed, it doesn’t look that great, so let’s take care of that next.
Step 2: Formatting the list of the recently modified pages
The next step is to format how the data in the list of the recently modified pages is displayed:
First we need to define a template that we want to use to display the data. We do this by adding the following snippet to the home page just after the opening body tag:
<div class="itemtemplate" data-win-control="WinJS.Binding.Template">
    <div class="item">
        <div class="item-content">
            <h3 class="item-title win-type-x-small win-type-ellipsis" data-win-bind="innerHTML: title"></h3>
            <h4 class="item-subtitle win-type-x-small win-type-ellipsis" data-win-bind="innerHTML: subtitle"></h4>
            <h4 class="item-description win-type-x-small win-type-ellipsis" data-win-bind="innerHTML: description"></h4>
        </div>
    </div>
</div>
Next, we need to tell the ListView control to use this template for rendering its items. We do this by extending the definition of the ListView control with the itemTemplate option:
<h2 id="recent-item-title">Recently modified</h2>
<div id="recent-item-list" class="resultslist win-selectionstylefilled" aria-label="Recently modified" data-win-control="WinJS.UI.ListView" data-win-options="{
selectionMode: 'none',
itemTemplate: select('.itemtemplate')
}">
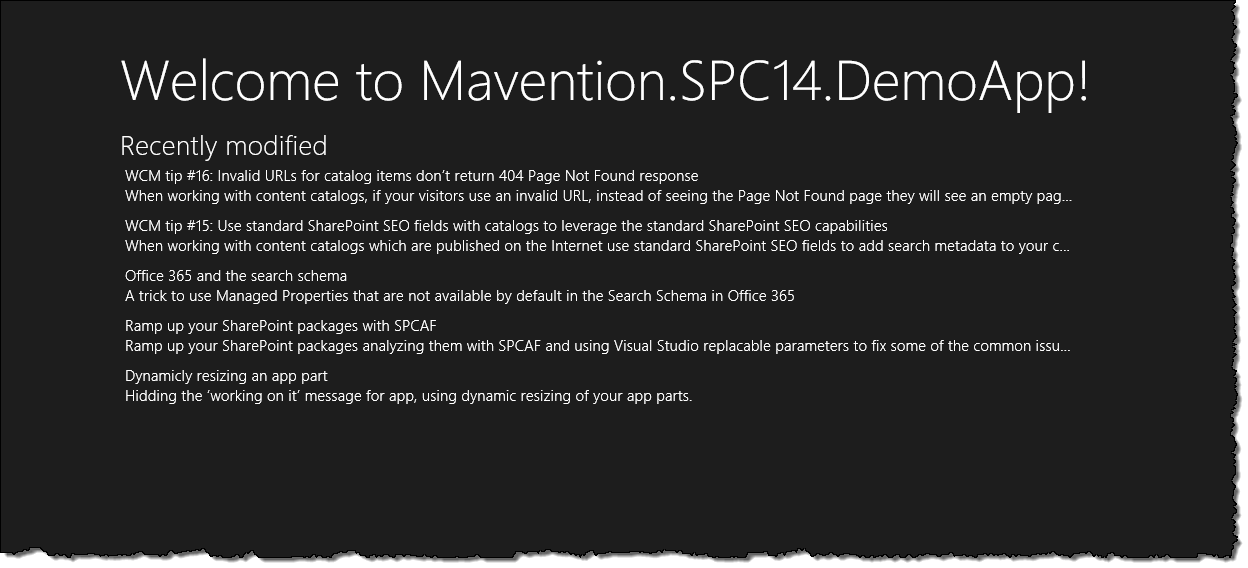
</div>If you run the app now you will see the results displayed in a more user-friendly way:

Now that the data is displayed correctly, it would be a good idea to allow users to view the contents of the item selected in the list.
Step 3: Viewing the contents of the selected list item
In this step we will extend the list of the recently modified pages with the ability to select a page and view its contents.

Let’s start by adding a new page to our app, that we will use to display the contents of the selected item. Let’s call that page itemContents. Similarly to the home page let’s start by adding the reference to our custom script file containing the helper functions by adding the following snippet in the head section of the page:
<script src="/js/mavention.spc14.js"></script>Next, let’s add two placeholders that we will use to display the selected page’s title and content:
<body>
    <div class="itemContents fragment">
        <header aria-label="Header content" role="banner">
            <button data-win-control="WinJS.UI.BackButton"></button>
            <h1 class="titlearea win-type-ellipsis">
                <span class="pagetitle" data-win-bind="innerHTML: title"></span>
            </h1>
        </header>
        <section aria-label="Main content" role="main">
            <div class="pagecontent win-selectionstylefilled" data-win-bind="innerHTML: content"></div>
        </section>
    </div>
</body>
To ensure that longer content will be displayed properly, let’s format it by adding the following CSS snippet to the page’s stylesheet (itemContents.css):
.itemContents .pagecontent {
    max-width: 60rem;
    overflow-y: auto;
    height: 95%; /* bottom margin */
    padding-right: 20px; /* spacing from vertical scrollbar */
}
In order to display the contents of an item we have to allow for selecting items in the ListView control on the home page. We do this by extending the control definition with the oniteminvoked event:
<div id="recent-item-list" class="resultslist win-selectionstylefilled" aria-label="Recently modified" data-win-control="WinJS.UI.ListView" data-win-options="{
        selectionMode: 'none',
        itemTemplate: select('.itemtemplate'),
        oniteminvoked: select('.pagecontrol').winControl.itemInvoked
     }">
</div>
In the code of the home page we have to register the event handler for that event in the init function of the page:
init: function (element, options) {
    this.itemInvoked = ui.eventHandler(this._recentItemInvoked.bind(this));
},
Then we need to implement the event handler by adding the following snippet to the code file of the home page:
_recentItemInvoked: function (args) {
    args.detail.itemPromise.done(function itemInvoked(item) {
        nav.navigate('/pages/itemContents/itemContents.html', {
            item: item
        });
    });
},
Whenever an item is selected in the ListView control on the home page, the app will navigate to the itemContents page passing the selected item as a parameter.
The last piece left is for the itemContents page to read the retrieved item parameter and load the contents of the selected page.
Let’s add the following code snippet to the code file of the itemContents page:
_loadData: function (element, itemId) {
    var container = element.querySelector('.itemContents').winControl;

    var xhr = WinJS.xhr({
        url: "http://www.mavention.com/_api/search/query?queryText='SlugOWSTEXT:" + itemId + "'&SelectProperties='Title,PublishingPageContentOWSHTML,SlugOWSTEXT'&RowLimit=1&SourceID='3729136f-cfb7-4fbb-a7d5-b7d8e39c8200'&QueryTemplatePropertiesUrl='spfile://webroot/queryparametertemplate.xml'",
        responseType: 'json',
        headers: {
            accept: 'application/json;odata=verbose'
        }
    });

    xhr.done(function (request) {
        var searchResponse = JSON.parse(request.response);
        if (searchResponse.d.query.PrimaryQueryResult.RelevantResults.Table.Rows.results.length > 0) {
            var searchResult = searchResponse.d.query.PrimaryQueryResult.RelevantResults.Table.Rows.results[0].Cells.results;

            var item = {
                title: Mavention.SPC14.getValueFromResults('Title', searchResult),
                content: Mavention.SPC14.getValueFromResults('PublishingPageContentOWSHTML', searchResult)
            };

            WinJS.Binding.processAll(container, item);
        }
        else {
            var dlg = new Windows.UI.Popups.MessageDialog('An error has occured while loading data', 'Error');
            dlg.showAsync();
            WinJS.Navigation.back();
        }
    }, function (request) {
    }, function (request) {
    });
},
Similarly to the home page the functions executes a call to the SharePoint 2013 Search REST API. By passing the identifier of the selected item, it retrieves the selected page (RowLimit=1) along with its title and contents (SelectProperties=‘Title,PublishingPageContentOWSHTML,SlugOWSTEXT’). Once the page is retrieved the contents are wrapped in a new object (lines 17-20) which is then bound to the page (line 22).
The last thing left is to call the _loadData function which should be done whenever the page is ready:
ready: function (element, options) {
    if (options.item.data.slug != null &&
        options.item.data.slug.length > 0) {
        this._loadData(element, options.item.data.slug);
    }
},
The page checks is the passed item argument is valid and calls the _loadData function passing the identifier (slug) of the selected item.
If you run the app and select and item in the list on the home page you should see its contents displayed:
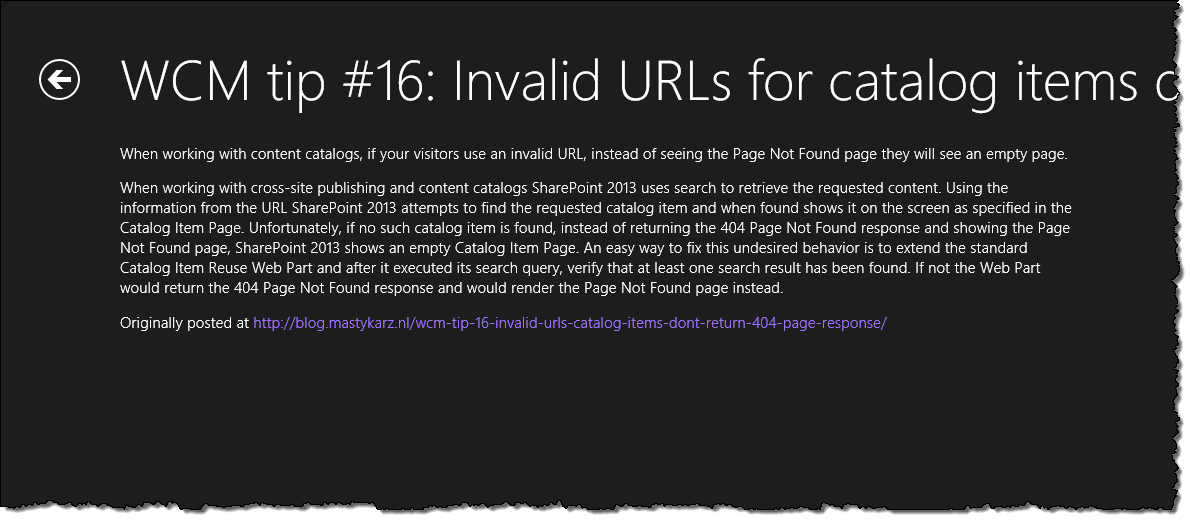
As you can imagine the mavention.com website contains more content than the 5 items displayed on the home page. One way to allow users to browse through those pages is to implement the search capability in the app which we will do in the next step.
Step 4: Implementing search capability
In this step we will extend our app with the ability to search in the contents of the mavention.com website:

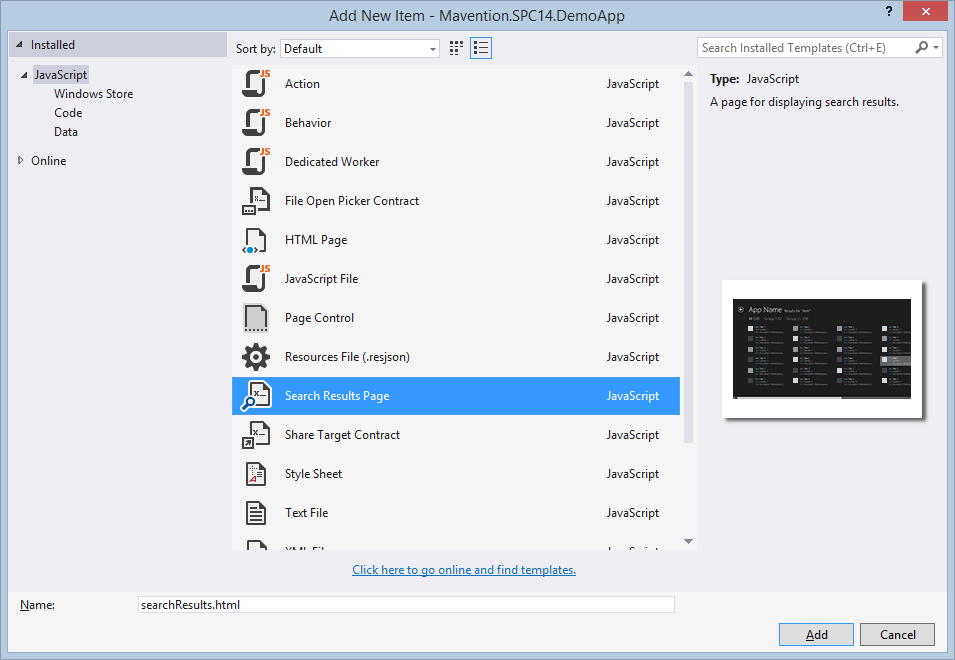
Whenever you need to implement search capability in your Windows Store app, the good news is that Visual Studio 2013 provides you with a page template for the search results page that contains all of the required functionality. The only thing that you need to do is to implement your app-specific search logic.
Let’s add a new page to our app using the Search Results Page template and call it searchResults:
Before we can start using search in our we have to enable it first. We do this by adding the following snippet in the default.js file just before the app.start() line:
appModel.Search.SearchPane.getForCurrentView().onquerysubmitted = function (args) { nav.navigate('/pages/searchResults/searchResults.html', args); };Whenever the search charm is invoked and the user searches in the app, the app should navigate to the searchResults page that will take care for retrieving and displaying search results.
As I mentioned before, if you create your search results page using the Search Results Page template, your search results page will contain everything except the search logic. In order to search in the contents of the mavention.com website and display the search results modify the standard _searchData function as follows:
_searchData: function (element, queryText) {
    var originalResults;

    var listView = element.querySelector(".resultslist").winControl;
    var obj = this;

    if (window.Data) {
        originalResults = Data.items.createFiltered(function (item) {
            return (item.title.indexOf(queryText) >= 0 || item.subtitle.indexOf(queryText) >= 0 || item.description.indexOf(queryText) >= 0);
        });
    } else {
        originalResults = new WinJS.Binding.List();

        var xhr = WinJS.xhr({
            url: "http://www.mavention.com/_api/search/query?queryText='" + queryText + "'&SelectProperties='Title,PageDescription,SlugOWSTEXT,owstaxidMvItemType'&RowLimit=500&SourceID='3729136f-cfb7-4fbb-a7d5-b7d8e39c8200'&QueryTemplatePropertiesUrl='spfile://webroot/queryparametertemplate.xml'",
            responseType: 'json',
            headers: {
                accept: 'application/json;odata=verbose'
            }
        });

        xhr.done(function (request) {
            var searchResponse = JSON.parse(request.response);
            var searchResults = searchResponse.d.query.PrimaryQueryResult.RelevantResults.Table.Rows.results;

            for (var i = 0; i < searchResults.length; i++) {
                var resultCells = searchResults[i].Cells.results;

                originalResults.push({
                    title: Mavention.SPC14.getValueFromResults('Title', resultCells),
                    subtitle: '',
                    description: Mavention.SPC14.getValueFromResults('PageDescription', resultCells) || '',
                    group: {
                        key: ''
                    },
                    slug: Mavention.SPC14.getValueFromResults('SlugOWSTEXT', resultCells)
                });
            }

            if (originalResults.length === 0) {
                document.querySelector('.resultsmessage').style.display = "block";
            } else {
                document.querySelector('.resultsmessage').style.display = "none";
            }
        }, function (request) {
            var dlg = new Windows.UI.Popups.MessageDialog('An error has occured while loading data', 'Error');
            dlg.showAsync();
        }, function (request) {
        });
    }
    return originalResults;
}
The function starts by executing a request to the SharePoint 2013 Search REST API passing the search query typed by the user (line 15). Once it retrieved search results from the website, it processes them (line 26). For each result a new object is created and added to the originalResults list (lines 29-37).
If you run the app and search for wcm you should get results similar to the following:
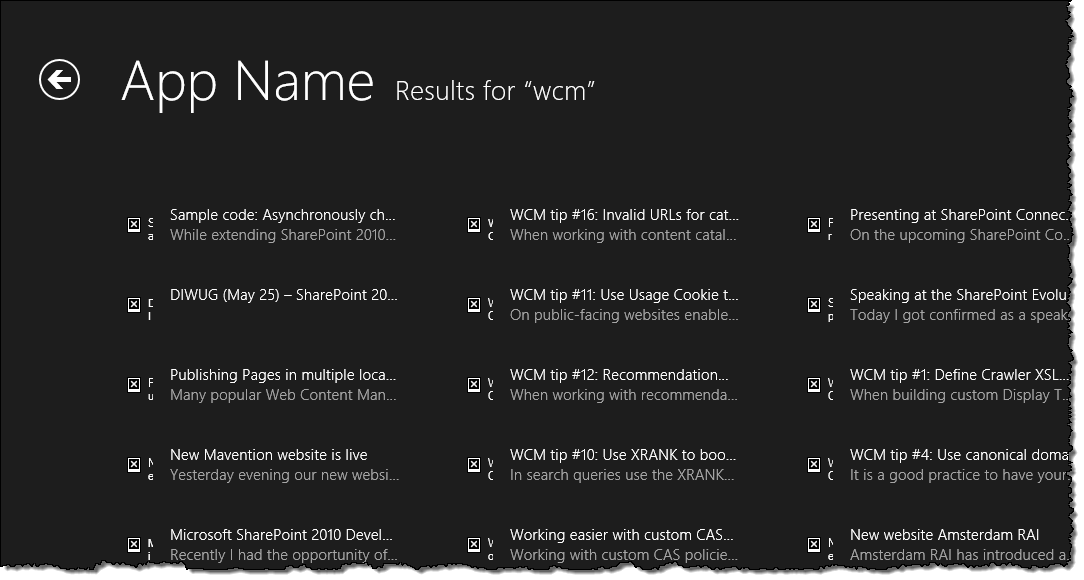
Because we are not retrieving images for search results, you see the broken image icon next to each result. Let’s fix that quickly.
Step 5: Removing the image from the search result item template
How each result is displayed on the search results page is defined in the item template in the search results page. Because we are not retrieving images for the search results, let’s modify the search result item template and remove the img tag:
<div class="itemtemplate" data-win-control="WinJS.Binding.Template">
    <div class="item">
        <div class="item-content">
            <h3 class="item-title win-type-x-small win-type-ellipsis" data-win-bind="innerHTML: title searchResults.markText"></h3>
            <h4 class="item-subtitle win-type-x-small win-type-ellipsis" data-win-bind="innerHTML: subtitle searchResults.markText"></h4>
            <h4 class="item-description win-type-x-small win-type-ellipsis" data-win-bind="innerHTML: description searchResults.markText"></h4>
        </div>
    </div>
</div>
If you run the app and search for ‘wcm’ again, you will see search results without the broken image:

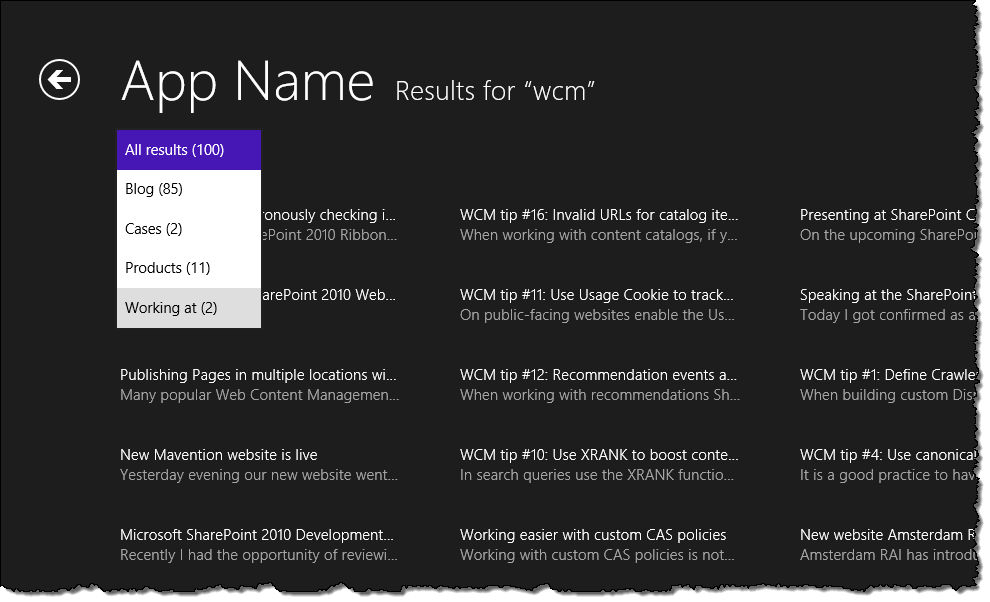
As you can see there are quite a few results for ‘wcm’ on mavention.com. Even though we allow for finding all relevant pages, it is challenging to find the one page that the user is interested with. One way to simplify browsing through a large number of search results is to provide the filtering capability.
Step 6: Filtering search results
In this step we will extend the search results page with the filtering capability to make it easier for users of the app to find the content that they are looking for.

Whenever you want to implement filtering on a search results page backed with SharePoint 2013 Search in a Windows Store app there is a good and a bad news. The good news is that the search results page, created using the Search Results Page template already contains all the logic required for the filtering to work. The bad news is that the standard implementation of filtering in the search results page assumes that you know upfront which filters there are. While you could use filtering the way it is available out of the box, it could lead to a situation where there are no items corresponding to the particular filter and selecting a filter would display an empty page. Additionally, hard-coding the list of filters in the app makes it less dynamic and whenever additional filtering option would become available on your website you would need to update your app accordingly.
In this step we will build the list of filters dynamically based on the retrieved search results.
The default implementation of search filters is based on an unordered list, where all filter options are displayed in one line next to each other. The challenge with this way of presenting filters is, that should you have more than a few filter options, they won’t fit in a single line and your app will look less attractive. If you need to accommodate more than a few filter options, it might be a better option to use a drop-down list instead. In order to do so, change the Main content section in the searchResults page as follows:
<section aria-label="Main content" role="main">
    <div class="resultsmessage win-type-x-large">No results match your search.</div>
    <div class="filterarea">
        <select class="filterselect"></select>
    </div>
    <div class="resultslist win-selectionstylefilled" aria-label="Search results" data-win-control="WinJS.UI.ListView" data-win-options="{
            selectionMode: 'none',
            itemTemplate: select('.itemtemplate'),
            oniteminvoked: select('.pagecontrol').winControl.itemInvoked
        }">
    </div>
</section>
Next we need to rewrite the logic for rendering filters so that it’s triggered after the search results are processed. For this apply the following changes:
Change the _filterChanged function
_filterChanged: function (element, filterIndex) {
    if (filterIndex >= 0) {
        var listView = element.querySelector(".resultslist").winControl;
        listView.itemDataSource = this._filters[filterIndex].results.dataSource;
    }
},
This change will use the select list rather than the unordered list to select a filter.
Change the _generateFilters function
_generateFilters: function () {
    this._filters = [];
},
This causes the function to return an empty array of filters which will be filled later on when the search results are processed.
Change the _handleQuery function
_handleQuery: function (element, args) {
    this._lastSearch = args.queryText;
    WinJS.Namespace.define("searchResults", { markText: WinJS.Binding.converter(this._markText.bind(this)) });
    this._initializeLayout(element);
    this._generateFilters();
    this._searchData(element, args.queryText);
},
Populating the filter bar has been removed as it’s done as a part of the search results processing routine.
Change the _populateFilterBar function
_populateFilterBar: function (element, originalResults) {
    var listView = element.querySelector(".resultslist").winControl;
    var li, option, filterIndex;

    for (filterIndex = 0; filterIndex < this._filters.length; filterIndex++) {
        this._applyFilter(this._filters[filterIndex], originalResults);

        if (filterIndex === 0) {
            listView.itemDataSource = this._filters[filterIndex].results.dataSource;
        }

        option = document.createElement("option");
        option.value = filterIndex;
        option.textContent = this._filters[filterIndex].text + " (" + this._filters[filterIndex].results.length + ")";
        element.querySelector(".filterselect").appendChild(option);
    }

    element.querySelector(".filterselect").onchange = function (args) { this._filterChanged(element, args.currentTarget.value); }.bind(this);
},
The logic to add filters to the select list is added as well as an event handler which executes after a filter has been selected from the list.
Change the _searchData function
_searchData: function (element, queryText) {
    var originalResults;

    var listView = element.querySelector(".resultslist").winControl;
    var obj = this;

    if (window.Data) {
        originalResults = Data.items.createFiltered(function (item) {
            return (item.title.indexOf(queryText) >= 0 || item.subtitle.indexOf(queryText) >= 0 || item.description.indexOf(queryText) >= 0);
        });
    } else {
        originalResults = new WinJS.Binding.List();

        var xhr = WinJS.xhr({
            url: "http://www.mavention.com/_api/search/query?queryText='" + queryText + "'&SelectProperties='Title,PageDescription,SlugOWSTEXT,owstaxidMvItemType'&RowLimit=500&SourceID='3729136f-cfb7-4fbb-a7d5-b7d8e39c8200'&QueryTemplatePropertiesUrl='spfile://webroot/queryparametertemplate.xml'",
            responseType: 'json',
            headers: {
                accept: 'application/json;odata=verbose'
            }
        });

        xhr.done(function (request) {
            var searchResponse = JSON.parse(request.response);
            var searchResults = searchResponse.d.query.PrimaryQueryResult.RelevantResults.Table.Rows.results;

            for (var i = 0; i < searchResults.length; i++) {
                var resultCells = searchResults[i].Cells.results;

                var itemTypeString = Mavention.SPC14.getValueFromResults('owstaxidMvItemType', resultCells);
                var itemType = Mavention.SPC14.getTaxonomyValue(itemTypeString);

                if (itemType != null && itemType.length > 0) {
                    obj.addFilterIfNecessary(itemType);
                }

                originalResults.push({
                    title: Mavention.SPC14.getValueFromResults('Title', resultCells),
                    subtitle: '',
                    description: Mavention.SPC14.getValueFromResults('PageDescription', resultCells) || '',
                    group: {
                        key: [ itemType ]
                    },
                    slug: Mavention.SPC14.getValueFromResults('SlugOWSTEXT', resultCells)
                });
            }

            obj._filters.sort(obj.sortTopics);
            obj._filters.splice(0, 0, { results: null, text: "All results", predicate: function (item) { return true; } });

            if (originalResults.length === 0) {
                document.querySelector('.resultsmessage').style.display = "block";
            } else {
                document.querySelector('.resultsmessage').style.display = "none";
            }

            obj._populateFilterBar(element, originalResults);
            obj._applyFilter(obj._filters[0], originalResults);
            obj._filterChanged(element, 0); // set current result set to all items

            if (originalResults.length === 0) {
                document.querySelector('.resultsmessage').style.display = "block";
            } else {
                document.querySelector('.resultsmessage').style.display = "none";
            }
        }, function (request) {
            var dlg = new Windows.UI.Popups.MessageDialog('An error has occured while loading data', 'Error');
            dlg.showAsync();
        }, function (request) {
        });
    }
    return originalResults;
},
The logic of processing search results has been extended with retrieving the type of each result and adding it to the list of filters if it hasn’t been added yet. After all search results have been processed the list of filters is being sorted alphabetically to make it easier to find each filter option. Additionally an option to show all items is added to the list of available filters.
Add the following two functions to the searchResults code file
sortTopics: function (a, b) {
    var i = 0;
    var result = 0;
    while (result === 0 &&
        i <= a.text.length &&
        i <= b.text.length) {
        if (a.text[i] < b.text[i]) {
            result = -1;
        }
        else if (a.text[i] > b.text[i]) {
            result = 1;
        }
        i++;
    }

    if (result === 0) {
        if (a.text.length > b.text.length) {
            result = 1;
        }
        else {
            result = -1;
        }
    }

    return result;
},

addFilterIfNecessary: function (filterName) {
    var filterExists = false;

    for (var i = 0; i < this._filters.length; i++) {
        if (this._filters[i].text === filterName) {
            filterExists = true;
            break;
        }
    }

    if (!filterExists) {
        console.log('Filter "' + filterName + '" doesn\'t exist. Adding...');
        this._filters.push({ results: null, text: filterName, predicate: function (item) { return Mavention.SPC14.arrayContains(item.group.key, filterName); } });
    }
    else {
        console.log('Filter "' + filterName + '" already exists. Skipping...');
    }
}
Those helper functions make it easier to sort the list of filters and check whether the particular filter option already exists in the list of filters or not.
As you can see there are quite a few changes required to the standard implementation of the search results page to get this to work and you might want to check the full code of this step to verify that you have applied all changes correctly. After that, when you run the app and search for ‘wcm’ you should see the filter options allowing you to narrow down your search results to the specific type of content.
Having made it easier for our users to find the content that they were looking for, it would be a good idea to let them open the particular search result and view its contents.
Step 7: Viewing the contents of the selected search result
In this step we will allow for viewing the contents of a search result. The good news is that for this purpose we can reuse the existing itemContents page. Additionally the searchResults page already has the implementation of the oniteminvoked event including the event handler so the only thing left for us to do is to implement the logic of the event handler. For this change the standard _itemInvoked function as follows:
_itemInvoked: function (args) {
    args.detail.itemPromise.done(function itemInvoked(item) {
        nav.navigate('/pages/itemContents/itemContents.html', {
            item: item
        });
    });
},
Similarly to what we have done in the code of the home page, whenever an item is selected in the ListView we navigate to the itemContents page, passing the selected item as a parameter.
Step 8: Recording view events
When building public-facing websites using the new search-driven content publishing model in SharePoint 2013, SharePoint automatically keeps track of what content is being used on your website and how it is used. This analytics information can be used for many purposes such as displaying recommended content and allows you to optimize your website’s conversion and expand the reach of your content. With those benefits it’s a good idea to instrument your app so that it’s capable of recording those analytics events just as your website does.
Recording search analytics events in SharePoint 2013 isn’t complex but requires a few prerequisites, particularly when running outside of the context of the website. First, each user must have a unique ID. On a public-facing website with anonymous users this ID is automatically generated by SharePoint when the Usage Cookie is enabled on the Web Application. In an app however this is something that you need to take care for yourself.
The second thing that you need is the ID of the Site Collection that contains the data published in the app. While this ID is available in the context of the website, you have to either hard-code or retrieve it in your app.
Let’s start by extending the mavention.spc14.js script file with two properties that will store the ID of the current user and the ID of the Site Collection:
// ...
WinJS.Namespace.define('Mavention.SPC14', {
    userId: null,
    siteId: null,
    // ...
});
Next, let’s add functions that will fill those properties:
guid: function () {
    return 'xxxxxxxx-xxxx-4xxx-yxxx-xxxxxxxxxxxx'.replace(/[xy]/g, function (c) {
        var r = Math.random() * 16 | 0, v = c == 'x' ? r : (r & 0x3 | 0x8);
        return v.toString(16);
    });
},

getUserId: function () {
    var userId = Windows.Storage.ApplicationData.current.roamingSettings.values["userId"];

    if (!userId) {
        userId = Mavention.SPC14.guid();
        Windows.Storage.ApplicationData.current.roamingSettings.values["userId"] = userId;
    }

    return userId;
},

setSiteId: function () {
    Mavention.SPC14.siteId = Windows.Storage.ApplicationData.current.roamingSettings.values["siteId"];

    if (!Mavention.SPC14.siteId) {
        var data = '<?xml version="1.0" encoding="utf-8"?>\
<soap:Envelope xmlns:xsi="http://www.w3.org/2001/XMLSchema-instance" xmlns:xsd="http://www.w3.org/2001/XMLSchema" xmlns:soap="http://schemas.xmlsoap.org/soap/envelope/">\
  <soap:Body>\
    <GetSite xmlns="http://schemas.microsoft.com/sharepoint/soap/">\
      <SiteUrl>http://www.mavention.com</SiteUrl>\
    </GetSite>\
  </soap:Body>\
</soap:Envelope>';

        var siteIdXhr = WinJS.xhr({
            url: 'http://www.mavention.com/_vti_bin/sites.asmx',
            type: 'POST',
            headers: {
                'Content-Length': data.length,
                'Content-Type': 'text/xml; charset=utf-8',
                'SOAPAction': 'http://schemas.microsoft.com/sharepoint/soap/GetSite'
            },
            data: data
        });

        siteIdXhr.done(function (request) {
            Mavention.SPC14.siteId = request.responseText.match(/Id="{([^}]+)}"/)[1];
            Windows.Storage.ApplicationData.current.roamingSettings.values["siteId"] = Mavention.SPC14.siteId;
        });
    }
}
The getUserId function is responsible for getting the unique ID of the user of the app. If the user started the app for the first time a new ID is generated using the guid function and is stored for future reuse in the app, so that the content viewed by this user can be tracked back to that user.
The setSideId function retrieves the ID of the Site Collection used as a source to publish the data to the app. Although you could hard-code this ID in the app, there are scenarios when this ID might change. Because the URL is less likely to change, we can retrieve the ID from the live website and store it in the app for future use just as we do with the user ID. The ID of a Site Collection is retrieved using the sites.asmx web service.
The last step is to load both IDs when the app is launched:
Mavention.SPC14.userId = Mavention.SPC14.getUserId();
Mavention.SPC14.setSiteId();
With the prerequisites in place let’s move to recording the view event.
The view event occurs whenever a user opens an item to view its contents. In this form the view event occurs only on the itemContents page where the contents of the particular item are loaded. This is therefore the page that we need to extend to record the view event.
In the code file of the itemContents page, let’s add the _recordView function:
_recordView: function (itemId) {
    var xhrRequestDigest = WinJS.xhr({
        url: 'http://www.mavention.com/_api/contextinfo',
        type: 'POST',
        responseType: 'json',
        headers: {
            accept: 'application/json;odata=verbose'
        }
    });

    xhrRequestDigest.done(function (request) {
        var requestDigestResponse = JSON.parse(request.response);
        var requestDigest = requestDigestResponse.d.GetContextWebInformation.FormDigestValue;

        var xhrViewRec = WinJS.xhr({
            url: 'http://www.mavention.com/_api/events/logevent',
            type: 'POST',
            headers: {
                'X-RequestDigest': requestDigest,
                'Content-Type': 'application/json;odata=verbose',
                'Accept': 'application/json;odata=verbose'
            },
            data: '{ "usageEntry": { "__metadata": { "type": "Microsoft.SharePoint.Administration.UsageEntry" }, "EventTypeId": 1, "ItemId": "' + itemId + '", "Site": "' + Mavention.SPC14.siteId + '", "ScopeId": "' + Mavention.SPC14.siteId + '", "User": "' + Mavention.SPC14.userId + '" } }'
        });
    });
},
The _recordView function uses the events REST API provided with SharePoint 2013 to record a usage event in SharePoint. Recording a usage event in SharePoint 2013 using the events REST API is a POST request, which requires a valid Form Digest that we retrieve first by issuing a POST request to the contextinfo REST endpoint (lines 2-9). After we get hold of a valid Form Digest (line 13), we can call the logevent operation on the events REST endpoint to record the view event.
When recording a usage event in SharePoint 2013 the following parameters must be passed:
- EventTypeId: id of the event that occurred; 1 for the view event
- ItemId: unique id of the item on which the event occurred; for catalog content it should be set to the value of the crawled property mapped to the UsageAnalyticsId Managed Property
- Site: ID of the Site Collection on which the event occurred
- ScopeId: ID of the scope on which the event occurred; Site Collection ID for the view event
- User: ID of the user for whom the event occurred
The last step left is to call the _recordView function to record the view event. This should be done after the content of the item has been retrieved and rendered. For this let’s extend the _loadData function:
_loadData: function (element, itemId) {
    var container = element.querySelector('.itemContents').winControl;

    var xhr = WinJS.xhr({
        url: "http://www.mavention.com/_api/search/query?queryText='SlugOWSTEXT:" + itemId + "'&SelectProperties='Title,PublishingPageContentOWSHTML,SlugOWSTEXT'&RowLimit=1&SourceID='3729136f-cfb7-4fbb-a7d5-b7d8e39c8200'&QueryTemplatePropertiesUrl='spfile://webroot/queryparametertemplate.xml'",
        responseType: 'json',
        headers: {
            accept: 'application/json;odata=verbose'
        }
    });

    var recordView = this._recordView;
    var itemId = itemId;

    xhr.done(function (request) {
        var searchResponse = JSON.parse(request.response);
        if (searchResponse.d.query.PrimaryQueryResult.RelevantResults.Table.Rows.results.length > 0) {
            var searchResult = searchResponse.d.query.PrimaryQueryResult.RelevantResults.Table.Rows.results[0].Cells.results;

            var item = {
                title: Mavention.SPC14.getValueFromResults('Title', searchResult),
                content: Mavention.SPC14.getValueFromResults('PublishingPageContentOWSHTML', searchResult)
            };

            WinJS.Binding.processAll(container, item);

            recordView(itemId);
        }
        else {
            var dlg = new Windows.UI.Popups.MessageDialog('An error has occured while loading data', 'Error');
            dlg.showAsync();
            WinJS.Navigation.back();
        }
    }, function (request) {
    }, function (request) {
    });
},
We start with storing references to the _recordView function and the ID of the current item (lines 12-13). After we processed the response and displayed the item’s contents, we call the _recordView function (line 27).
Although recording the view event will not be visible in the UI, you can use a tool like Fiddler to verify that it’s working correctly. For this open the app, select an item and after its contents have been loaded and displayed you should see a number of requests in Fiddler. The last request is the one responsible for recording the view event and if everything worked correctly you should see a null response from the server.

Now that the app keeps track of what content is viewed in the app and how it is viewed, let’s take a look at how we could benefit from this analytics data in the app by recommending similar content.
Step 9: Displaying recommendations
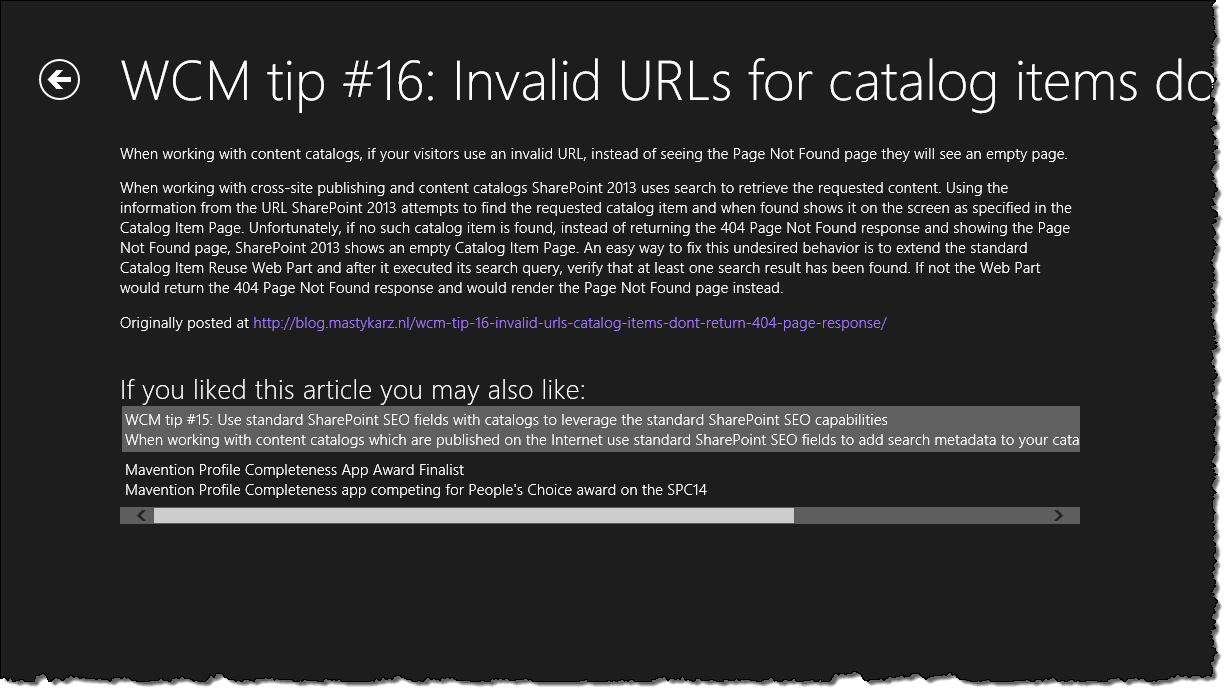
One of the common practices on Internet websites for helping users discover new content is recommending content similar to the content that they are currently browsing. This pattern is often referred to as content recommendations. SharePoint 2013 offers displaying content recommendations based on its content usage data, and you can see it in action on mavention.com by navigating to a blog post and scrolling to the end of the page.
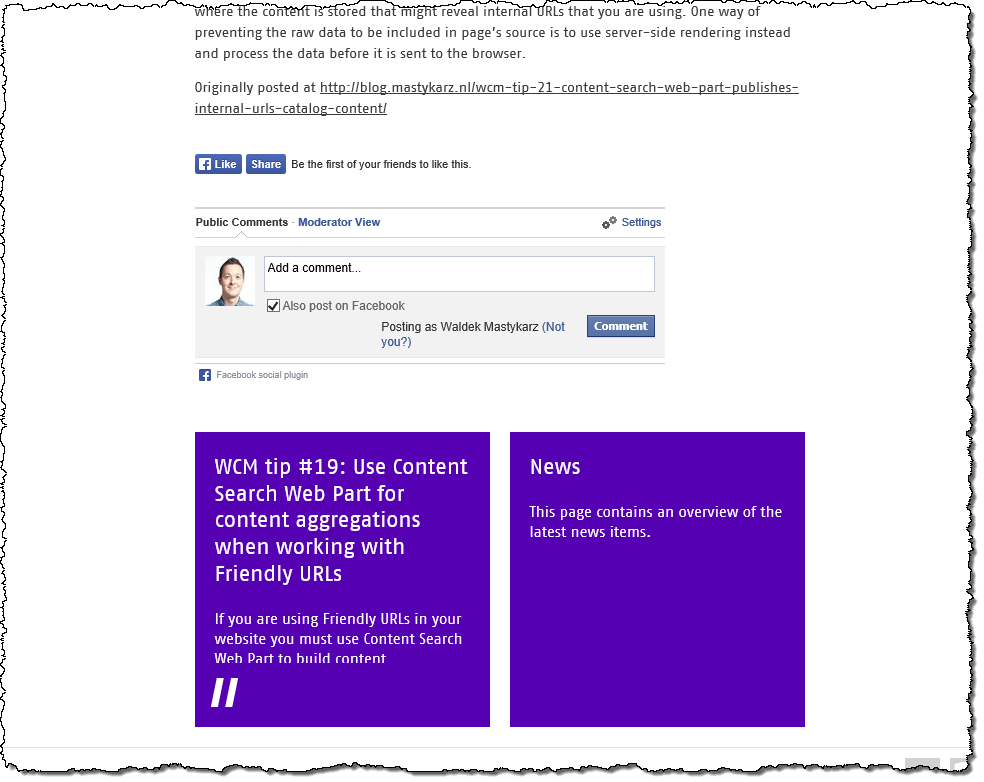
The two tiles displayed below the content are content recommendations automatically suggested by SharePoint 2013.
The great thing is, that displaying recommendations isn’t limited to websites and can be used in app as well. In this step we will extend the itemContents page to suggest content to the user, similarly to what we see on mavention.com:
Let’s start with extending the itemContents page and adding a ListView control to display the recommendations. We will add it directly after the div holding the page contents:
<h2 id="recommendations-item-title">If you liked this article you may also like:</h2>
<div id="recommendations-item-list" class="recommendationsresultslist win-selectionstylefilled" aria-label="Recommendations" data-win-control="WinJS.UI.ListView" data-win-options="{
    selectionMode: 'none',
    itemTemplate: select('.recommendeditemtemplate'),
    oniteminvoked: select('.pagecontrol').winControl.itemInvoked
 }">
</div>
To control how the recommended items are displayed let’s add the following template just after the opening body tag:
<div class="recommendeditemtemplate" data-win-control="WinJS.Binding.Template">
    <div class="item">
        <div class="item-content">
            <h3 class="item-title win-type-x-small win-type-ellipsis" data-win-bind="innerHTML: title"></h3>
            <h4 class="item-description win-type-x-small win-type-ellipsis" data-win-bind="innerHTML: description"></h4>
        </div>
    </div>
</div>
Next we need to extend the code of the itemContents page to load recommendations and allow users for opening them. Let’s start by adding the _loadRecommendations function that loads the content recommendations for the current item:
_loadRecommendations: function (itemId, element) {
    var listView = element.querySelector('#recommendations-item-list').winControl;

    var xhr = WinJS.xhr({
        url: "http://www.mavention.com/_api/search/query?queryText='recommendedfor:" + itemId + "'&SelectProperties='Title,PageDescription,SlugOWSTEXT,owstaxidMvItemType'&RowLimit=2&SourceID='88de1079-093d-4671-802f-0b20cd093a31'&QueryTemplatePropertiesUrl='spfile://webroot/queryparametertemplate.xml'",
        responseType: 'json',
        headers: {
            accept: 'application/json;odata=verbose'
        }
    });

    xhr.done(function complete (request) {
        var searchResponse = JSON.parse(request.response);

        var results = new WinJS.Binding.List();
        searchResponse.d.query.PrimaryQueryResult.RelevantResults.Table.Rows.results.forEach(function (row) {
            var resultCells = row.Cells.results;

            results.push({
                title: Mavention.SPC14.getValueFromResults('Title', resultCells),
                subtitle: '',
                description: Mavention.SPC14.getValueFromResults('PageDescription', resultCells) || '',
                group: {
                    key: Mavention.SPC14.getTaxonomyValue(Mavention.SPC14.getValueFromResults('owstaxidMvItemType', resultCells))
                },
                slug: Mavention.SPC14.getValueFromResults('SlugOWSTEXT', resultCells)
            });
        });

        listView.itemDataSource = results.dataSource;
    },
    function error(request) {
        try {
            var dlg = new Windows.UI.Popups.MessageDialog('An error has occured while loading data', 'Error');
            dlg.showAsync();
        } catch (exception) {
        }
    });
}
If you look closely at this function you should notice that it’s nothing more than another request to the SharePoint 2013 Search REST API. This time we explicitly request two content recommendations for the current item (recommendedfor:itemid).
To allow for opening the recommended items we add an event handler:
_recommendedItemInvoked: function (args) {
    args.detail.itemPromise.done(function itemInvoked(item) {
        nav.navigate('/pages/itemContents/itemContents.html', {
            item: item
        });
    });
},
…and link it to the itemInvoked event:
init: function (element, options) {
    this.itemInvoked = ui.eventHandler(this._recommendedItemInvoked.bind(this));
},
If you run the app now and open an item, you should see recommended content right after the contents of the selected item:

When you select a recommended item, the contents of that item along with its own recommendations will be displayed while in the background the app and SharePoint will keep track of your usage pattern surfacing more relevant content recommendations each time.
Step 10: Dynamically loading app navigation from SharePoint
When we started building the app, we used the list of recently modified content as the main entry point to browse the content in the app. Later on we added search to allow access to other pages as well. Often however, you might want to provide your users with a more structured way to navigate through your app.
In many cases the app navigation is hard-coded in the app. While this allows you to control the app flow, each change to the app structure or its navigation requires you to resubmit the app to the app store. What if we could manage app navigation in SharePoint and have the app load it dynamically?
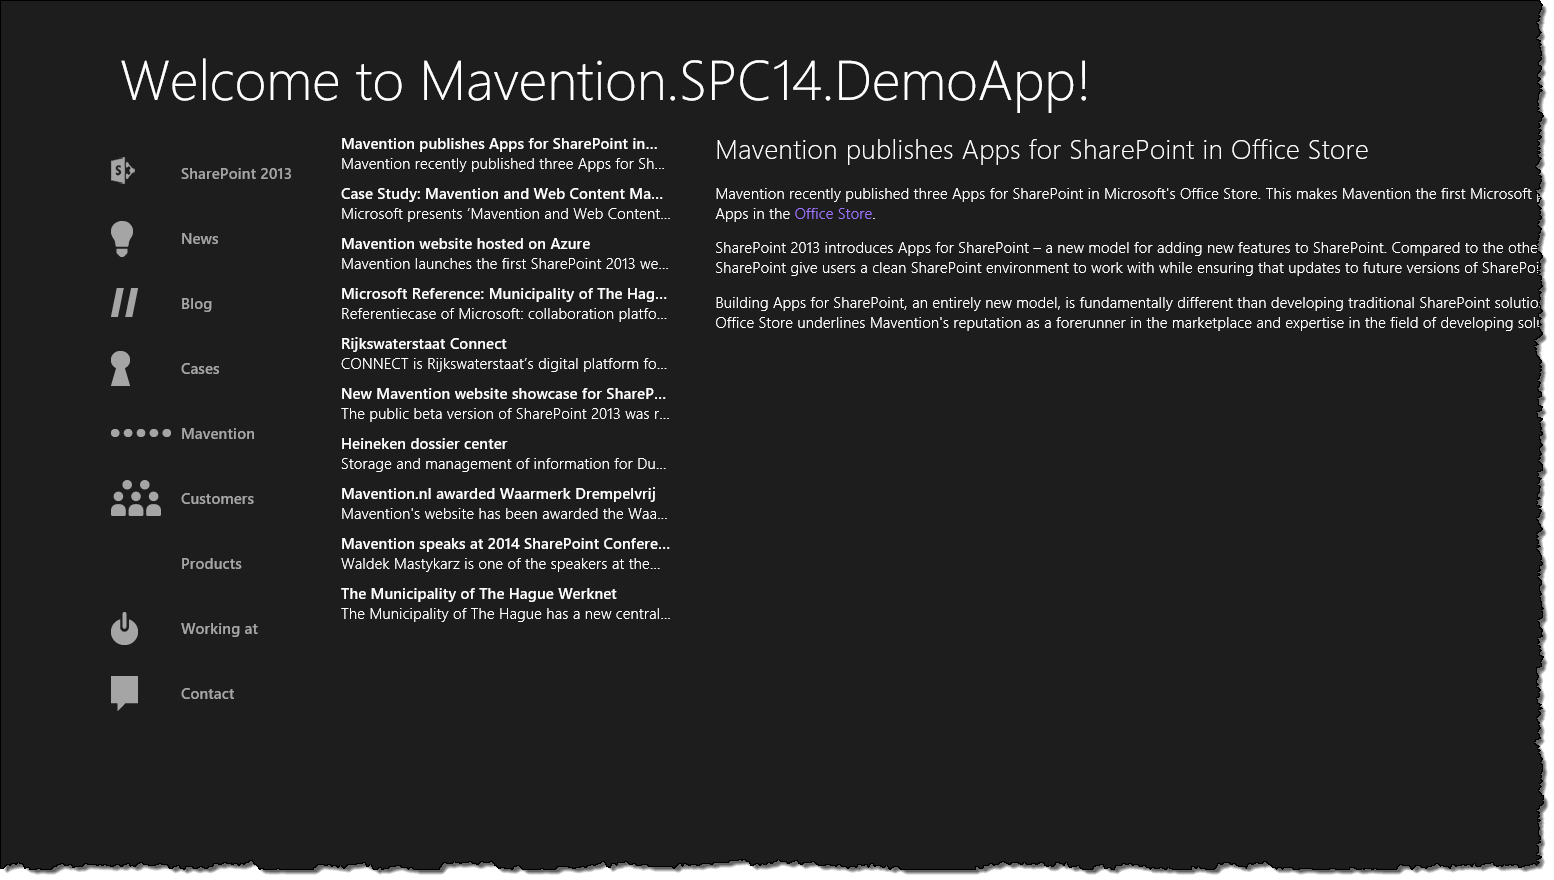
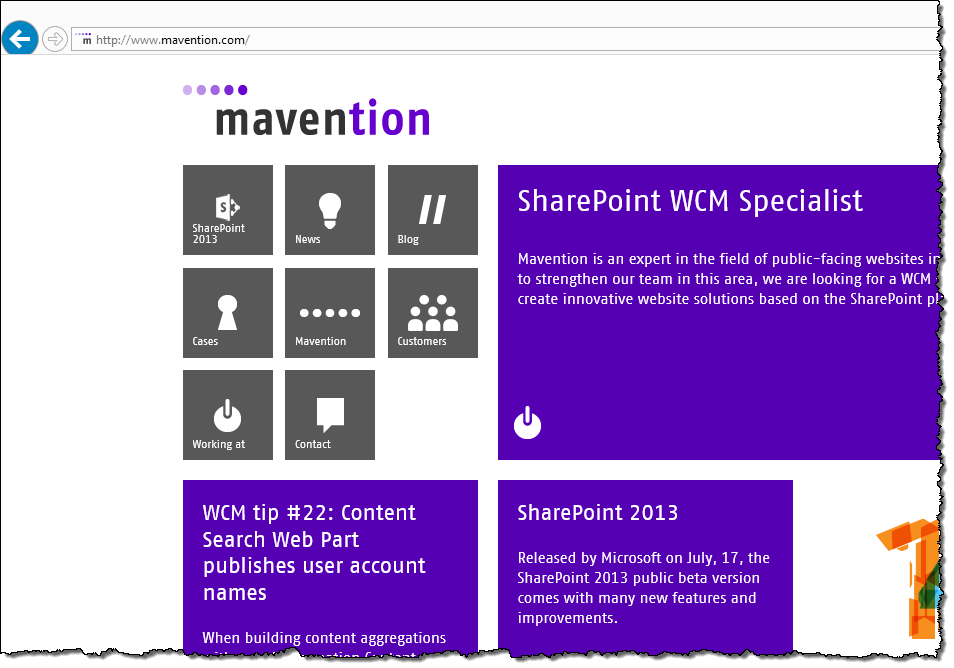
If you look closely, you should notice that the navigation displayed in the app corresponds to the navigation options displayed on mavention.com including icons!
Loading navigation dynamically from SharePoint 2013 is easy and can be done using the navigation REST API. In the following steps we will change the home page of the app to provide a single-page content navigation experience.
Let’s start by defining three areas in the app: the categories, items and the item contents:
<div class="categories win-selectionstylefilled" aria-label="Categories" data-win-control="WinJS.UI.ListView" data-win-options="{
            selectionMode: 'none',
            itemTemplate: select('.categoriesTemplate'),
            oniteminvoked: select('.pagecontrol').winControl.categoryInvoked
        }">
</div>
<div class="items win-selectionstylefilled" aria-label="Items" data-win-control="WinJS.UI.ListView" data-win-options="{
            selectionMode: 'none',
            itemTemplate: select('.itemsTemplate'),
            oniteminvoked: select('.pagecontrol').winControl.itemInvoked
        }">
</div>
<div id="itemContainer">
    <h2 id="itemTitle" class="win-type-ellipsis" data-win-bind="innerHTML: title"></h2>
    <div id="itemBody" data-win-bind="innerHTML: content"></div>
</div>
To control how categories and items are displayed let’s add the following templates:
<div class="categoriesTemplate" data-win-control="WinJS.Binding.Template">
    <div class="item-tile" data-win-bind="style.backgroundImage: iconUrl">
        <div class="item-title win-type-large win-type-ellipsis" data-win-bind="innerHTML: title"></div>
    </div>
</div>
<div class="itemsTemplate" data-win-control="WinJS.Binding.Template">
    <div class="item-info">
        <div class="item-title win-type-large win-type-ellipsis" data-win-bind="innerHTML: title"></div>
        <div class="item-description win-type-x-small win-type-ellipsis" data-win-bind="innerHTML: description"></div>
    </div>
</div>
Next, let’s extend the code of the home page to load the content. Let’s start by loading the available content categories using the navigation REST API:
_loadCategories: function (element) {
    var categories = element.querySelector(".categories").winControl;

    var that = this;

    var xhr = WinJS.xhr({
        url: "http://www.mavention.com/_api/navigation/menustate?mapprovidername='GlobalNavigationSwitchableProvider'&customproperties='Nav_Color,Nav_Icon'",
        responseType: 'json',
        headers: {
            accept: 'application/json;odata=verbose'
        }
    });

    xhr.done(function complete(request) {
        var response = JSON.parse(request.response);

        var siteCategories = new WinJS.Binding.List();

        response.d.MenuState.Nodes.results.forEach(function (item) {
            siteCategories.push({
                element: element,
                key: item.Key,
                title: item.Title,
                iconUrl: 'url(' + that._getValueFromResults('Nav_Icon', item.CustomProperties.results) + ')'
            });
        });

        categories.itemDataSource = siteCategories.dataSource;
    });
},
Calling the navigation REST API will return the Managed Navigation of the particular site. If you look carefully at the REST call you will notice that we request the Nav_Color and Nav_Icon properties. Those are custom local properties that we set on the different terms and that allow us to set additional properties on the different menu items that we can use in the app.
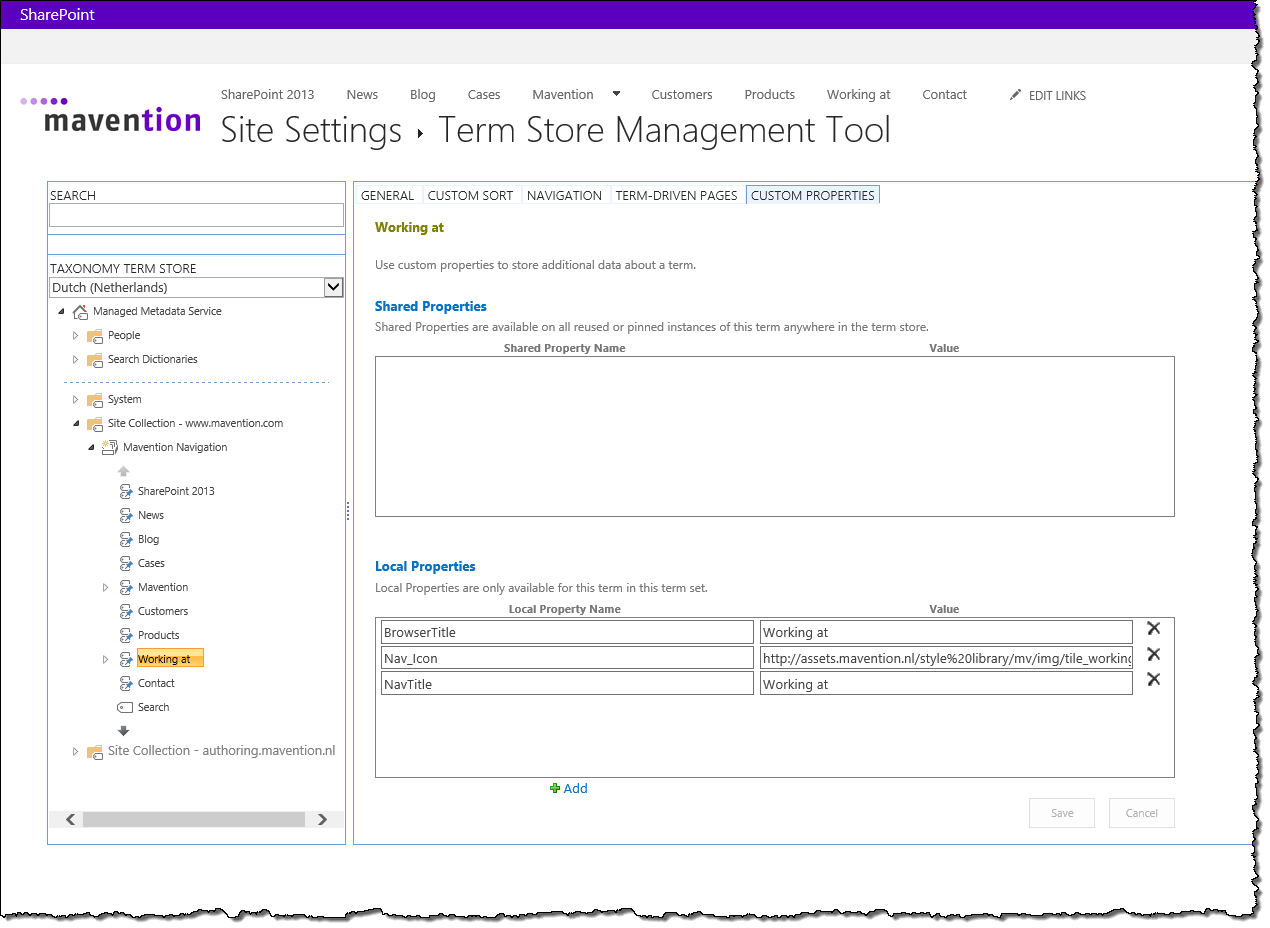
Important: The navigation REST API only allows you to load custom properties of which the name begins with Nav_, _Nav_ or _Sys_Facet_. If you try to load a property with a name that doesn’t begin with either of those prefixes you will get an Unauthorized Access Exception.
Next, we parse the results and for each result we get the title (line 23) and the URL of the icon that should be displayed in the app (line 24).
With categories in place let’s add logic to load items from the selected category:
_loadItems: function (category) {
    var categoryKey = category.data.key;

    var items = category.data.element.querySelector(".items").winControl;

    var xhr = WinJS.xhr({
        url: "http://www.mavention.com/_api/search/query?queryText=%27owstaxidMvItemType:" + categoryKey + " IsLandingPageOWSBOOL<>1%27&SelectProperties=%27Title,PageDescription,PublishingImage,SlugOWSTEXT%27&RowLimit=10&SourceID=%27bf0b05a2-48b4-44d6-bec8-07c587736b89%27&QueryTemplatePropertiesUrl=%27spfile://webroot/queryparametertemplate.xml%27",
        responseType: 'json',
        headers: {
            accept: 'application/json;odata=verbose'
        }
    });

    var that = this;

    xhr.done(function complete(request) {
        var response = JSON.parse(request.response);

        var itemsFromCategory = new WinJS.Binding.List();

        response.d.query.PrimaryQueryResult.RelevantResults.Table.Rows.results.forEach(function (row) {
            itemsFromCategory.push({
                element: category.data.element,
                key: that._getValueFromResults('SlugOWSTEXT', row.Cells.results),
                title: that._getValueFromResults('Title', row.Cells.results),
                description: that._getValueFromResults('PageDescription', row.Cells.results),
            });
        });

        items.itemDataSource = itemsFromCategory.dataSource;
    });
},
This is a regular call to the SharePoint 2013 Search REST API where we pass the ID of the selected category to retrieve 10 items associated with it (owstaxidMvItemType:categoryKey).
Next, let’s allow for selecting and item and displaying its contents:
_loadItem: function (selectedItem) {
    var itemKey = selectedItem.data.key;

    var itemContainer = selectedItem.data.element.querySelector("#itemContainer").winControl;

    var xhr = WinJS.xhr({
        url: "http://www.mavention.com/_api/search/query?queryText=%27SlugOWSTEXT:" + itemKey + "%27&SelectProperties=%27Title,PublishingPageContentOWSHTML%27&RowLimit=1&SourceID=%27bf0b05a2-48b4-44d6-bec8-07c587736b89%27&QueryTemplatePropertiesUrl=%27spfile://webroot/queryparametertemplate.xml%27",
        responseType: 'json',
        headers: {
            accept: 'application/json;odata=verbose'
        }
    });

    var that = this;

    xhr.done(function complete(request) {
        var response = JSON.parse(request.response);

        var item = null;

        response.d.query.PrimaryQueryResult.RelevantResults.Table.Rows.results.forEach(function (row) {
            item = {
                title: that._getValueFromResults('Title', row.Cells.results),
                content: that._getValueFromResults('PublishingPageContentOWSHTML', row.Cells.results),
            };
        });

        WinJS.Binding.processAll(itemContainer, item);
    });
},
This function is a similar to the one we have used previously in the itemContents page.
The last step is to glue everything together by registering event handlers for the different events and loading the list of categories when the home page opens:
init: function (element, options) {
    this.categoryInvoked = ui.eventHandler(this._categoryInvoked.bind(this));
    this.itemInvoked = ui.eventHandler(this._itemInvoked.bind(this));
},

_categoryInvoked: function (args) {
    var that = this;

    args.detail.itemPromise.done(function categoryInvoked(category) {
        that._loadItems(category);
    });
},

_itemInvoked: function (args) {
    var that = this;

    args.detail.itemPromise.done(function itemInvoked(item) {
        that._loadItem(item);
    });
},

ready: function (element, options) {
    this._loadCategories(element);
}
If you start the app, you will see the list of categories which will correspond to the Managed Navigation that you have on your website. After you select a category a list of pages belonging to that category will be displayed. Finally, after you select an item, its contents will be displayed in the app.

As you can see dynamically loading navigation from SharePoint 2013 using the new navigation REST API is pretty easy and offers you a lot of flexibility with regard to managing your app’s navigation. Although this example involved loading the navigation that corresponds to your main website, you could easily define a separate navigation for your app and manage it in SharePoint.
Summary
SharePoint 2013 offers new capabilities and a rich set of APIs for building companion apps for public-facing websites. While building companion apps backed with SharePoint 2013 isn’t challenging there are a few patterns that you need to learn in order to fully benefit of the functionality that SharePoint 2013 has to offers.
This was the third and the last article accompanying my presentation on the SharePoint Conference 2014.
Download: Mavention SPC14 Demo App (1MB, ZIP)