Building Office 365 web applications with React
React is a powerful library for building web applications with rich user interfaces. Did you know that you can use React to build Office 365 web applications that communicate with the Microsoft Graph?
Building web applications with React
If your application uses a lot of HTML markup for its UI or if the data changes a lot, React might be just the thing to help you keep your application performing well. Using its virtual DOM, React keeps track of UI changes and re-renders the changed elements of the page to its DOM.
React focuses on the view part of your application and can be easily integrated with other frameworks that you might already be using. But you might as well use React as a foundation of your application that integrates with Office 365.
Building Office 365 web applications
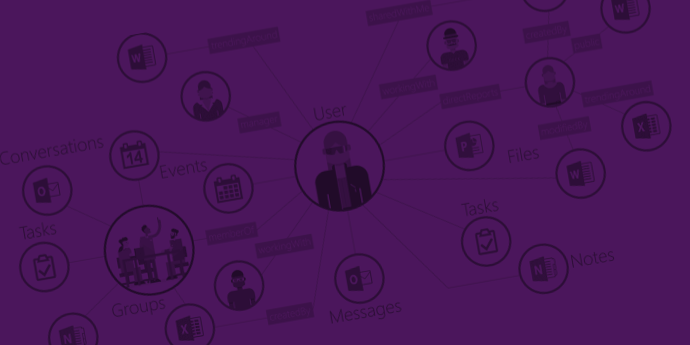
Thanks to the Microsoft Graph you can build web applications using any technology you want. You can build web applications backed by server-side code as well 100% client-side applications. No matter your choice of technology the first thing that your web application needs to do, in order to be able to communicate with Office 365, is to authenticate against it.
For building client-side applications Azure Active Directory (AAD), which is responsible for authentication in Office 365, offers the implicit OAuth flow where client applications don’t specify a secret but instead operate on a trusted location known to AAD. After successful authentication AAD sends the access token to that URL which allows the application to communicate with Office 365.
While implementing the implicit OAuth flow can be done manually using specific web requests and responses, Microsoft simplified the process by providing us with the ADAL JS library. This library consists of two pieces: a generic piece that takes care of the authentication flow and an Angular 1.x HTTP interceptor that makes it extremely easy to build Office 365 web applications with Angular 1.x. The great thing is that the generic piece of the ADAL JS library can be used with other frameworks, such as React.
Building Office 365 web applications with React
To illustrate how you could leverage ADAL JS in React to build Office 365 web applications we will build a simple web application that shows an overview of your Office 365 Groups.
The complete source code of the application is available on GitHub at https://github.com/waldekmastykarz/office-mygroups-react.
Prerequisites
Because we’re building a web application that connects to Office 365 we need a working Office 365 tenant with some Office 365 Groups in it. We also need to register an application in the Azure Active Directory, associated with this Office 365 tenant. Registering an AAD application allows us to grant our application the necessary permissions to access the Microsoft Graph.
To register the application in AAD:
- go to the old Azure Management Portal (https://manage.windowsazure.com)
- in the portal navigate to your Azure Active Directory and open the Applications tab
- add a new web application
- set the reply URL to
https://localhost:8443
- set the reply URL to
- copy the Client Id of the newly created application, we will it need later when implementing authentication in our application
- grant the application the following permissions:
- Windows Azure Active Directory
- Sign in and read user profile
- Microsoft Graph
- Access directory as the signed in user
- Read all groups
- Windows Azure Active Directory
- in the application’s manifest enable OAuth implicit flow
Creating the React application
If you’ve worked with React in the past you probably have your own way of creating new React web applications. If you’re however fairly new to it, you could use the React application blueprint I shared recently.
If you choose to create the React application yourself it’s important that the dev server runs on port 8443 as specified in the reply URL of the AAD application. If you use a different port, you won’t be able to authenticate against the AAD.
Adding authentication using ADAL JS
Installing ADAL JS
The first thing we need to do, is to install the ADAL JS package which we will use to implement authentication in our React application. Because ADAL JS doesn’t support webpack, we need to install its modified version called modular-adal-angular. As mentioned in the package’s details, it requires the expose-loader package to work correctly. Because we will be issuing web requests, we will also need a library that supports promises. In this example we will use a library called q but any other library would work just as well.
Let’s install all these packages by executing:
$ npm i modular-adal-angular expose-loader q -SAdding ADAL JS support files
Next, let’s create a new folder called adal and create two files inside adal-config.js and adal-request.js (see repo).
In the adal-config.js file we will specify ADAL JS configuration information such as the Client Id of our application and the endpoints it uses. We will use the adal-request.js file to build a communication layer between React and the ADAL JS library.
In the adal-config.js file paste the following contents:
var adalConfig = {
  tenant: 'common',
  clientId: '00000000-0000-0000-0000-000000000000',
  extraQueryParameter: 'nux=1',
  disableRenewal: true,
  endpoints: {
    'https://graph.microsoft.com': 'https://graph.microsoft.com'
  }
  // cacheLocation: 'localStorage', // enable this for IE, as sessionStorage does not work for localhost.
};

module.exports = adalConfig;
In line 3 replace the empty Guid with the Client Id of your newly created Azure web application. In the current setup the application will be able only to access the Microsoft Graph. If you were building an application that uses SharePoint, you would need to add the URL of your SharePoint sites in the endpoints section on line 6.
Building the communication layer between React and ADAL JS
When building Angular applications the ADAL JS library automatically authenticates routes and requests as specified in the configuration. Unfortunately this is done by Angular-specific components which we cannot use in our React application.
The core part of the authentication process is already covered for by the generic piece of the ADAL JS library that we can leverage in React. The pieces that we have to build ourselves are:
- for outgoing web requests:
- ensuring that the user is authenticated. If not, having ADAL JS authenticate the user for us
- retrieving specific access token for that request from ADAL JS. If no such token is available, having ADAL JS retrieve the token from AAD for us and storing it for future use
- adding that access token to the web request
- processing AAD callbacks to our application with information such as access tokens or authentication errors and passing the information to ADAL JS
Let’s start by implementing the foundation of our communication layer. In the adal-request.js file paste the following code snippet:
var q = require('q');
var AuthenticationContext = require('expose?AuthenticationContext!../../node_modules/modular-adal-angular/lib/adal.js');
var adalConfig = require('./adal-config');

var _adal = new AuthenticationContext(adalConfig);

var processAdalCallback = function() {

}

var isAuthenticated = function() {

}

var adalRequest = function(settings) {

}

module.exports = {
  adalRequest: adalRequest,
  processAdalCallback: processAdalCallback
}
First we reference all required modules and ADAL JS configuration we defined previously. Next, we create a new instance of the ADAL JS Authentication Context. Then we specify three functions that we will need to implement:
- processAdalCallback which will pass information from AAD callbacks to ADAL JS
- isAuthenticated which will check using ADAL JS if the current user is authenticated or not
- adalRequest which will make it easier to make requests to endpoints protected with AAD such as the Microsoft Graph. Using the settings passed in the arguments we can specify things like URL, request method, response type, etc.
Finally we export two functions for use outside of the module. The isAuthenticated function will be used internally by the adalRequest function to ensure that the current user is authenticated before executing a web request to an endpoint secured using AAD.
Easily executing web requests to endpoints secured with AAD
Let’s start by implementing the adalRequest function:
var adalRequest = function(settings) {
  var deferred = q.defer();

  isAuthenticated().then(function() {
    var resource = _adal.getResourceForEndpoint(settings.url);

    if (!resource) {
      _adal.info('No resource configured for \'' + settings.url + '\'');
      deferred.reject();
      return deferred.promise;
    }

    var tokenStored = _adal.getCachedToken(resource);
    if (tokenStored) {
      if (!settings.headers) {
        settings.headers = {};
      }

      settings.headers.Authorization = 'Bearer ' + tokenStored;

      makeRequest(settings).then(deferred.resolve, deferred.reject);
    }
    else {
      var isEndpoint = false;

      for (var endpointUrl in _adal.config.endpoints) {
        if (settings.url.indexOf(endpointUrl) > -1) {
          isEndpoint = true;
        }
      }

      if (_adal.loginInProgress()) {
        _adal.info('Login already in progress');
        deferred.reject();
      }
      else if (isEndpoint) {
        _adal.acquireToken(resource, function(error, tokenOut) {
          if (error) {
            deferred.reject();
            _adal.error(error);
          }
          else {
            if (tokenOut) {
              _adal.verbose('Token is available');
              if (!settings.headers) {
                settings.headers = {};
              }
              settings.headers.Authorization = 'Bearer ' + tokenOut;
              makeRequest(settings).then(deferred.resolve, deferred.reject);
            }
          }
        });
      }
    }
  }, function() {
    _adal.login();
  })

  return deferred.promise;
}
This function is responsible for executing a web request to and endpoint secured with AAD such as SharePoint Online API or Microsoft Graph. Such requests can only be executed by users who are authenticated and who have a valid access token to the specific endpoint. The first thing that the function does is to ensure that the user is authenticated. We will implement this function later, but for now it’s sufficient to know that it returns a promise which resolves after the user has been successfully authenticated. If the user is not authenticated, calling the isAuthenticated function will trigger the AAD authentication flow. Next, the adalRequest function will try to get the access token to the specific resource (line 140), determined based on the URL of the web request (line 132). If the token exists, it’s added to the web request and the request is executed using a helper function (lines 141-149). If the access token hasn’t been retrieved yet, the function will use ADAL JS to request the token (line 164) and execute the request.
The helper function (lines 102-126) used to execute web requests uses the standard XMLHttpRequest object but could be implemented using any library suitable for your needs:
var makeRequest = function(settings) {
  var deferred = q.defer();

  var xhr = new XMLHttpRequest();
  xhr.onreadystatechange = function() {
    if (this.readyState === 4) {
      if (this.status === 200) {
        deferred.resolve(this.response);
      }
      else if (this.status >= 400) {
        deferred.reject();
      }
    }
  }
  xhr.open(settings.method || 'GET', settings.url, true);

  for (var header in settings.headers) {
    xhr.setRequestHeader(header, settings.headers[header]);
  }

  xhr.responseType = settings.dataType || 'json';
  xhr.send(settings.data);

  return deferred.promise;
}
Implementing authenticating users
Before users can communicate with the Microsoft Graph they need to authenticate first. This is done using the previously mentioned isAuthenticated (lines 68-100) function:
var isAuthenticated = function() {
  var deferred = q.defer();

  updateDataFromCache(_adal.config.loginResource);
  if (!_adal._renewActive && !_oauthData.isAuthenticated && !_oauthData.userName) {
    if (!_adal._getItem(_adal.CONSTANTS.STORAGE.FAILED_RENEW)) {
      // Idtoken is expired or not present
      _adal.acquireToken(_adal.config.loginResource, function(error, tokenOut) {
        if (error) {
          _adal.error('adal:loginFailure', 'auto renew failure');
          deferred.reject();
        }
        else {
          if (tokenOut) {
            _oauthData.isAuthenticated = true;
            deferred.resolve();
          }
          else {
            deferred.reject();
          }
        }
      });
    }
    else {
      deferred.resolve();
    }
  }
  else {
    deferred.resolve();
  }

  return deferred.promise;
}
The isAuthenticated function returns a promise that resolves whenever the user gets authenticated.
Processing AAD callbacks
OAuth flows for authentication and retrieving access tokens for the different resources are based on callbacks. The web application redirects to Azure Active Directory which executes the specific flow and redirects back to the application including information specific to the particular flow. For an application to use OAuth it has to handle the callbacks and process the information retrieved from AAD.
In our case this is done by the processAdalCallback (lines 8-56) function:
var processAdalCallback = function() {
  var hash = window.location.hash;

  if (_adal.isCallback(hash)) {
    // callback can come from login or iframe request
    var requestInfo = _adal.getRequestInfo(hash);
    _adal.saveTokenFromHash(requestInfo);
    window.location.hash = '';

    if (requestInfo.requestType !== _adal.REQUEST_TYPE.LOGIN) {
      if (window.parent.AuthenticationContext === 'function' && window.parent.AuthenticationContext()) {
        _adal.callback = window.parent.AuthenticationContext().callback;
      }
      if (requestInfo.requestType === _adal.REQUEST_TYPE.RENEW_TOKEN) {
        _adal.callback = window.parent.callBackMappedToRenewStates[requestInfo.stateResponse];
      }
    }

    if (requestInfo.stateMatch) {
      if (typeof _adal.callback === 'function') {
        // Call within the same context without full page redirect keeps the callback
        if (requestInfo.requestType === _adal.REQUEST_TYPE.RENEW_TOKEN) {
          // Idtoken or Accestoken can be renewed
          if (requestInfo.parameters['access_token']) {
            _adal.callback(_adal._getItem(_adal.CONSTANTS.STORAGE.ERROR_DESCRIPTION), requestInfo.parameters['access_token']);
            return;
          } else if (requestInfo.parameters['id_token']) {
            _adal.callback(_adal._getItem(_adal.CONSTANTS.STORAGE.ERROR_DESCRIPTION), requestInfo.parameters['id_token']);
            return;
          }
        }
      } else {
        // normal full login redirect happened on the page
        updateDataFromCache(_adal.config.loginResource);
        if (_oauthData.userName) {
          //IDtoken is added as token for the app
          window.setTimeout(function() {
            updateDataFromCache(_adal.config.loginResource);
            // redirect to login requested page
            var loginStartPage = _adal._getItem(_adal.CONSTANTS.STORAGE.START_PAGE);
            if (loginStartPage) {
              window.location.path(loginStartPage);
            }
          }, 1);
        }
      }
    }
  }
}
The processAdalCallback function executes only if an AAD OAuth hash has been provided in the URL (line 11). This is how AAD passes its information to web applications in the implicit OAuth flow and this is what the function is checking for. Based on the provided hash ADAL JS tries to determine the type of flow that the hash belongs to (line 13). After validating the hash (line 26) any callbacks registered with ADAL JS will be executed completing the previously started flow. The token retrieved in the hash is stored for subsequent requests (lines 41 and 45).
Registering ADAL JS with the React web application
The last thing, that we need to do, is to make our web application use the ADAL JS library. For this let’s change the app/index.jsx file to:
var React = require('react');
var ReactDOM = require('react-dom');
var Adal = require('./adal/adal-request');

require('../css/styles.css');

var App = React.createClass({
  render: function() {
    return (
      <div>
        <h1>My React app</h1>
      </div>
    );
  }
});

Adal.processAdalCallback();

if (window === window.parent) {
  ReactDOM.render(<App />, document.getElementById('app'));
}
First, on line 3, we load our newly created ADAL JS communication layer. Then, before we bootstrap our application, we process any AAD callbacks (line 21). Because ADAL JS uses iframes for requesting access tokens, we instantiate our application only if it’s loaded in the top frame to prevent additional load (lines 23-25).
Calling the Microsoft Graph from a React web application
With everything in place we can now call the Microsoft Graph to get the list of our Office 365 Groups. For this let’s create a new React class called Groups and in its componentDidMount function (lines 34-82) let’s call the Microsoft Graph Groups API:
componentDidMount: function() {
  var component = this;
  component.serverRequest = Adal.adalRequest({
    url: 'https://graph.microsoft.com/v1.0/me/memberOf?$top=500',
    headers: {
      'Accept': 'application/json;odata.metadata=full'
    }
  }).then(function(data) {
    var myGroups = [];

    data.value.forEach(function(groupInfo) {
      // workaround as the rest filter for unified groups doesn't seem to work client-side
      if (groupInfo.groupTypes &&
        groupInfo.groupTypes.indexOf('Unified') > -1) {
        myGroups.push({
          id: groupInfo.id,
          odataId: groupInfo['@odata.id'],
          displayName: groupInfo.displayName,
          description: groupInfo.description
        });
      }
    }, this);

    // omitted for brevity

    component.setState({
      loading: false,
      groups: myGroups
    })
  }.bind(component));
},
Here you can see how we execute the web request to the Microsoft Graph using the Adal.adalRequest function specifying the endpoint and headers (lines 36-40). That function handles OAuth authentication for us allowing us to focus on executing the request and processing the response.
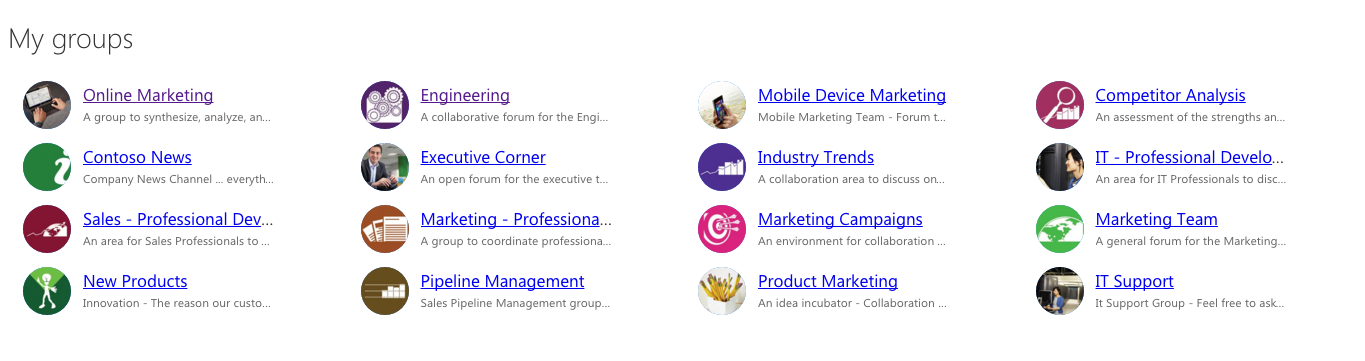
If everything works as expected you should be able now to get the list of your Office 365 Groups.
The web application published in the sample repo uses the Office UI Fabric to render the overview of Office 365 Groups.
Summary
React is a powerful library for building web applications with rich user interfaces. Thanks to its flexibility you can combine React with other libraries to build powerful solutions. With a little effort you can extend the existing ADAL JS library to use React for building Office 365 web applications.