
Bulk-create Planner tasks with dates using Microsoft Power Automate
So the meeting is over and you’re left with a bunch of action points that you need to put in Planner. You know how to create them in bulk, but how to attach start- and due dates to them?
Bulk-create Planner tasks with Power Automate
A while back I wrote about how to create Planner tasks in bulk using a Power Automate flow. To recap, we’d create a manually-triggered flow that takes the list of tasks to create as input. For each item in the list, it would create a Planner task in the specified plan.
Recently, I was asked a question though: what if you wanted to create tasks in bulk, but also specify the start- and due date for each one? Here’s how to do it.
For the following sections, I’ll assume you have the flow to create Planner tasks in bulk that I discussed previously. If you’re just starting, check out my previous article first.
Bulk-create Planner tasks with dates using Power Automate
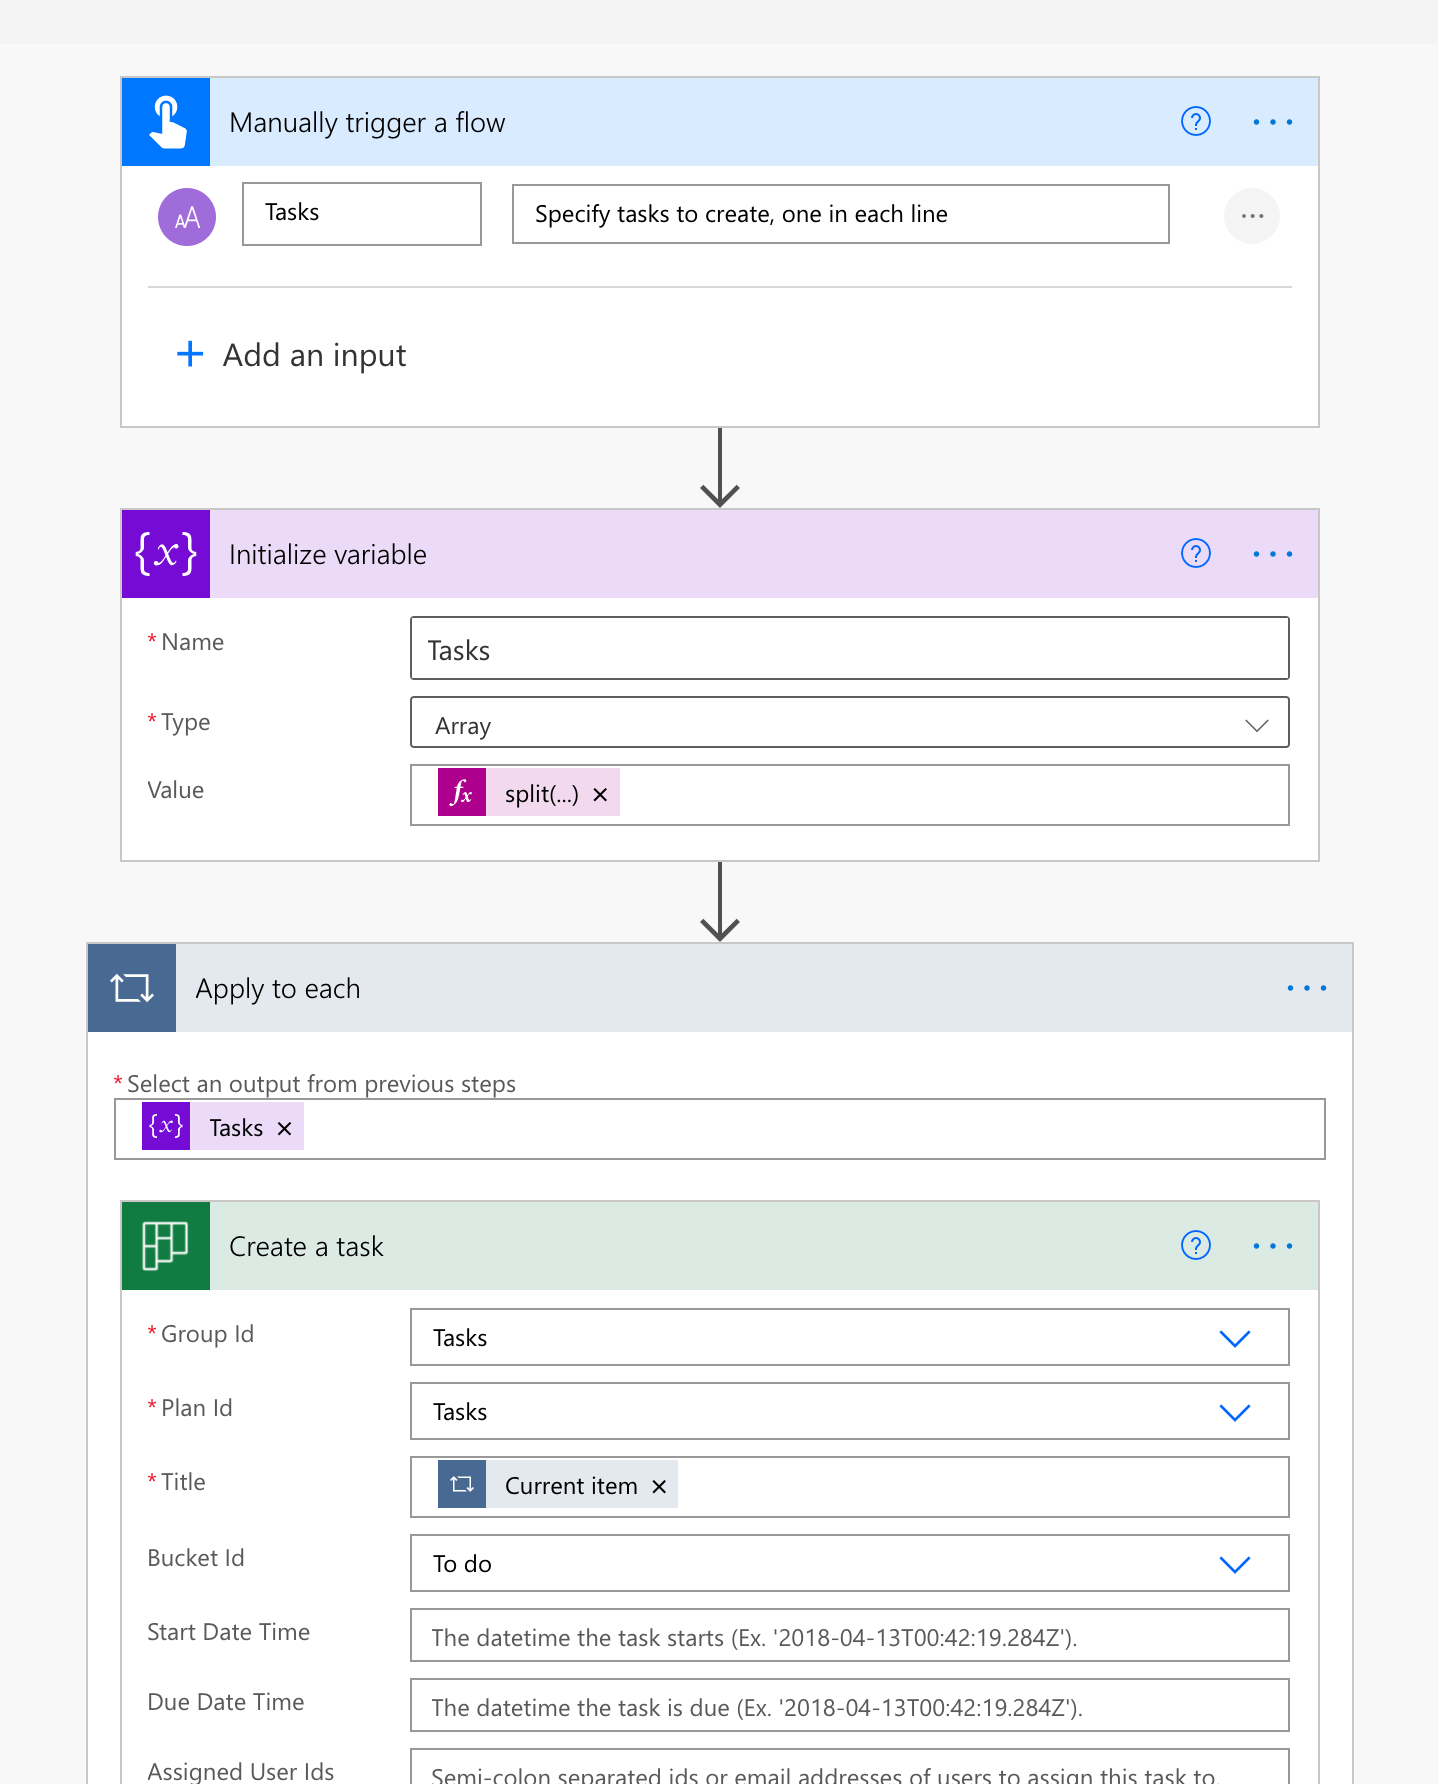
Originally, we took as input the list of tasks to create, one task in each line:
Build the flow
Take images
Write blog post
Ship it
We’d split the input text by line break and end up with an array of task names. We’d then use the Apply to each loop, to create a Planner task for each item.
To specify the start- and due date for each task, it’s the easiest to include them in the same line as the task name:
Build the flow;2021-04-28;2021-05-01
Take images;2021-04-28;2021-05-02
Write blog post;2021-04-29;2021-05-03
Ship it;2021-04-30;2021-05-04
In this example, I start with the task name, followed by its start date, followed by the due date. Note, that dates are formatted as YYYY-MM-DD (year-month-day with leading zeroes). This is important, because the Create a task action expects dates to be in the ISO format.
For the separator I picked the semicolon (;) because it’s less likely to be a part of the task name. You can use any character as the separator just be sure that it’s not used in the task name as it will give you incorrect dates which will break creating the Planner task.
With this new input, we’ll need to change the logic of our flow. Just like we did previously, we’ll start with breaking the list of all tasks into separate lines using the Initialize variable action with the value set to expression:
split(triggerBody()['text'], '
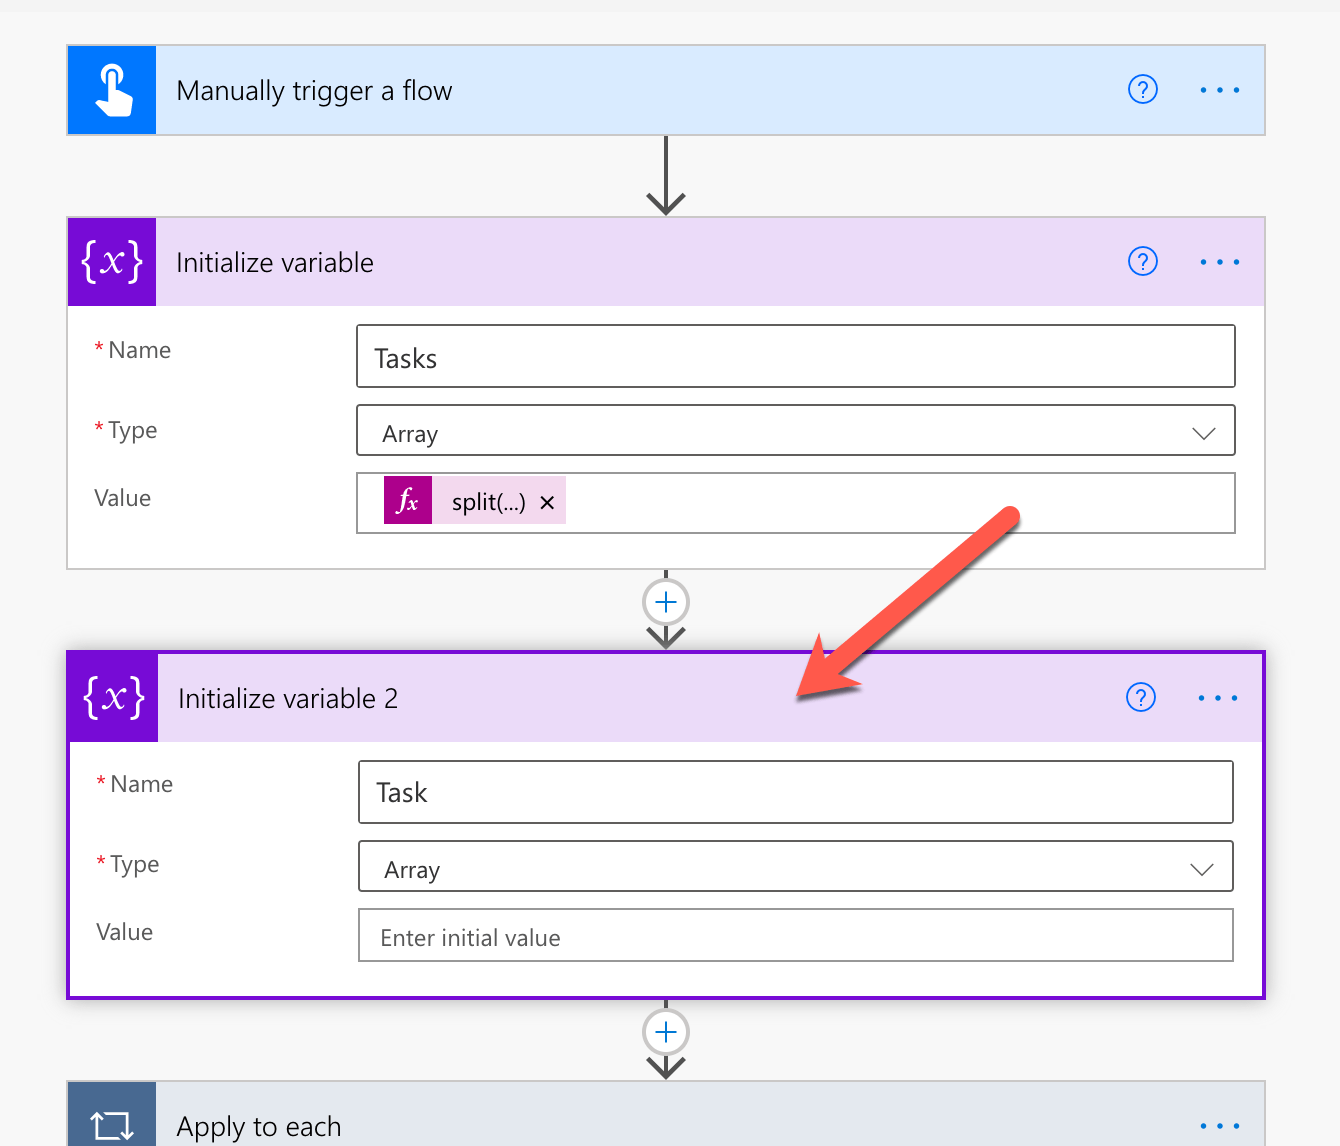
')Then, we need to initialize another variable, named Task, that we’ll use to split each line into task name, start date and due date. It will be also an array and we’ll set its value inside the Apply to each loop, so let’s initialize it with an empty array.
Next, inside the Apply to each loop, we begin by setting the Task variable using the expression:
split(items('Apply_to_each'), ';')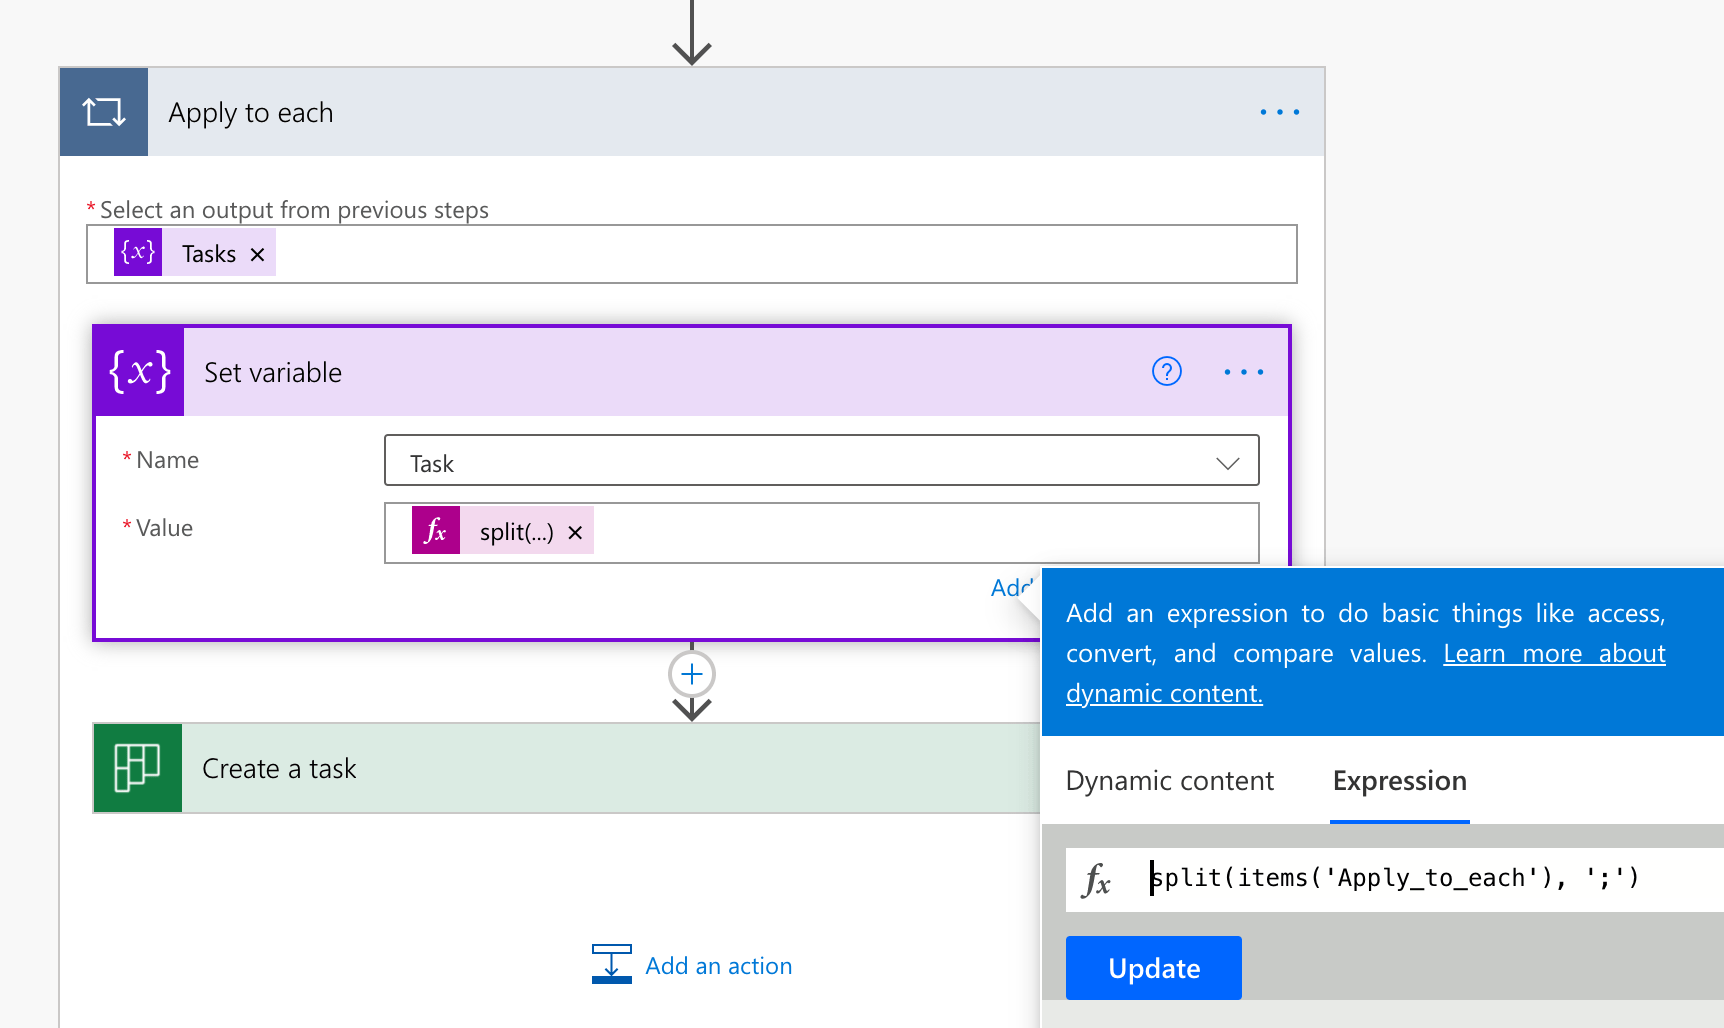
The semicolon (;) is the separator that we used previously. If you used a different character, you’d need to change it here as well.
Finally, we need to update the Create a task action to use the information from the Task variable to create the task. Select the group and plan where you want tasks to be created. Then, specify the expressions: for Title: variables('Task')[0], for Start Date Time variables('Task')[1] and for Due Date Time variables('Task')[2].
variables('Task') returns the value of our Task variable, which is an array (collection of items). The value between square brackets, refers to which item in the array we want, where 0 is the first item, 1 the second, and so on.
With these changes in place, you’re ready to run the flow. If you specified the list of tasks with two dates, you should see in your Planner plan tasks created with correct names, start- and due dates.
