Consistent content authoring in SharePoint 2010 Rich Text Editor
Many content authors struggle with the same challenge: how to guarantee consistent content presentation across the whole website. This challenge is not SharePoint specific. No matter which Content Management System you’re using, the odds are high that sooner or later you will face it. And it’s not really surprising. Consistency is after all a trade-off: how much flexibility and functionality are you willing to give in for the control over the content presentation. Find out what you need to keep the presentation consistent across the whole site and how SharePoint 2010 can help you get this done.
First things first
The requirements for a good Rich Text Editor that supports consistent user experience are pretty simple. First and most important of all it should not allow content editors to use any kind of in-line styling. This means both using the style attribute and presentational markup such as b, i, u, etc. Instead CSS styles defined with the branding should be used and when possible content authors should make use of semantic markup such as strong or em.
Defining page structure using headings is important. Not only it’s more user friendly by increasing readability but also can help you increase search results ranking of your content. One of the requirements for a correct structure of a web page is that there should be only one H1 heading on the page and it should be reserved for the title of the page. This means that a good Rich Text Editor should not allow you to use the H1 tag within the content.
And that’s basically it. Although it might not seem like much, it’s not that simple to get things done once you start working according to the above rules. So now we know what a good Rich Text Editor should support, let’s have a look at how we can configure the SharePoint 2010 Rich Text Editor to meet our needs.
Configuring the SharePoint 2010 Rich Text Editor – almost there
SharePoint 2010 ships with improved Rich Text Editor. Not only it uses now Ribbon, what simplifies editing content, but it also outputs XHTML what makes it easier to create content with proper markup. The interesting part is of course, how the SharePoint 2010 RTE supports consistent user experiences. Let’s start with the first requirement of not using in-line styling.
A little less fonts (markup)
The first thing that should catch your attention is the Font group on the Ribbon.

This group contains functionality that allows content editors to style content. Almost every functionality from that group results in adding in-line styling or presentational markup, so it’s definitely something you want to disallow from the consistency point of view.
The easiest thing you could do would be to disable the whole group using the AllowFonts property of the RichHtmlField control:
<PublishingWebControls:RichHtmlField FieldName="PublishingPageContent" HasInitialFocus="True" AllowFonts="false" MinimumEditHeight="400px" runat="server"/>
While it disables the whole Fonts group at once there are two issues with it. First of all you would disable too much. The B and I buttons could be used in a semantic fashion since they result in respectively strong and em HTML tags, so there is no need to disable them. You could work around this issue by adding a custom Markup Style for both strong and emphasized content (we will discuss later how to get this done).
Another consequence of disabling the complete Fonts group is disabling the Clear Format button which can be very useful when working with rich content from a different source. Unfortunately there is no easy workaround for getting this functionality back other than adding a custom Clear Format button to the Ribbon.
Although setting the AllowFonts property to false disables the font controls on the Ribbon you can still use some of the functionality by using keyboard shortcuts such as CTRL+B (strong), CTRL+I (emphasized), CTRL+Space (Clear Format). The Rich Text Editor will even allow you to save the content with in-line markup. In order to really disallow presentational markup what you need to do is to add another attribute to the RichHtmlField control called AllowTextMarkup.
<PublishingWebControls:RichHtmlField FieldName="PublishingPageContent" HasInitialFocus="True" AllowFonts="false" AllowTextMarkup="false" MinimumEditHeight="400px" runat="server"/>Once you set the AllowTextMarkup attribute to false on your RichHtmlField control and will try to save some content that has presentational markup, the RTE will return an error:

The nice thing is that the RTE will give you the option to automatically correct all issues, meaning removing all markup that isn’t allowed.
Taming the paragraphs
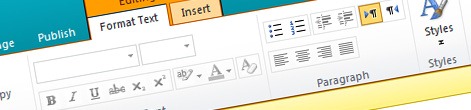
Moving down the Ribbon, the next thing that you would want to be disabled is formatting paragraphs.

By default the Rich Text Editor formats paragraphs such as indenting and configuring the text alignment using in-line styles which might lead to inconsistent user experience.
You can disable paragraph formatting by setting the AllowParagraphFormatting attribute to false. This will disable the Ribbon buttons for indenting paragraphs and configuring text-alignment.

Unfortunately the AllowParagraphFormatting attribute doesn’t solve all issues. Although changing the text direction of a paragraph (left-to-right and right-to-left) is not something you would do a lot, it also makes use of in-line styling. There is however no attribute available on the RichHtmlField control that would allow you to disable those buttons.
Structuring the content the way it should be
Avoiding in-line formatting is only a part of successful content management. Although it helps you separating content from presentation, what allows you to easier reuse the content within your website or even beyond it, there are other things that you should consider as well if you want to make the content more accessible. Properly structuring content can help you not only make it easier for your users to read it, but it can also help you to get better search results.
Choosing proper outline for your content is not difficult. There are basically two simple rules that you should stick to: every page should have only one H1 heading which should be used for the page title and there should be no gaps in heading levels (in other words H1 should be followed by H2 and not H3).
Keeping heading levels without any gaps might be challenging especially with large/complex content. Although the SharePoint 2010 Rich Text Editor doesn’t provide anything out of the box that would make it easier for you to maintain the structure of your document, there are some tools such as Mavention Scan Page Headings that might help you.
By default the RTE allows you to choose a heading level from H1 to H4. Ideally you would want to remove the H1 from the list so that content editors can choose heading levels starting from H2. The good news is that you can easily customize the list of available headings.
Better Rich Text Editor Markup Styles
The list of Markup Styles available in the Rich Text Editor is built using CSS. This means that you can easily create a list of styles consistent with the branding of your site and make it available to content editors.
The first thing that you need to do, to configure your custom list of Markup Styles, is to set the prefix of your custom definitions. This allows the RTE to distinguish between styles that should be displayed in the drop down list and other styles that are included in your CSS files. You can do this using the PrefixStyleSheet attribute.
<PublishingWebControls:RichHtmlField FieldName="PublishingPageContent" HasInitialFocus="True" AllowFonts="false" AllowTextMarkup="false" AllowParagraphFormatting="false" PrefixStyleSheet="mv-" MinimumEditHeight="400px" runat="server"/>As soon as you set the prefix, you should notice that the Markup Styles drop down list is not opening anymore. Because you changed the style prefix and there are no CSS selectors yet, the list is empty.
After configuring the prefix you can proceed with creating definitions for your headings. As mentioned before the H1 is reserved for the page title so the first heading level available in the RTE is H2.
You can define a Markup Style such as H2 as follows:
H2.mv-Element-H2
{
  -ms-name:"Heading 2";
}
H2 is the name of the element that will be applied to the selection. The mv- part of the class name is the name of the prefix specified in the RichHtmlField control and the Element part of the class specifies that the CSS selector will appear in the Markup Styles list. Finally, using the -ms-name property, you can specify the display name that will be visible to the content editors.
The above code snippet will add the Heading 2 option to the Markup Styles drop down list:

Using the above approach you can easily create your own list of Markup Styles that should be available to content editors. This applies not only to headings but to all other elements such as strong and em.

Almost there
Using the standard configuration of the Rich Text Editor you can help your content editors and make it easier for them to use consistent markup across the website. Although you can configure the RTE’s UI to contain only the necessary functionality, it is not fool proof. Although the options are not available in the UI, you could still use in-line styling and presentational markup in the HTML source. You could of course disallow editing the HTML source in the first place but it would seriously limit the functionality and the odds are high your content editors will ask for the edit HTML source functionality.
From the configuration point of view this is how far you can go. If you need to create a more fool-proof solution you would have to extend the standard RichHtmlField control, and this is exactly what I will show you in the next part of how to do consistent content authoring in SharePoint 2010. In the next part of the article I will show you how to remove all the unnecessary options from the UI and validate the contents of the Rich Text Editor to ensure that no in-line formatting and presentational markup has been included. Stay tuned!
Technorati Tags: SharePoint 2010,Web Content Management