Deploying Custom Actions using the App Model
Even though the App Model doesn’t support deploying declarative artifacts to host web, did you know that you could deploy Custom Actions using the App Model?
Custom Actions in SharePoint 2013
Custom Actions offer you a great way to extend capabilities of the SharePoint platform. The possibilities span the range of including custom JavaScript on every page to extending the Ribbon. Custom Actions can be deployed on every scope: from Web to Farm allowing you to easily choose the scope of your customization which makes them very powerful and flexible.
In the past Custom Actions were declarative artifacts deployed using Features. And although this is still possible today using Farm and Sandboxed Solutions, it doesn’t work with the new App Model, or does it?
Custom Actions and the App Model
Although there are quite a few differences between Farm Solutions and Apps for SharePoint one that applies to Custom Actions is the app isolation. Apps for SharePoint are installed in Webs, and although they allow for deploying some declarative artifacts, they are being deployed to the App Web rather than the Host Web where the app is installed. The good news is, that the Client-Side Object Model (CSOM) allows us to programmatically register Custom Actions with the Host Web/Site in a way similar to the declarative approach we used to use with Farm and Sandboxed Solutions. The bad news is, that currently, in order to register a Custom Action using CSOM your app requires the Full Control permission on the Site/Site Collection where you want to register it.
Following are a few scenarios that you might stumble upon when extending the capabilities of the SharePoint platform using the App Model.
Breaking your website – Bad
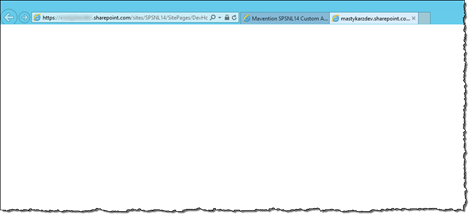
One of the common scenarios for leveraging Custom Actions is registering custom JavaScript to execute on every page. This could be to display notifications, update UI or load other scripts on demand. Although it’s relatively easy to do, particularly with Apps for SharePoint, there is a risk of you breaking your site. If done improperly, registering a script using a Custom Action will prevent you from opening any page (including system pages in the _layouts path!) and all you will see is a blank screen.
Imagine the following scenario: you’re building an app that contains some JavaScript that you would want to run on every page in your portal. You’re using the following code to register it using a Custom Action:
Site site = clientContext.Site;

UserCustomAction customAction = site.UserCustomActions.Add();
customAction.Location = "ScriptLink";
customAction.ScriptSrc = String.Format("{0}://{1}/Scripts/HelloWorld.js", Request.Url.Scheme, Request.Url.Authority);
customAction.Sequence = 1000;
customAction.Update();

clientContext.ExecuteQuery();
We start with getting a reference to the Site Collection as this is the scope that we want to register our script with. Next, we create a new UserCustomAction (line 3), specify that it’s a script registration action (line 4) and provide the path to our JavaScript file located in our App Web. Finally we save our changes, and the next time you will visit your website you will see… a blank screen!
What you might have not known, is that ScriptLink supports only links to JavaScript files located within the Site Collection. If you try to link to a file outside of your Site Collection (which also applies to App Webs even though technically they are located in the same Site Collection), you will break your portal.
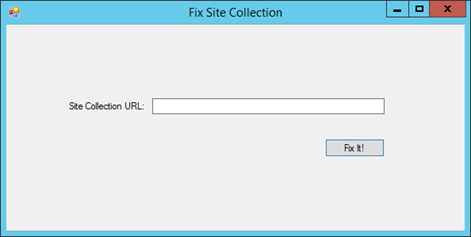
Before we look at how to register a ScriptLink from an App for SharePoint properly let’s first fix our site. Since we cannot access the site to deploy another app, and taking into account that we might be working with Office 365 where we don’t have access to the server to execute PowerShell, I created a Windows App that allows you to fix your site (download at the end of this article).
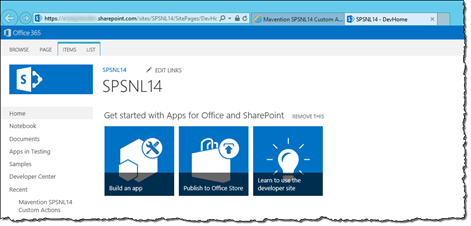
After starting the app the only thing that you will need to do is to provide the URL of your Site Collection. After clicking the Fix It! button the app will connect to your site, ask you to login (note that it’s playing nicely and doesn’t ask you for your credentials but asks you to login using the standard login page instead) and will remove all Custom Actions configured in your Site Collection. If everything worked as expected you should now be able to open your site again:
Registering ScriptLink from App for SharePoint the right way
As you have just seen ScriptLink requires the script file to be located in the Site Collection. So before registering it, we need to copy the script file to the Host Web/Site. For this your app will need the Write permission on the Site or Site Collection (depending on the scope of your ScriptLink Custom Action). In this example we will copy our script file to the Style Library in the Host Site.
Site site = clientContext.Site;

// Get List
var lists = clientContext.LoadQuery(site.RootWeb.Lists.Where(l => l.RootFolder.Name == "Style Library"));
clientContext.ExecuteQuery();
List styleLibrary = lists.FirstOrDefault();

if (styleLibrary != null) {
    // Check if file exists and check out if necessary
    clientContext.Load(site.RootWeb, w => w.ServerRelativeUrl);
    clientContext.ExecuteQuery();

    Microsoft.SharePoint.Client.File file = site.RootWeb.GetFileByServerRelativeUrl(String.Format("{0}/Style Library/HelloWorld.js", site.RootWeb.ServerRelativeUrl.TrimEnd('/')));
    clientContext.Load(file, f => f.Exists, f => f.CheckOutType);
    try {
        clientContext.ExecuteQuery();

        if (file.Exists &&
            file.CheckOutType == CheckOutType.None) {
            file.CheckOut();
            clientContext.ExecuteQuery();
        }
    }
    catch (ServerException ex) {
        // expected if the file doesn't exist
        if (ex.ServerErrorTypeName != "System.IO.FileNotFoundException") {
            throw;
        }
    }

    // Get File Contents
    string fileContents = System.IO.File.ReadAllText(Server.MapPath(@"..\Scripts\HelloWorld.js"));

    // Upload Script File
    file = styleLibrary.RootFolder.Files.Add(new FileCreationInformation {
        Content = Encoding.UTF8.GetBytes(fileContents),
        Overwrite = true,
        Url = "HelloWorld.js"
    });
    file.CheckIn(String.Empty, CheckinType.MajorCheckIn);
    clientContext.ExecuteQuery();

    // Register Custom Action
    UserCustomAction customAction = site.UserCustomActions.Add();
    customAction.Location = "ScriptLink";
    customAction.ScriptSrc = "~SiteCollection/Style Library/HelloWorld.js";
    customAction.Sequence = 1000;
    customAction.Update();
    clientContext.ExecuteQuery();
}
else {
    throw new FileNotFoundException("'Style Library' not found");
}
We start with retrieving the Style Library. This time we use LINQ to do this (lines 4-6). Once we retrieved the list, we check if our script file already exists (lines 13-14). The awkward thing about this check is that if the file does not exist, SharePoint will throw a generic ServerException and only by examining the value of its ServerErrorTypeName property (it will be set to System.IO.FileNotFoundException if the file doesn’t exist; line 26) you will be able to determine if the file actually exists or not.
If the file exists, we should ensure that we can overwrite it by checking it out first if necessary (lines 18-22).
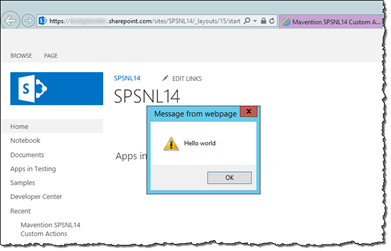
Next we upload our script file to the Style Library and publish it (lines 35-41). Finally we register a new ScriptLink Custom Action. Please note that this time the URL to our script file begins with the ~SiteCollection token. With this everything will work as expected and the next time we visit a page anywhere in our Site Collection we will see the script being executed.
Unregistering ScriptLink from App for SharePoint
Structured and repeatable deployments using the App Model are imperative. The consequence of this is that also the process of upgrading and uninstalling your app along with all its artifacts needs to be taken care of manually.
Cleaning up after an app that registered a ScriptLink is relatively easily. You first unregister the ScriptLink Custom Action and then delete the script file from the Site Collection.
Site site = clientContext.Site;

// Delete Custom Actions
var customActions = clientContext.LoadQuery(site.UserCustomActions.Where(a => a.ScriptSrc == "~SiteCollection/Style Library/HelloWorld.js"));
clientContext.ExecuteQuery();

foreach (UserCustomAction customAction in customActions) {
    customAction.DeleteObject();
}

// Execute only if Custom Actions have been found and removed
if (clientContext.HasPendingRequest) {
    clientContext.ExecuteQuery();
}

// Delete File
clientContext.Load(site.RootWeb, w => w.ServerRelativeUrl);
clientContext.ExecuteQuery();

Microsoft.SharePoint.Client.File file = site.RootWeb.GetFileByServerRelativeUrl(String.Format("{0}/Style Library/HelloWorld.js", site.RootWeb.ServerRelativeUrl.TrimEnd('/')));
file.DeleteObject();
clientContext.ExecuteQuery();
The easiest way to retrieve a ScriptLink Custom Action is by matching the URL to the script file configured in the ScriptSrc property using LINQ (line 4). Once all Custom Actions with that URL are retrieved you can remove them by iterating through the collection and calling the DeleteObject method on each one of them (lines 7-9).
If your uninstallation process broke initially and you’re rerunning it, it could just happen that no Custom Actions have been found and deleted. With that, there would be no point in calling SharePoint at that moment. By checking if any changes are pending we can call SharePoint only if necessary (lines 12-14).
After removing the ScriptLink Custom Action the last step is to delete the script file. We start with retrieving it (line 20) and then calling the DeleteObject method on the File object (line 21).
Deploying Ribbon customizations with Page Components using the App Model
A slightly more complex, yet just as common, scenario is to extend the Ribbon with some custom controls which are controlled by a Page Component. Because the Page Component might be rather large, depending on the functionality behind the Ribbon controls, it should be loaded only when necessary.
Site site = clientContext.Site;

// Get List
var lists = clientContext.LoadQuery(site.RootWeb.Lists.Where(l => l.RootFolder.Name == "Style Library"));
clientContext.ExecuteQuery();
List styleLibrary = lists.FirstOrDefault();

if (styleLibrary != null) {
    UploadScript("Mavention.SharePoint.InsertTOC.Loader.js", styleLibrary.RootFolder, clientContext);
    UploadScript("Mavention.SharePoint.InsertTOC.PageComponent.js", styleLibrary.RootFolder, clientContext);

    // Get Web Language
    clientContext.Load(site.RootWeb, w => w.Language);
    clientContext.ExecuteQuery();

    // Register Script Loader
    UserCustomAction pageComponentLoaderCustomAction = site.UserCustomActions.Add();
    pageComponentLoaderCustomAction.Location = "ScriptLink";
    pageComponentLoaderCustomAction.ScriptSrc = "~SiteCollection/Style Library/Mavention.SharePoint.InsertTOC.Loader.js";
    pageComponentLoaderCustomAction.Sequence = 1000;
    pageComponentLoaderCustomAction.Update();
    clientContext.ExecuteQuery();

    // Register Ribbon Button
    UserCustomAction ribbonButtonCustomAction = site.UserCustomActions.Add();
    ribbonButtonCustomAction.Location = "CommandUI.Ribbon";
    ribbonButtonCustomAction.Name = "MaventionInsertTOCButton";
    ribbonButtonCustomAction.CommandUIExtension = String.Format(Properties.Resources.RibbonXML, site.RootWeb.Language);
    ribbonButtonCustomAction.Sequence = 20;
    ribbonButtonCustomAction.Update();
    clientContext.ExecuteQuery();
}
else {
    throw new FileNotFoundException("'Style Library' not found");
}
Similarly to the previous case we also start with retrieving a reference to the Style Library and uploading two script files: the Page Component loader (line 9), responsible for loading the Page Component using the Script On Demand (SOD) framework, and the Page Component itself (line 10). Because the logic for uploading both files is the same, it has been refactored to a separate method:
private void UploadScript(string fileName, Folder folder, ClientContext clientContext) {
    Microsoft.SharePoint.Client.File file = folder.Files.Add(new FileCreationInformation {
        Content = Encoding.UTF8.GetBytes(System.IO.File.ReadAllText(Server.MapPath(@"..\Scripts\" + fileName))),
        Overwrite = true,
        Url = fileName
    });
    file.CheckIn(String.Empty, CheckinType.MajorCheckIn);
    clientContext.ExecuteQuery();
}
Having uploaded both files, we begin with registering the first Custom Action which is a ScriptLink for the Page Component Loader. This steps is exactly the same as the step we have taken previously for registering a custom JavaScript file with a Site Collection.
The next step is to register the Ribbon customization. Also here we start with creating a new Custom Action, but this time we specify CommandUI.Ribbon as the location (line 26). Even though we’re deploying the Ribbon customization imperatively, it still involves a fair amount of XML – just as it does in a fully declarative provisioning approach. For clarity all of the Ribbon XML has been included in app’s resources and is referenced from there (line 28). Following are the contents of the Ribbon Customization used in this example:
<CommandUIExtension>
  <CommandUIDefinitions>
    <CommandUIDefinition Location="Ribbon.EditingTools.CPInsert.Content.Controls._children">
      <Button Id="Ribbon.EditingTools.CPInsert.Content.TableOfContents"
              Alt="Insert Table of Contents"
              Command="Mavention.SharePoint.InsertTOC.InsertTOC"
              LabelText="Insert Table of Contents"
              Sequence="20"
              Image16by16="/_layouts/15/{0}/images/formatmap16x16.png" Image16by16Top="-240" Image16by16Left="-18"
              Image32by32="/_layouts/15/{0}/images/formatmap32x32.png" Image32by32Top="-204" Image32by32Left="-341"
              TemplateAlias="o1"
              ToolTipTitle="Insert Table of Contents"
              ToolTipDescription="Insert Table of Contents"/>
    </CommandUIDefinition>
  </CommandUIDefinitions>
</CommandUIExtension>
You might have noticed that the XML snippet contains a formatting token which is processed before the XML is set on the CommandUIExtension property of the Custom Action. The reason for this is, that the Ribbon Button uses a localized image and we need to set the locale of the current Web to ensure for a consistent user experience.
One more thing worth noticing is that when defining the Ribbon customization Custom Action we define a name using the Name property. Later on, when uninstalling our app and its resources, we will use this name to retrieve this Custom Action and delete it.
Removing Ribbon customizations with Page Components using the App Model
The process of removing a Ribbon customization with Page Component is very similar to the process of removing a script registration using ScriptLink: we first remove all Custom Actions and then delete the files.
Site site = clientContext.Site;

// Delete Custom Actions
var customActions = clientContext.LoadQuery(site.UserCustomActions.Where(a => a.ScriptSrc == "~SiteCollection/Style Library/Mavention.SharePoint.InsertTOC.Loader.js" || a.Name == "MaventionInsertTOCButton"));
clientContext.ExecuteQuery();

foreach (UserCustomAction customAction in customActions) {
    customAction.DeleteObject();
}

// Execute only if Custom Actions have been found and removed
if (clientContext.HasPendingRequest) {
    clientContext.ExecuteQuery();
}

// Delete Files
clientContext.Load(site.RootWeb, w => w.ServerRelativeUrl);
clientContext.ExecuteQuery();

Microsoft.SharePoint.Client.File loader = site.RootWeb.GetFileByServerRelativeUrl(String.Format("{0}/Style Library/Mavention.SharePoint.InsertTOC.Loader.js", site.RootWeb.ServerRelativeUrl.TrimEnd('/')));
loader.DeleteObject();
Microsoft.SharePoint.Client.File pageComponent = site.RootWeb.GetFileByServerRelativeUrl(String.Format("{0}/Style Library/Mavention.SharePoint.InsertTOC.PageComponent.js", site.RootWeb.ServerRelativeUrl.TrimEnd('/')));
pageComponent.DeleteObject();
clientContext.ExecuteQuery();
The only difference in this process, comparing to what we have done previously, is how we retrieve the Ribbon customization Custom Action. While registering the Custom Action for the Ribbon customization we specified a name and now we’re using it to retrieve it from the UserCustomActions collection (line 4).
Download: Sample App for SharePoint (235KB, ZIP) Download: Site Collection Fixup App (7KB, ZIP)


