Using different login pages on different Site Collections in a single Web Application
SharePoint 2010 makes it easy for you to host multiple Site Collections within a single Web Application. In terms of Internet-facing websites this capability is extremely powerful when it comes to hosting mini-sites. And although they all might use the same credential store, they might need a login page using their own branding. Find out how to configure different login page for every Site Collection in a single Web Application.
Delivering personal experiences on the web
SharePoint 2010 is a powerful and flexible platform for hosting Internet-facing websites. It supports all the different scenarios: from large company websites to mini-sites supporting for example a product launch campaign. No matter your requirements, SharePoint can help you get everything in place to support your business.
When it comes to hosting multiple Site Collections in a single Web Application you have two options. You can either use manage paths or choose for Host Named Site Collections. While the first choice is most often being made from the governance point of view, it’s the second option that your marketing department loves. Using Host Named Site Collections makes all the Site Collections look from the outside just as if they were separate Web Applications! They have their own URL, that can be a whole different domain than the root Site Collection, which is great when it comes to support marketing campaigns.
In the last few years more and more sites shift from only providing static information to delivering personalized experiences. After authenticating, using visitor’s profile, you can tailor the user experience to his specific needs offering more value from the visit. To provide the best user experience you want to make the authentication process as unobtrusive as possible making it an integral part of your site. And this is exactly when things get challenging.
Authentication settings in SharePoint 2010
As you might know authentication settings in SharePoint 2010 are scoped to Web Application. This means that all Site Collections within the same Web Application share authentication providers but also the login page. Although you might be using a single user store for all the visitors of all your sites, the odds are high that you would want a different login page for each one of them! While this seems impossible at first, you can use a simple trick to get this to work.
Configuring separate login pages for different Site Collections
One way of configuring separate login pages for different Site Collections is to replace the standard login page with an HTTP Handler which will, based on the requested URL, find the right Site Collection, get the URL of its login page and redirect the visitor to it.
Configuring prerequisites
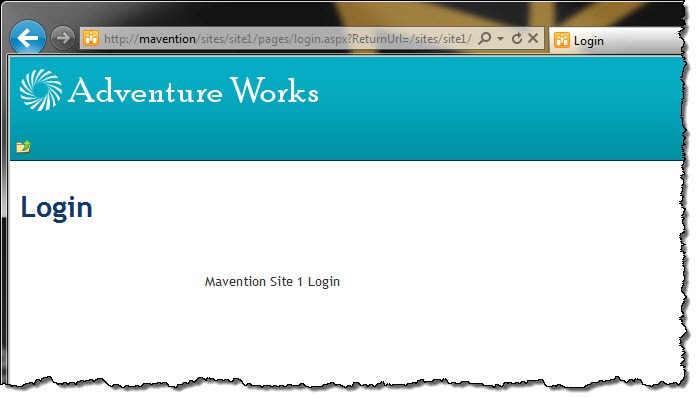
For the purpose of this article we will use two Site Collections with URLs /sites/site1 and /sites/site2. Both Site Collections are hosted within a Web Application that allows anonymous access. In each Site Collection create a Publishing Page called Login. This page should be accessible for anonymous users to allow them to authenticate.
The last step in the preparation process is to register the login pages for each Site Collection. Because the Web Application allows us to define only one login page, we have to store the URL of the Site Collection’s login page elsewhere. Using the Root Web’s Property Bag is a great place to do that as it’s lightweight and easy to work with once you have the reference to the parent Site Collection.
Out of the box SharePoint doesn’t provide any user interface to manage the properties from the site’s Property Bag. If you need to set a value of a property in the site’s Property you can do this either declaratively, using the Property Element, using a Feature Receiver or using PowerShell. The following code snippet shows how to set a value of a property in the Root Web’s Property Bag using PowerShell.
$rootWeb = Get-SPWeb http://mavention/sites/site1
$rootWeb.SetProperty('MaventionLoginPage', '/sites/site1/pages/login.aspx')
$rootWeb.Update()
After executing the above script for both Site Collections we are ready to proceed with the next step which is creation of the HTTP Handler that will redirect the visitors to the right login page.
Creating the login redirection HTTP Handler
As mentioned before, a Web Application allows you to configure only one login page. To be able to have separate login pages for different sites, you have to replace the default login page with an endpoint that is able to redirect the visitor to the right login page based on the requested URL. We chose for HTTP Handler because it’s lightweight and introduces less overhead than an Application Page.
The following code snippet presents the code of the redirection HTTP Handler:
using System;
using System.Linq;
using System.Web;
using Microsoft.SharePoint;
using Microsoft.SharePoint.Utilities;

namespace Mavention.SharePoint.Authentication {
    public class LoginRedirection : IHttpHandler {
        public static readonly string ReferrerParameterName = "ReturnUrl";
        public static readonly string LoginPagePropertyName = "MaventionLoginPage";

        #region IHttpHandler Members

        public bool IsReusable {
            get { return false; }
        }

        public void ProcessRequest(HttpContext context) {
            string referrerRelativeUrl = context.Request.QueryString[ReferrerParameterName];

            Uri requestUri = context.Request.Url;
            string referrer = SPUrlUtility.CombineUrl(requestUri.GetLeftPart(UriPartial.Authority), referrerRelativeUrl);
            string loginPageUrl = null;
            using (SPSite site = new SPSite(referrer)) {
                loginPageUrl = site.RootWeb.GetProperty(LoginPagePropertyName) as string;
            }

            if (!String.IsNullOrEmpty(loginPageUrl)) {
                char joinChar = loginPageUrl.Contains('?') ? '&' : '?';
                loginPageUrl = String.Format("{0}{1}{2}={3}", loginPageUrl, joinChar, ReferrerParameterName, referrerRelativeUrl);
                context.Response.Redirect(loginPageUrl);
            }
            else {
                throw new InvalidOperationException();
            }
        }

        #endregion
    }
}
We start with retrieving the requested URL (line 19). Using that URL we can determine which Site Collection has been requested (line 22). Next, we retrieve the instance of the specific Site Collection (line 24) and from the property of the Root Web we read the URL of the login page for that specific Site Collection (line 25). If the URL of the login page has been configured, we append to it the URL that has originally been requested (line 30) so that we can redirect the user back to that URL upon a successful authentication. The last thing left to do is to redirect the visitor to the right login page (line 31).
Configuring the HTTP Handler as authentication endpoint
To make use of the HTTP Handler that we have created previously we have to register it with the Web Application hosting our Site Collections. For this go to Central Administration and in the Web Applications section navigate to the Manage web applications page. In the overview of Web Applications available in your Farm, select your Web Application and in the Ribbon from the Security group click the Authentication Providers button.

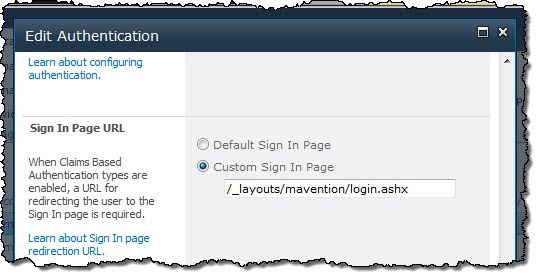
Next choose the Zone, that your visitors use to access your website with. When the Edit Authentication dialog appears, scroll down to the Sign In Page URL section, select the Custom Sign In Page option, and as URL provide the URL of the HTTP Handler we have created previously:
Now, when you navigate to a location within your Site Collection that requires authentication you should be redirected to the login page of that specific Site Collection.