
Easily publishing release versions of web applications to Azure Web Apps with Git, Gulp and Kudu
Azure Web Apps support a number of services for continuous deployment. One of them is a Git repository to which you can push your changes and which are automatically deployed to your Azure Web App. Did you know however that you can leverage your existing Gulp tasks in that deployment process to deploy the release version of your web application?
Publishing web application to Azure Web Apps using Git
Recently fellow-MVP Elio Struyf published a step-by-step description of how you can publish your web application to an Azure Web App using Git. Azure Web Apps allow you to create a Git repo to facilitate continuous deployment. You release the new version of your application by doing nothing more than pushing your commits to that repository.
Inconvenient default deployment to Azure Web Apps with Git
The challenge with the approach illustrated by Elio is that by default the Kudu engine, that powers this deployment process, copies all contents of your repository to the wwwroot folder of your Azure Web Application. The odds are high that you might have a build process setup for your application using for example Gulp or Grunt which processes your application files and copies them to a release folder (often called dist). Because Kudu doesn’t know about your build process, in order to have your Azure Web App refer to the release version of your web application rather than its source, you would need to include the dist folder in source control, so that it’s included in your Git repository and can be pushed to your Azure Web App, and remap your Azure Web App to point to site\repository\dist rather than site\wwwroot as it does by default. Did you know however that you can have Kudu execute a custom build process instead?
Publishing release version of your web application with Git, Gulp and Kudu
To illustrate the process of configuring a custom build process with Kudu, let’s create a sample web application that consists of a welcome page (index.html) and a CSS stylesheet (css/styles.css).

The source code of the sample project is available on GitHub at https://github.com/waldekmastykarz/sample-azure-deployment
The build process for this application is implemented with a custom Gulp task that currently doesn’t do anything else than copying files to the dist folder.
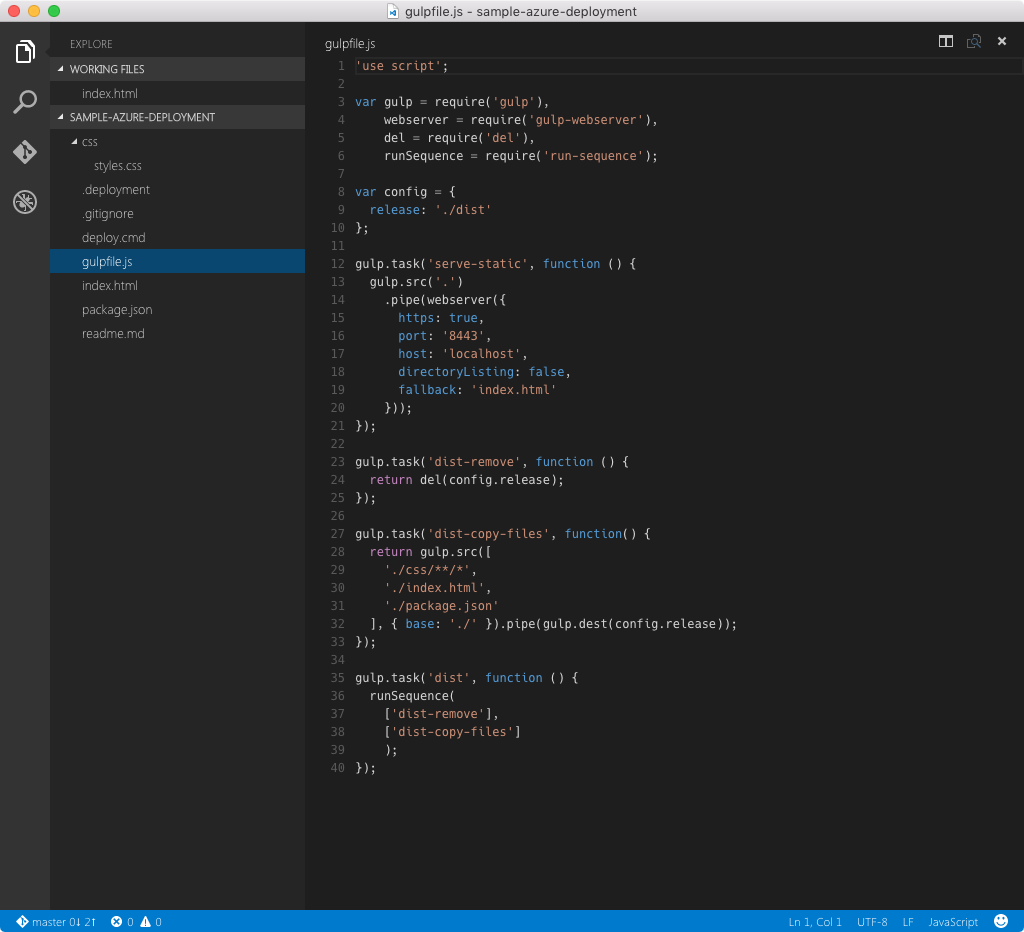
In order to have Kudu execute a custom build process you need two things: a batch file (in this example a Windows batch file) that calls your build process implemented in the Gulp dist task and a .deployment file in the root of your repository, which passes options to Kudu including the path to your custom batch file.

Creating the batch file to call the Gulp dist task
The batch file is responsible for installing all dependencies required to run the Gulp dist task and copying its output from the dist folder to the wwwroot folder of the Azure Web App.
Following are the contents of a sample batch file that does that:
call npm install
IF "%ERRORLEVEL%" NEQ "0" goto error

call gulp dist
IF "%ERRORLEVEL%" NEQ "0" goto error

del /q %DEPLOYMENT_TARGET%\*
for /d %%x in (%DEPLOYMENT_TARGET%\*) do @rd /s /q "%%x"
IF "%ERRORLEVEL%" NEQ "0" goto error

xcopy %DEPLOYMENT_SOURCE%\dist %DEPLOYMENT_TARGET% /Y /E
IF "%ERRORLEVEL%" NEQ "0" goto error

goto end

:error
endlocal
echo An error has occurred during web site deployment.
call :exitSetErrorLevel
call :exitFromFunction 2>nul

:exitSetErrorLevel
exit /b 1

:exitFromFunction
()

:end
endlocal
echo Finished successfully.
Assuming you’re not including your node modules in source control, the first step for the build process is to install all node packages including Gulp (line 1):
call npm install Next we execute the Gulp dist task (line 4) which currently only copies application files to the dist folder but which in a real-life scenario could for example transpile and minify script and stylesheet files.
call gulp distNext, we clear the contents of the wwwroot folder to remove the old version of our web application. Kudu passes the path to the wwwroot folder in the %DEPLOYMENT_TARGET% variable which we can conveniently use in our script (lines 7 and 8).
del /q %DEPLOYMENT_TARGET%\*
for /d %%x in (%DEPLOYMENT_TARGET%\*) do @rd /s /q "%%x"
Finally we copy the contents of the dist folder to the wwwroot folder of the Azure Web App (line 11).
xcopy %DEPLOYMENT_SOURCE%\dist %DEPLOYMENT_TARGET% /Y /EThe dist folder is generated in the repository folder which contains all code we pushed to the Git repository backing our Azure Web App. Kudu passes the path to the repository folder using the %DEPLOYMENT_SOURCE% variable.
The batch file also includes some instrumentation so that the build process is cancelled should an error occurre at any given point.
Registering the custom batch file with Kudu
Having created the batch file to execute our build process and copy its output to the wwwroot folder, the last thing left is to instruct Kudu to use this file in its build process. To do this, create a new file called .deployment (note the leading . (dot) in the filename) in the root of your repository and enter the following contents:
[config]
command = deploy.cmd
Next time you push a commit to the Git repository backing your Azure Web App, Kudu will use your custom script to build and release your web application.
Testing the custom deployment with Git, Gulp and Kudu
Let’s put the newly created deployment process to test. Let’s start with cloning the sample repo I shared on GitHub.
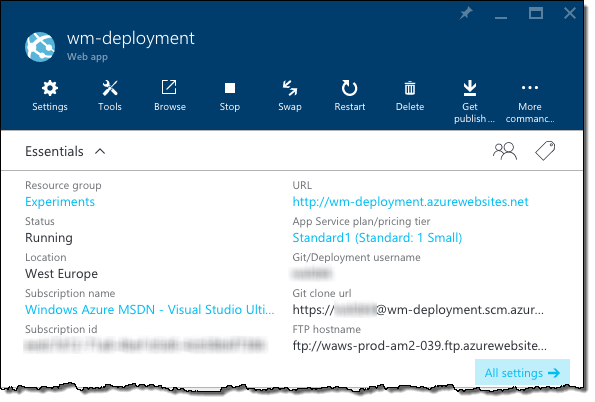
Next, create a new Azure Web App and set its Continuous deployment to the local Git repository (step-by-step instructions for doing this are available on Elio’s blog).
Next, copy the Git clone url of your newly created Azure Web App and add it as a remote repository to your project:
$ git remote add azure-prod <url>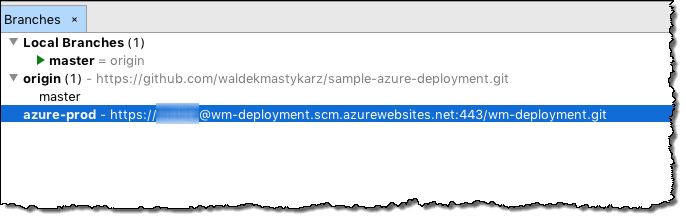
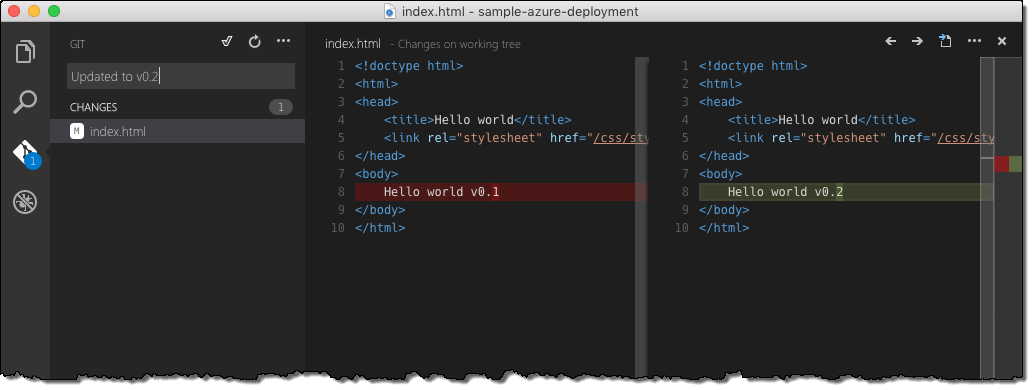
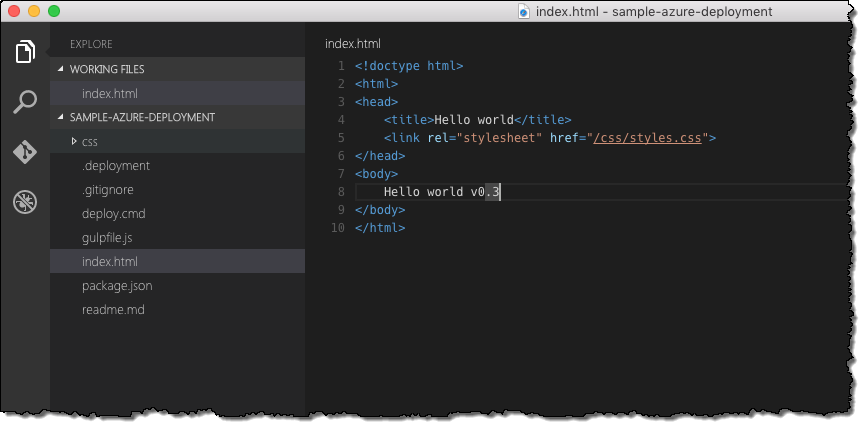
Let’s test the deployment process by changing the contents of the index.html file and committing the changes locally.
Next let’s push the changes to the azure-prod remote repository.

When pushing the commit to the Azure Web App you will notice that the process takes a little longer. This is caused by the custom build process being executed directly after the commit has been pushed. If the custom deployment process worked as expected you should see in the output the different steps of the process.

Additionally your latest changes should be now released to your Azure Web App.
While this approach works, it has one downside: it is deploying your latest changes directly to production. Should the build process fail or should there be some other issues your web application would become unavailable. Luckily Azure Web Apps offer us a simple solution to this challenge.
Deploying Azure Web Apps using Deployment Slots
Azure Web Apps support the concept of Deployment Slots: separate instances of your web application with their own URL and resources but all part of your Azure Web App. With Deployment Slots you can deploy your web application, verify that it’s working as expected, and after you do, replace the current production version of your web application with the new one with a single mouse click.
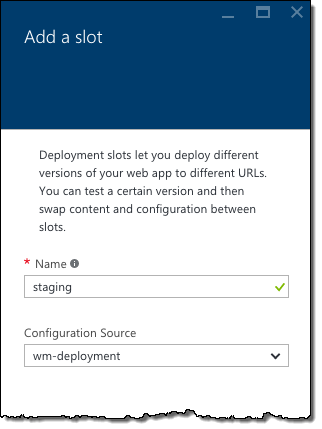
Deployment Slots are supported by Azure Web Apps hosted using the Standard plan and above. In order to add a Deployment Slot to your Azure Web App, open its Settings blade and from the Publishing group click the Deployment slots option.

Next, in the menu click the Add Slot button. Name the slot staging and in the Configuration Source dropdown choose to clone the settings from the main slot.
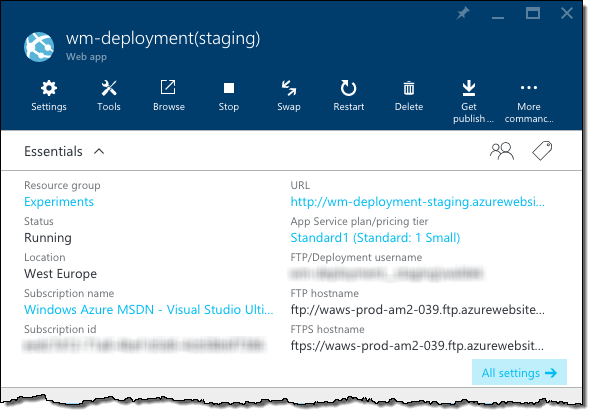
Once your Deployment Slot is created it will look like a whole new Azure Web App.
Similarly to configuring Continuous Deployment for the Azure Web App, we need to configure it for the Deployment Slot. This is done using the exact same steps as for the main web application.
Having configured Local Git Repository for your Deployment Slot, copy its Git url and add it as a remote repository to your cloned repo.
$ git remote add azure-staging <url>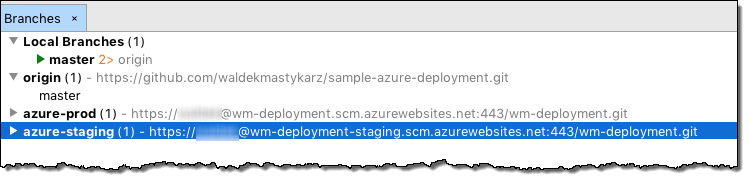
Next push your current release to the staging slot to verify that everything is working as expected.
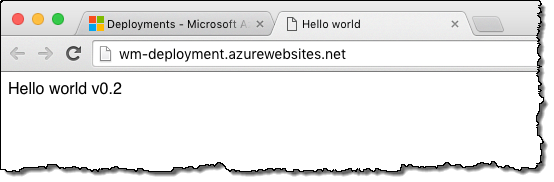
Currently you have the same version of your web application deployed to both production and staging. The whole idea of using Deployment Slots is to use them to test new releases before rolling them out to production. To see how this would be working in our setup, let’s change the index.html file again.
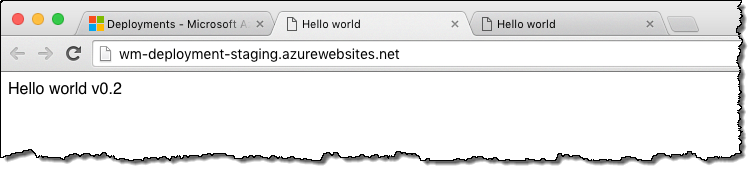
Let’s commit our changes but this time let’s push them to the staging repo. In the web browser we can now see v0.2 deployed to production but on our staging slot we can see the latest changes!
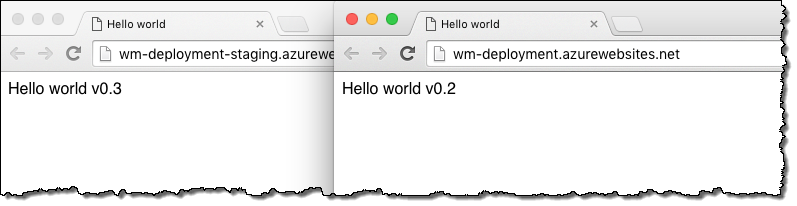
Having confirmed the latest changes let’s roll them out to production. Back in the Azure Management Portal the only thing you need to do is to click the Swap button on the blade of the Staging Deployment Slot.

If you take a look at the two deployment slots you will see that your production slot has the latest version of your web application and the previous version is available on the staging slot. From here you can either keep it as a failsafe in case some unexpected issues occur or update it to the latest version by once again pushing your latest commits to the azure-staging repository.
Summary
Azure Web Apps offer powerful capabilities for facilitating continuous deployment. One of them is the ability to create a local Git repository to which you can push changes and which are directly deployed to the Azure Web App. By leveraging the Kudu engine, available as a part of Azure Web Apps, you can reuse your existing Gulp or Grunt build tasks in the continuous deployment process on Azure Web Apps. Combined with Deployment Slots you can build powerful deployment solutions for your web applications and Office web add-ins.