5 ways to load templates in SharePoint Framework Client-Side Web Parts built using Angular
One of the key elements of each Angular application are templates used to display data. Here are 5 ways how you can define them in SharePoint Framework Client-Side Web Parts built using Angular.
Angular for the masses
Angular is one of the most popular JavaScript frameworks for building client-side applications. According to Google Trends analysis, for the last two years Angular has been continuously gaining popularity and closing the gap to jQuery.
Many developers like Angular for its modularity and flexibility which makes it suitable for variety of solutions: from small widgets to complete multi-route applications.
JavaScript frameworks and SharePoint - better together
The recently released SharePoint Framework encourages developers to leverage existing JavaScript frameworks and build rich SharePoint customizations. For years SharePoint developers were already building client-side SharePoint solutions. SharePoint Framework improves SharePoint’s client-side extensibility capabilities by formalizing and standardizing how JavaScript is used for building SharePoint customizations.
Building Web Parts on the SharePoint Framework with Angular
Depending on the solution that you are building, your Angular application might be composed of different elements. In most cases you would build a template - to present the information to the user, a data service - to retrieve the data and a controller to facilitate communication between the template and the data service. And while separating controllers and services is self-explanatory, many developers wonder what the best way is to work with templates when building Client-Side Web Parts on the SharePoint Framework using Angular.
Loading templates in SharePoint Framework Client-Side Web Parts built using Angular
When building Client-Side Web Parts on the SharePoint Framework using Angular, there a number of ways in which you can define the template for the Angular application. Each approach offers you a different degree of intergation and code maintainability and differs in complexity. Depending on your requirements and preference you can pick the one that meets your needs the best.
Sample project illustrating the different methods for loading templates in Client-Side Web Parts built using Angular is available on GitHub at https://github.com/waldekmastykarz/spfx-angular-templates.
Including Angular template in-line
One way to define the template of your Angular Client-Side Web Part is by assigning it in the Web Part as the contents of the Web Part’s DOM element:
public render(): void {
  if (this.renderedOnce === false) {
    this.domElement.innerHTML = `<div class="${styles.inlineTemplate}" ng-controller="HomeController as vm">
      <div class="${styles.container}">
        <div class="ms-Grid-row ms-bgColor-themeDark ms-fontColor-white ${styles.row}">
          <div class="ms-Grid-col ms-u-lg10 ms-u-xl8 ms-u-xlPush2 ms-u-lgPush1">
            <span class="ms-font-xl ms-fontColor-white">Welcome to SharePoint!</span>
            <p class="ms-font-l ms-fontColor-white">Customize SharePoint experiences using Web Parts.</p>
            <p class="ms-font-l ms-fontColor-white">{{vm.hello}}</p>
            <a href="https://github.com/SharePoint/sp-dev-docs/wiki" class="ms-Button ${styles.button}">
              <span class="ms-Button-label">Learn more</span>
            </a>
          </div>
        </div>
      </div>
    </div>`;
    const wp: InlineTemplateWebPart = this;

    angular.module('inlineTemplateApp', [])
      .controller('HomeController', function (): void {
        this.hello = wp.title;
      });
    angular.bootstrap(this.domElement, ['inlineTemplateApp']);
  }
}This is the easiest approach to define the template of your Angular application in a Client-Side Web Part. It doesn’t require any additional plumbing to load the template into your Web Part and initialize it with Angular. And because the HTML is specified inside the Web Part you can benefit of the unique CSS class names generated in the build process of the SharePoint Framework project.
If you’ve been building Angular applications in the past, you might dislike this approach for how it’s mixing HTML with code, doing the exact opposite of what Angular encourages us to do. For complex Web Parts the HTML template might quickly get too large. Even though you could use Angular components or directives to extract specific pieces, you might still end up with a fair piece of HTML in your Web Part’s code.
This approach is the easiest way of building SharePoint Framework Client-Side Web Parts with Angular. While it could be sufficient for the less-complex Web Parts, if your Web Part consists of dynamic or multiple views, one of the other approaches for loading templates might be a better choice.
Loading template contents using require
Another way to load the template of your Angular application into your Web Part is by defining it in a separate .html file and load its contents into the Web Part’s DOM element using the require function.
home-template.html
<div class="requireTemplate" ng-controller="HomeController as vm">
  <div class="container">
    <div class="ms-Grid-row ms-bgColor-themeDark ms-fontColor-white row">
      <div class="ms-Grid-col ms-u-lg10 ms-u-xl8 ms-u-xlPush2 ms-u-lgPush1">
        <span class="ms-font-xl ms-fontColor-white">Welcome to SharePoint!</span>
        <p class="ms-font-l ms-fontColor-white">Customize SharePoint experiences using Web Parts.</p>
        <p class="ms-font-l ms-fontColor-white">{{::vm.hello}}</p>
        <a href="https://github.com/SharePoint/sp-dev-docs/wiki" class="ms-Button button">
          <span class="ms-Button-label">Learn more</span>
        </a>
      </div>
    </div>
  </div>
</div>public render(): void {
if (this.renderedOnce === false) {
this.domElement.innerHTML = require('./home-template.html');
const wp: RequireTemplateWebPart = this;
angular.module('requireTemplateApp', [])
.controller('HomeController', function (): void {
this.hello = wp.title;
});
angular.bootstrap(this.domElement, ['requireTemplateApp']);
}
}This approach comes closer to what you might be used to when building Angular applications. The template is defined in its own HTML file and is separated from the application’s code. During the build proces the .html file with the template is automatically included in the Web Part’s bundle file which simplifies the deployment process and allows you to focus on building the solution rather than its plumbing. It has however one downside.
If you’ve worked with Angular in the past and look at the HTML template you won’t see anything out of the ordinary. But think again about how Web Parts are different from typical Angular applications. When building Angular applications you typically own the whole page and know upfront about every piece of the page. Web Parts on the other hand are added to the page by users. Your Web Part built using Angular might be the only Web Part on the page, but it might as well be one of many Web Parts added by users, some of them even not necessarily built using Angular. I bet you can imagine quite a few possible conflicts between the different Web Parts on the same page one of which are colliding CSS classes.
Unique CSS classes to the rescue
Typically, if two Web Parts on the same page define the same CSS class, the last CSS definition overwrites previous ones changing how the different Web Parts are rendered.
SharePoint Framework helps developers avoid such collisions by automatically adding a random suffix to each class name defined in the .scss file belonging to the Web Part. These unique class names are generated during the build process and to use them, developers have to use the references from the auto-generated TypeScript file corresponding to the .scss file.
Unfortunately, the auto-generated .ts file with the unique CSS class names can only be used from other .ts files and isn’t available in static .html files. No matter if you choose to use the TypeScript file or not, all classes defined in the .scss file contain the unique suffix, which makes it impossible for you to reference in your HTML template. To work around this issue you can define your CSS classes as global which will prevent the build process to add the unique suffixes to them during the build:
:global .requireTemplate {
  :global .container {
    max-width: 700px;
    margin: 0px auto;
    box-shadow: 0 2px 4px 0 rgba(0, 0, 0, 0.2), 0 25px 50px 0 rgba(0, 0, 0, 0.1);
  }

  :global .row {
    padding: 20px;
  }

  :global .listItem {
    max-width: 715px;
    margin: 5px auto 5px auto;
    box-shadow: 0 0 4px 0 rgba(0, 0, 0, 0.2), 0 25px 50px 0 rgba(0, 0, 0, 0.1);
  }

  :global .button {
    text-decoration: none;
  }
}With that however, we are back right where we started, having the risk of possible CSS class names conflicts.
Loading template contents with unique CSS classes using import
In the previous approach you’ve seen how you can separate the HTML template from the Web Part’s code, similarly to how you would do it in Angular. The downside was however the risk of getting CSS classes colissions with other Web Parts that might be on the page. Using a slightly different approach you could get access to the dynamically generated CSS classes in your template after all.
First of all you would define your HTML template in a separate TypeScript file:
import styles from './ImportTemplate.module.scss';

const template: string = `
<div class="${styles.importTemplate}" ng-controller="HomeController as vm">
  <div class="${styles.container}">
    <div class="ms-Grid-row ms-bgColor-themeDark ms-fontColor-white ${styles.row}">
      <div class="ms-Grid-col ms-u-lg10 ms-u-xl8 ms-u-xlPush2 ms-u-lgPush1">
        <span class="ms-font-xl ms-fontColor-white">Welcome to SharePoint!</span>
        <p class="ms-font-l ms-fontColor-white">Customize SharePoint experiences using Web Parts.</p>
        <p class="ms-font-l ms-fontColor-white">{{::vm.hello}}</p>
        <a href="https://github.com/SharePoint/sp-dev-docs/wiki" class="ms-Button ${styles.button}">
          <span class="ms-Button-label">Learn more</span>
        </a>
      </div>
    </div>
  </div>
</div>`;

export default template;As you can see, in the first line we’re importing the references to the dynamically generated CSS class names and use them throughout the template.
In the Web Part you would then assign the template to the Web Part’s DOM element:
import template from './home-template';

export default class ImportTemplateWebPart extends BaseClientSideWebPart<IImportTemplateWebPartProps> {

  public constructor(context: IWebPartContext) {
    super(context);
  }

  public render(): void {
    if (this.renderedOnce === false) {
      this.domElement.innerHTML = template;
      const wp: ImportTemplateWebPart = this;

      angular.module('importTemplateApp', [])
        .controller('HomeController', function (): void {
          this.hello = wp.title;
        });
      angular.bootstrap(this.domElement, ['importTemplateApp']);
    }
  }
}Comparing to the previous approach, this technique is less pure: even though the HTML template is separated from the rest of the Web Part’s code, it’s technically wrapped in code. Thanks to TypeScript’s string interpolation you can easily define the template as a multiline string and reference the dynamically generated CSS class names. Still the template ends up as a JavaScript file included in the Web Part bundle file generated in the build process.
Loading template contents with unique CSS classes using require
We’ve just seen how you can work around the limitation of the inability to reference the dynamically generated CSS classes in the application’s template. The price for that was wrapping the template HTML in code. But what if there was another way, one that would allow you to keep the template as pure HTML and reference the dynamically generated CSS classes?
Imagine, that you would define your template in a static .html template as follows:
<div class="{{::vm.styles.requireUniqueStyles}}" ng-controller="HomeController as vm">
  <div class="{{::vm.styles.container}}">
    <div class="ms-Grid-row ms-bgColor-themeDark ms-fontColor-white {{::vm.styles.row}}">
      <div class="ms-Grid-col ms-u-lg10 ms-u-xl8 ms-u-xlPush2 ms-u-lgPush1">
        <span class="ms-font-xl ms-fontColor-white">Welcome to SharePoint!</span>
        <p class="ms-font-l ms-fontColor-white">Customize SharePoint experiences using Web Parts.</p>
        <p class="ms-font-l ms-fontColor-white">{{::vm.hello}}</p>
        <a href="https://github.com/SharePoint/sp-dev-docs/wiki" class="ms-Button {{::vm.styles.button}}">
          <span class="ms-Button-label">Learn more</span>
        </a>
      </div>
    </div>
  </div>
</div>Notice, how CSS class names, that are defined in the Web Part, have been replaced by Angular one-way bindings.
In the Web Part you would then reference the template as follows:
public render(): void {
  if (this.renderedOnce === false) {
    this.domElement.innerHTML = require('./home-template.html');
    const wp: RequireUniqueStylesWebPart = this;

    angular.module('requireUniqueStylesApp', [])
      .controller('HomeController', function (): void {
        this.hello = wp.title;
        this.styles = styles;
      });
    angular.bootstrap(this.domElement, ['requireUniqueStylesApp']);
  }
}While this approach is almost the same like the other approach using require we discussed previously, it has one subtle, but very important, difference: it passes the names of all auto-generated CSS class names into Angular and binds them to the styles property in the controller. That way the names of the generated CSS classes become available in the view model and can be referenced in the template.
This approach is very similar to how the standard Web Part using Knockout scaffolded using the SharePoint Framework Yeoman generator works.
For simple and moderately-complex Web Parts this approach offers a nice balance of separation between the HTML and the code and the overhead required to load the template into the Web Part.
Loading template through Angular application
In all approaches discussed previously, we’ve been using a different variation to load a single template for the whole Web Part. What if you were building a more complex Web Part, one with complex or multiple views, routes or components and you wanted to use more of Angular’s own templating mechanism?
While it’s not impossible to have your SharePoint Framework Client-Side Web Part built using Angular load HTML templates through Angular, it doesn’t just work by itself. There are a few things that you have to take into account in order for it to work as intended.
To illustrate what you would need to do, in order to have your HTML templates loaded by Angular, let’s build an Angular application that would use a component with an external template:
public render(): void {
  if (this.renderedOnce === false) {
    this.domElement.innerHTML = '<helloworld></helloworld>';
    const wp: AngularTemplateWebPart = this;

    angular.module('inlineapp', [])
      .component('helloworld', {
        controller: function (): void {
          this.hello = wp.title;
          this.styles = styles;
        },
        controllerAs: 'vm',
        templateUrl: `./home-template.html`
      });
    angular.bootstrap(this.domElement, ['inlineapp']);
  }
}In this example we set the Web Part’s DOM element to our root Angular component, that uses an HTML template that should be loaded from a separate HTML file. The template itself is self-explanatory and, except for defining the controller, it looks the same as the one used in the previous approach:
<div class="{{::vm.styles.angularTemplate}}">
  <div class="{{::vm.styles.container}}">
    <div class="ms-Grid-row ms-bgColor-themeDark ms-fontColor-white {{::vm.styles.row}}">
      <div class="ms-Grid-col ms-u-lg10 ms-u-xl8 ms-u-xlPush2 ms-u-lgPush1">
        <span class="ms-font-xl ms-fontColor-white">Welcome to SharePoint!</span>
        <p class="ms-font-l ms-fontColor-white">Customize SharePoint experiences using Web Parts.</p>
        <p class="ms-font-l ms-fontColor-white">{{::vm.hello}}</p>
        <a href="https://github.com/SharePoint/sp-dev-docs/wiki" class="ms-Button {{::vm.styles.button}}">
          <span class="ms-Button-label">Learn more</span>
        </a>
      </div>
    </div>
  </div>
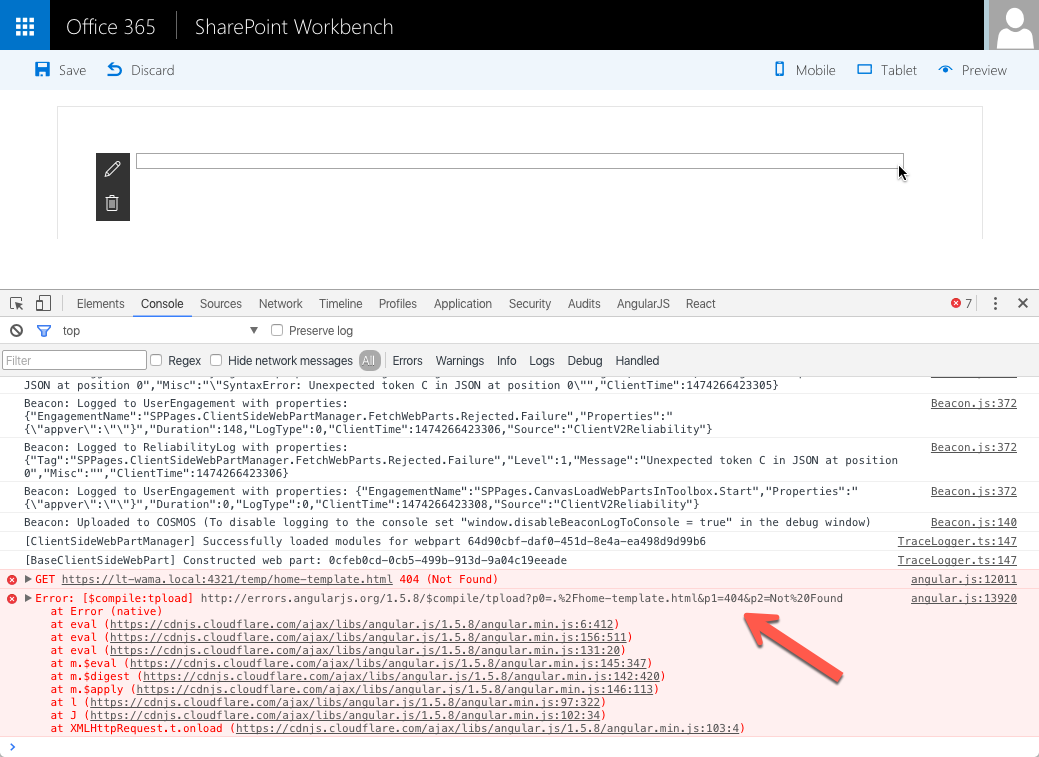
</div>If you would try to add this Web Part to the page, you would get an error saying that Angular couldn’t find the template file home-template.html.
There are two reasons for that.
Inconvenient loading Angular templates from a URL
First of all the URL that we used in the Angular component is invalid. In contrary to what you might think, the URL shouldn’t be relative to the Web Part file, which is in the same directory, but it should be relative to the page where the Web Part is placed. Given that SharePoint Framework Web Parts are hosted externally, for this URL to work, it should be an absolute URL pointing to the location where the template file is hosted. But it’s not that easy.
During development, your Web Part is hosted on your local machine and the HTML template is available at https://localhost:4321/dist/home-template.html. When you deploy the same Web Part to your production environment that URL becomes https://your.hostingserver.com/home-template.html. So somehow, when specifying the URL to your HTML template in your Angular application, you have to dynamically set it to the correct URL depending on the type of build for the template reference to work both during development and after deploying to production.
After you get the URL right, there is one more thing you have to take care of. If you take a look at the dist folder (or temp/deploy for a production build) you won’t find the .html template file in there. Even though the file is in the src folder, and it’s getting copied to the intermediate lib folder it’s not included in the build output folder.
It’s not surprising though, if you think about it: the file is only referenced by a URL defined in a string that isn’t recognized by Webpack and by default, all unreferenced assets are being skipped in the bundling process. Even if Webpack would pick it up, it’s still not what we want: we don’t want our HTML template to be included in the Web Part bundle. Instead we want it to be available as a separate file that we can load through Angular. Let’s solve this issues one by one.
Copying the .html template file to the output
Let’s start by defining a task that will copy the .html template file to the correct output folder based on the build type.
'use strict';
var error = require('@microsoft/gulp-core-build').error,
  log = require('@microsoft/gulp-core-build').log;

var CopyTemplates = {
  execute: (config) => {
    return new Promise((resolve, reject) => {
      var copyAssetsTask = undefined;
      for (var i = 0; i < config.uniqueTasks.length; i++) {
        if (config.uniqueTasks[i].name === 'copyAssets') {
          copyAssetsTask = config.uniqueTasks[i];
          break;
        }
      }

      if (!copyAssetsTask) {
        var errorMsg = 'Couldn\'t retrieve the CopyAssets task.';
        error(errorMsg);
        reject(errorMsg);
        return;
      }

      var destPath = config.production ? copyAssetsTask.taskConfig.deployCdnPath : config.distFolder;

      log(`Copying HTML template to ${destPath}...`);

      config.gulp.src('./src/webparts/angularTemplate/**/*.html')
        .pipe(config.gulp.dest(destPath));

      resolve();
    });
  },
  name: 'copytemplates'
};
exports.default = CopyTemplates;We start by getting the reference to the CopyAssets task (lines 8-14). We need it to get the path to the output folder for a production build. Next, based on the build type, we set the output folder either to the debug or production build output folder (line 23). Finally, we copy the .html template file to the output folder (lines 27-28). This task might seem an overkill for what it does, comparing to just calling:
config.gulp.src('./src/webparts/angularTemplate/**/*.html')
  .pipe(config.gulp.dest('./dist'));
By defining the task as a SharePoint Framework build task, rather than as a regular Gulp task, we can get the information about the build type and the path to the output folder from the build configuration instead of managing it ourselves. Additionally, we don’t need to manually setup our task as a dependency for all standard build tasks and can simply register it as a custom build task for the SharePoint Framework project to automatically work both for bundling and serving the project locally.
Setting the correct template URL
For Angular to load our HTML template from a URL, we have to specify an absolute URL, pointing to the local development machine for debug builds, or the hosting environment for production builds. Let’s start by including the base URL of our template in the Web Part:
export default class AngularTemplateWebPart extends BaseClientSideWebPart<IAngularTemplateWebPartProps> {
  get baseUrl(): string { return '$BASEURL$'; }

  public render(): void {
    if (this.renderedOnce === false) {
      this.domElement.innerHTML = '<helloworld></helloworld>';
      const wp: AngularTemplateWebPart = this;

      angular.module('angularTemplateApp', [])
        .component('helloworld', {
          controller: function (): void {
            this.hello = wp.title;
            this.styles = styles;
          },
          controllerAs: 'vm',
          templateUrl: `${this.baseUrl}home-template.html`
        });
      angular.bootstrap(this.domElement, ['angularTemplateApp']);
    }
  }
}We extend our Web Part with an additional property that returns the current base URL that we prepend to the URL of the HTML template. In the source code the base URL is set to the $BASEURL$ token, but using a custom build task we will replace it with the correct URL based on the build type.
Let’s define the following custom build task:
'use strict';
var fs = require('fs'),
    error = require('@microsoft/gulp-core-build').error,
    log = require('@microsoft/gulp-core-build').log;

var SetBaseUrl = {
  execute: (config) => {
    return new Promise((resolve, reject) => {
      var writeManifestsTask = undefined;
      for (var i = 0; i < config.uniqueTasks.length; i++) {
        if (config.uniqueTasks[i].name === 'writemanifests') {
          writeManifestsTask = config.uniqueTasks[i];
          break;
        }
      }

      if (!writeManifestsTask) {
        var errorMsg = 'Couldn\'t retrieve the WriteManifests task.';
        error(errorMsg);
        reject(errorMsg);
        return;
      }

      var url = config.production ? `${writeManifestsTask.taskConfig.cdnBasePath}` : `${writeManifestsTask.taskConfig.debugBasePath}dist/`;

      var webPartCodePath = `${config.libFolder}/webparts/angularTemplate/AngularTemplateWebPart.js`;
      var webPartCode = fs.readFileSync(webPartCodePath, 'utf-8');
      webPartCode = webPartCode.replace('$BASEURL$', url);
      fs.writeFile(webPartCodePath, webPartCode, (err) => {
        if (err) {
          error(err);
          reject(err);
          return;
        }

        log(`Base URL successfully set to ${url}`);
        resolve();
      });
    });
  },
  name: 'setbaseurl'
};
exports.default = SetBaseUrl;We start by getting the reference to the WriteManifests task (lines 9-15). From the configuration of this task we can get the URL of where the Web Part is deployed to for each build type. Based on the build type, that we retrieve from the build configuration, we set the correct URL (line 24) and use it to replace the $BASEURL$ token in the Web Part’s code (lines 26-38). Note how we’re replacing the token in the contents of the Web Part’s code file after it has been transpiled by TypeScript and copied to the intermediate lib folder (line 26). That way we’re not changing the original source code and we’re modifying the code just in time for it to be bundled.
Registering custom build tasks with the build pipeline
The last thing left to do, is to register our custom build tasks with the SharePoint Framework project build pipeline. We do that by calling the build.addBuildTasks function:
'use strict';

const gulp = require('gulp');
const build = require('@microsoft/sp-build-web');
const setBaseUrl = require('./setBaseUrlTask');
const copytemplates = require('./copyTemplatesTask');

build.addBuildTasks(setBaseUrl);
build.addBuildTasks(copytemplates);
build.initialize(gulp);At the time of writing this article there is a bug in the addBuildTasks function that, despite its specifications, doesn’t support passing multiple tasks as an array. Instead, you need to pass each task separately.
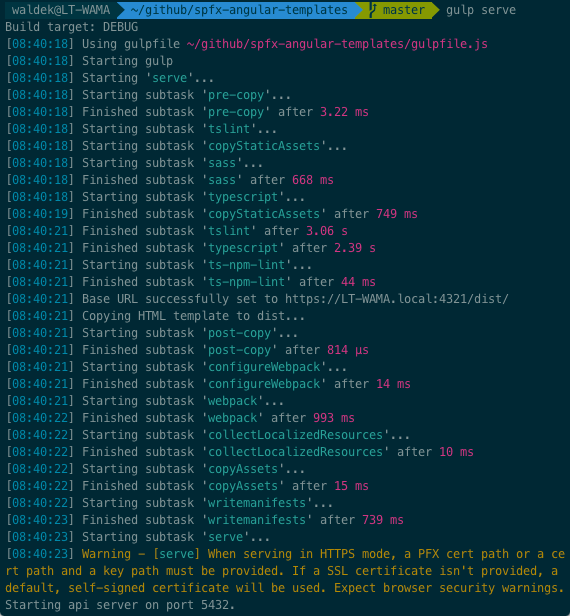
If you run gulp serve, you can confirm that our tasks are called as intended:
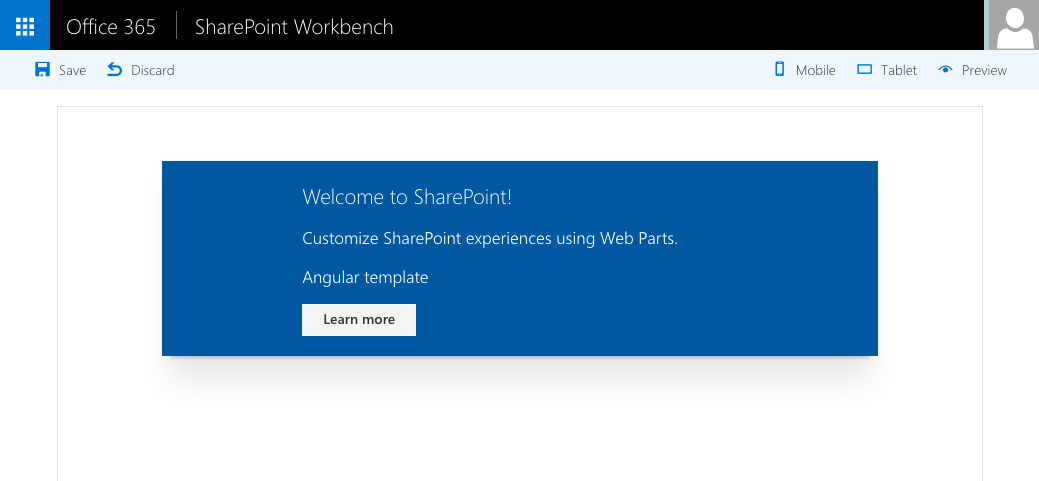
Adding the Web Part to the page proves that Angular can now correctly load the HTML template from the URL we specified:
Summary
One of the key elements of each Angular application are templates used to display data. When building SharePoint Framework Client-Side Web Parts using Angular there are a few ways in which we can define the application’s HTML template: from simple ones defining the template in Web Part’s code, to more complex ones leveraging Angular’s templating capabilities. Which approach you choose depends partly on your requirements and partly on your preferences.


