Multi-page forms with the SharePoint Scenario framework
Splitting long forms into multiple pages is a great idea from the usability point of view. The downside is that it requires you to create some sort of mechanism of persisting the data between the pages. The good news is that SharePoint 2010 provides you with a framework for that particular purpose. Find out how to create multi-page forms with the SharePoint Scenario framework.
WhatIs: SharePoint Scenario framework
SharePoint Scenario framework is one of many hidden gems of the SharePoint 2010 platform. Although it’s not very well document it’s an invaluable asset in your toolbox whenever you need to implement multi-page form.
The SharePoint Scenario framework allows you to create multi-page forms, where every page can be a separate page in SharePoint (no matter if it’s an Application Page, a Web Part page or a Publishing Page). This is a great news in terms of reusability of form sections. Because every page of your form can be a separate Web Part it allows you to build your forms as composite controls rather than giant all-in-one Web Parts. Reusing a particular step across multiple forms is very easy and doesn’t require you to do any changes in the code.
How it works?
A form built using the SharePoint Scenario framework consists of two pieces: the Scenario Definition and form pages. When composing the form it’s up to you to decide whether you want to implement every page as a separate control and a separate page. The great benefit of separating form pages is that you can compose many forms with minimal effort by reusing common form sections. The downside is that it adds some maintenance as you have to manage a number of Web Parts instead of one.
Important: Before you read further you should know that the SharePoint Scenario framework requires ASP.NET Session State to work. There are some interesting resources available about using Session State with SharePoint 2010 among which an article by Mark Arend and another one by Todd Carter. You should read both articles before deciding on whether the Scenario framework is suitable to use in your scenario or not.
Scenario Definition
At the foundation of a form built on the Scenario Framework is the Scenario Definition. A scenario definition is an XML file deployed to the {SharePointRoot}\TEMPLATE\Scenarios\{YourScenario} folder which describes the steps in your form (scenario).
The following code snippet shows a sample Scenario Definition for a multi-page form with two pages:
<?xml version="1.0" encoding="utf-8"?>
<Scenario xmlns="urn:Microsoft.SharePoint.Administration" Title="Visitor Info" Description="Gather Visitor Information">
  <Section Title="Section 1">
    <Page
      CurrentPageUrl="/visitor-info/Pages/default.aspx"
      NextPageUrl="/visitor-info/Pages/display.aspx"
      RedirectOnCancelUrl="/Pages/default.aspx" />
    <Page
      CurrentPageUrl="/visitor-info/Pages/display.aspx"
      RedirectOnCompletionUrl="/Pages/default.aspx"
      RedirectOnCancelUrl="/Pages/default.aspx"/>
  </Section>
</Scenario>
When creating a Scenario Definition for your form there a few rules that you have to obey. Although the exact XML definition (XSD) is stored in the Microsoft.SharePoint assembly as the Microsoft.SharePoint.Administration.ScenarioXmlConfigurationSchema.xsd resource, here are a few rules that should help you get started:
- Every Scenario must have a Title and a Description and at least one Section
- Every Section must have a Title and at least one Page
- Every Page must have the CurrentPageUrl and the RedirectOnCancelUrl attributes
- The CurrentPageUrl must be at least 7 chars long and must end with the .aspx extension
- The RedirectOnCancelUrl must not be empty
- The last step must have the RedirectOnCompletionUrl attribute which must not be empty
There are a few scenarios already defined in the {SharePointRoot}\TEMPLATE\Scenarios folder which you can explore to get a better idea how to create a Scenario Definition for your multi-page form.
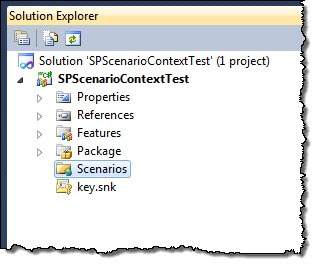
As mentioned before Scenario Definitions must be deployed to the {SharePointRoot}\TEMPLATE\Scenarios folder. From the project perspective you can do this by adding the Scenarios Mapped Folder to your SharePoint Project:
Important: It is important that you place your Scenario Definition XML file in a folder. The name of that folder will be used by the form as your Scenario ID.
Using the Scenario framework
The SharePoint Scenario framework ships with a very simple API located in the Microsoft.SharePoint assembly in the Microsoft.SharePoint.Administration.SPScenarioContext class.
Whenever you want to interact with the Scenario framework you have to first retrieve a reference to the Scenario Context. You can do this by calling the SPScenarioContext.GetContext(Page, CultureInfo) method:
SPScenarioContext context = SPScenarioContext.GetContext(Page, CultureInfo.CurrentUICulture);For this to work the URL of the current page must contain the scenarioId query string parameter with a valid ID pointing to one of the Scenario Definitions deployed to the {SharePointRoot}\TEMPLATE\Scenarios folder.
Once you have the reference to the Scenario context you can start working with the data. For this the API provides you with two methods: PersistDataToSessionState(string, object) and RetrieveDataFromSessionState(string). Whenever you want to persist some data to use them further in the form all you have to do is to make a call to the PersistDataToSessionState(string, object) method:
SPScenarioContext context = SPScenarioContext.GetContext(Page, CultureInfo.CurrentUICulture);
if (context != null) {
    context.PersistDataToSessionState("myKey", someObject);
}
The point to note here is that you can not only store object of primitive types such as int or string but any object that is serializable.
Once you have your object stored in the Scenario Context you will want to retrieve it at some point. For this all you have to do is to call the RetrieveDataFromSessionState(string) method:
SPScenarioContext context = SPScenarioContext.GetContext(Page, CultureInfo.CurrentUICulture);
if (context != null) {
    myObject = context.RetrieveDataFromSessionState("myKey") as MyType;
}
Finally when you are done working with the data you have to provide your user with the ability to move to the next or the previous step. Every page in the Scenario framework has a reference to a CompletionUrl and CancelUrl. It is up to you to make those URLs point to correct URLs to create the desired flow in your multi-page form.
You can move between steps by calling either the TransitionToTheNextPage(bool) or the TransitionToTheCancelPage(bool) method which will respectively redirect the visitor to the next or the cancel page. Using the boolean parameter you can automatically redirect user to the desired page. If you need to manipulate the URL before redirecting the user, you can pass the false value to the methods and modify the returned URL for example:
SPScenarioContext context = SPScenarioContext.GetContext(Page, CultureInfo.CurrentUICulture);
if (context != null) {
    SPUtility.Redirect(context.TransitionToNextPage(false) + "&myParam=myValue", SPRedirectFlags.Static, HttpContext.Current);
}
Now you know how everything works in theory let’s move things into practice.
SharePoint Scenario Framework hands-on
To illustrate the working of the SharePoint Scenario Framework and to see how all pieces fall together let’s create a simple multi-page form.
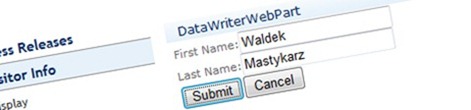
On the first page we will ask the visitor to enter his first and last name:

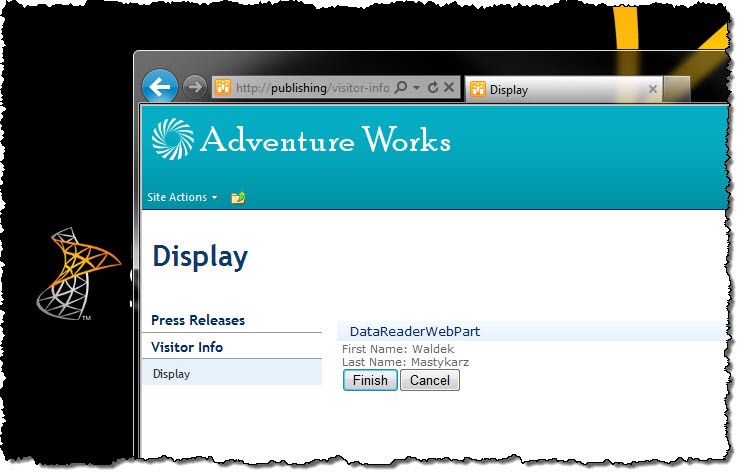
On the second and the last page we will display the data entered by the visitor:

We will create the multi-page form on a Publishing Page where every form page will be a separate Publishing Page.
Step 1: Creating the Scenario Definition
Let’s start off by creating a Scenario Definition for our multi-page form.
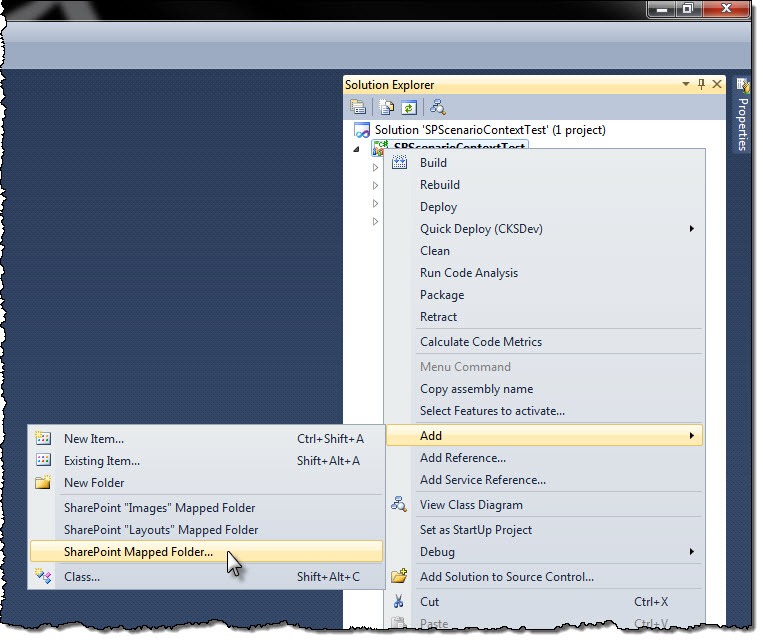
First let’s add the Scenarios Mapped Folder so that we can deploy our Scenario Definition using a SharePoint Package. For this we use the the Add > SharePoint Mapped Folder… SharePoint Project option:
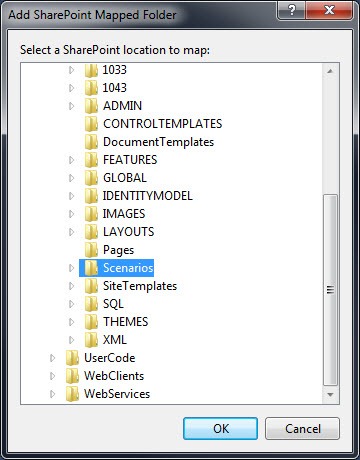
and we select the {SharePointRoot}\TEMPLATE\Scenarios folder:
After adding the Scenarios Mapped Folder we create a new folder called VisitorInfo and add in it a new file called VisitorInfo.xml with the following contents:
<?xml version="1.0" encoding="utf-8"?>
<Scenario xmlns="urn:Microsoft.SharePoint.Administration" Title="Visitor Info" Description="Gather Visitor Information">
  <Section Title="Section 1">
    <Page
      CurrentPageUrl="/visitor-info/Pages/default.aspx"
      NextPageUrl="/visitor-info/Pages/display.aspx"
      RedirectOnCancelUrl="/Pages/default.aspx" />
    <Page
      CurrentPageUrl="/visitor-info/Pages/display.aspx"
      RedirectOnCompletionUrl="/Pages/default.aspx"
      RedirectOnCancelUrl="/Pages/default.aspx"/>
  </Section>
</Scenario>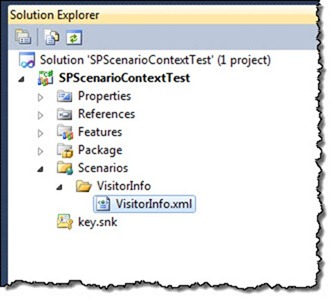
Step 2: Creating wrapper class for storing data
As mentioned before in our sample form we will ask the visitor to enter his first and last name which we will display later on. Although we could store all those values separately we can create a wrapper class for it.
In your SharePoint Project add a new class and call it VisitorInfo. The following code snippet shows the contents of the class:
using System;

namespace SPScenarioContextTest {
    [Serializable]
    public class VisitorInfo {
        public static readonly string VisitorInfoPropertyName = "VisitorInfo";

        public string FirstName { get; set; }
        public string LastName { get; set; }
    }
}
The VisitorInfoPropertName field contains the name of the key with which we will store the visitor information in the Scenario Context.
Step 3: Creating the data entry form page
Our sample form will contain two pages where the first page shows the data entry form and the second one displays the entered data. To separate the pages from each other and make it possible to reuse the pages across multiple forms we will create a separate Web Part for every form page. Let’s start by creating the first page that allows the visitor to enter his personal information.

Add to your SharePoint Project a new Web Part using the Web Part SPI Template. Call the Web Part DataWriterWebPart and paste the following contents:
using System;
using System.ComponentModel;
using System.Globalization;
using System.Web.UI;
using System.Web.UI.WebControls;
using System.Web.UI.WebControls.WebParts;
using Microsoft.SharePoint.Administration;

namespace SPScenarioContextTest.DataWriterWebPart {
    [ToolboxItemAttribute(false)]
    public class DataWriterWebPart : WebPart {
        TextBox FirstName;
        TextBox LastName;
        IButtonControl SubmitButton;
        IButtonControl CancelButton;

        protected override void CreateChildControls() {
            FirstName = new TextBox();
            Controls.Add(FirstName);

            LastName = new TextBox();
            Controls.Add(LastName);

            SubmitButton = new Button();
            SubmitButton.Text = "Submit";
            SubmitButton.Click += new EventHandler(SubmitButton_Click);
            Controls.Add((Button)SubmitButton);

            CancelButton = new Button();
            CancelButton.Text = "Cancel";
            CancelButton.Click += new EventHandler(CancelButton_Click);
            Controls.Add((Button)CancelButton);

            ChildControlsCreated = true;
        }

        void CancelButton_Click(object sender, EventArgs e) {
            SPScenarioContext context = SPScenarioContext.GetContext(Page, CultureInfo.CurrentUICulture);
            if (context != null) {
                context.TransitionToCancelPage(true);
            }
        }

        void SubmitButton_Click(object sender, EventArgs e) {
            SPScenarioContext context = SPScenarioContext.GetContext(Page, CultureInfo.CurrentUICulture);
            if (context != null) {
                context.PersistDataToSessionState(VisitorInfo.VisitorInfoPropertyName, new VisitorInfo {
                    FirstName = FirstName.Text,
                    LastName = LastName.Text
                });
                context.TransitionToNextPage(true);
            }
        }

        protected override void RenderContents(HtmlTextWriter writer) {
            new Label {
                AssociatedControlID = FirstName.ID,
                Text = "First Name:"
            }.RenderControl(writer);
            FirstName.RenderControl(writer);
            writer.Write("<br />");
            new Label {
                AssociatedControlID = LastName.ID,
                Text = "Last Name:"
            }.RenderControl(writer);
            LastName.RenderControl(writer);
            writer.Write("<br />");
            ((Button)SubmitButton).RenderControl(writer);
            ((Button)CancelButton).RenderControl(writer);
        }
    }
}
As you have seen our data entry control consists of two text boxes and two buttons. Those are defined in lines 12 – 15 and instantiated in the CreateChildControls method in lines 17 – 35. Both buttons are associated with event handlers (lines 26 and 31) which interact with the SharePoint Scenario framework.
After the visitor has entered his information and clicked the Save button, his data should be persisted and he should be redirected to the next page. To do this we first have to get a reference to the Scenario Context (line 45). Once we have it, we create an instance of the VisitorInfo class (lines 47 – 50) and store it in the Scenario Context (line 47). Finally we redirect the visitor to the next page of the form (line 51).
Should the visitor click the Cancel button then he should be redirected to the cancel page. We can do this be retrieving the Scenario context and redirecting the visitor to the Cancel page (line 40).
Step 4: Creating the data display form page
The last step is to create the data display form page which retrieves the previously entered data and displays it to the visitor.
Add another Web Part to your SharePoint Project using the Web Part SPI Template. Name the Web Part DataReaderWebPart and paste the following contents:
using System;
using System.ComponentModel;
using System.Globalization;
using System.Web.UI;
using System.Web.UI.WebControls;
using System.Web.UI.WebControls.WebParts;
using Microsoft.SharePoint.Administration;

namespace SPScenarioContextTest.DataReaderWebPart {
    [ToolboxItemAttribute(false)]
    public class DataReaderWebPart : WebPart {
        IButtonControl FinishButton;
        IButtonControl CancelButton;

        VisitorInfo visitorInfo;

        protected override void CreateChildControls() {
            FinishButton = new Button();
            FinishButton.Text = "Finish";
            FinishButton.Click += new EventHandler(FinishButton_Click);
            Controls.Add((Button)FinishButton);

            CancelButton = new Button();
            CancelButton.Text = "Cancel";
            CancelButton.Click += new EventHandler(CancelButton_Click);
            Controls.Add((Button)CancelButton);

            ChildControlsCreated = true;
        }

        void CancelButton_Click(object sender, EventArgs e) {
            SPScenarioContext context = SPScenarioContext.GetContext(Page, CultureInfo.CurrentUICulture);
            if (context != null) {
                context.TransitionToCancelPage(true);
            }
        }

        void FinishButton_Click(object sender, EventArgs e) {
            SPScenarioContext context = SPScenarioContext.GetContext(Page, CultureInfo.CurrentUICulture);
            if (context != null) {
                context.TransitionToNextPage(true);
            }
        }

        protected override void OnPreRender(EventArgs e) {
            base.OnPreRender(e);

            SPScenarioContext context = SPScenarioContext.GetContext(Page, CultureInfo.CurrentUICulture);
            if (context != null) {
                visitorInfo = context.RetrieveDataFromSessionState(VisitorInfo.VisitorInfoPropertyName) as VisitorInfo;
            }
        }

        protected override void RenderContents(HtmlTextWriter writer) {
            if (visitorInfo != null) {
                writer.Write("First Name: {0}<br/>", visitorInfo.FirstName);
                writer.Write("Last Name: {0}<br/>", visitorInfo.LastName);
                ((Button)FinishButton).RenderControl(writer);
                ((Button)CancelButton).RenderControl(writer);
            }
        }
    }
}
Just like the data entry control the data display control has two buttons (lines 12 and 13) which have to be instantiated (lines 17 – 29) and linked to event handlers (lines 20 and 25).
While loading the Web Part we try to retrieve previously stored data (lines 45 – 52). We first retrieve the Scenario Context (line 48) and try to retrieve the data (line 50). Later during the render stage (lines 54 – 61) we check if the data has been retrieved (line 55) and render it if possible (lines 56 and 57).
And that’s all! All you have to do now is to build & deploy your project, create a new subsite called Visitor Info (URL: /visitor-info), create Publishing Pages as specified in the Scenario Definition and add the Web Parts.
Important: While testing the form don’t forget to append ?scenarioId=visitorInfo to the URL. Otherwise the form won’t work correctly.
Summary
Common requirement when working with large forms is to split them into multiple steps. SharePoint 2010 provides the SharePoint Scenario framework which simplifies creating and working with multi-page forms. Using the SharePoint Scenario framework you can focus on building forms instead of implementing the plumbing for persisting data between pages. Additional benefit of using the Scenario framework is that you can separate form pages and turn them into building blocks that you can reuse across multiple forms.