
Optimize Azure Search for blog
Azure Search is a great way to allow your visitors to search in your content. And if you have a blog, these two tweaks will help you show better results.
Own the search experience
There is more content than we could ever consume in our lifetimes on the Internet. So unless you can serve the right content, your visitors will leave.
You could divide your audience into two groups. First, there are people who don’t know about your blog. Most likely they will use an internet search engine such as Google or Bing and if your blog contains relevant content, they will come to it.
Then, there are people who already are on your blog, your visitors. They could come right to the page they need or they could come to your landing page. Either way, if they don’t find what they’re looking for quickly, they will leave. If your blog doesn’t support searching in your content, you could consider using Google or Bing site search to help them find what they’re looking for. But you can do better than that.
Rather than blindly trusting Internet search engines, you can implement your own search experience using Azure Search. It’s very easy to configure, free to use, and with a few additional tweaks, you can make it return exactly what your visitors are looking for.
Create Azure Search index for a blog
After you created an Azure Search instance in your Azure Subscription and added an index to it, the next step is to define the fields that should be included in the index. No matter how you host your blog, most likely each article has the following properties:
- title
- excerpt
- author
- date
- content
- preview image
- tags/category
To help your visitors find relevant content, you will benefit the most of including the title, content, date and tags/category in the search index. Author might be relevant if you share a blog with others. Excerpt often contains content similar to what’s in the main body so there is no need to index it.
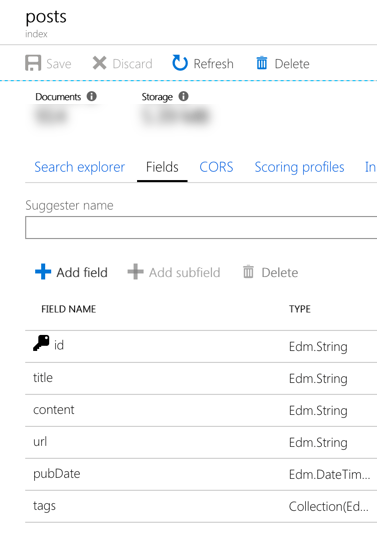
If you were to fill your index with your blog posts right now, it would already return results. But the results would be far from perfect. Let’s improve them.
Optimization #1: define field weights
For every index in Azure Search, you can define one or more scoring profiles. Using a scoring profile you tell Azure Search what’s important so that it can return the most relevant results for the given search query.
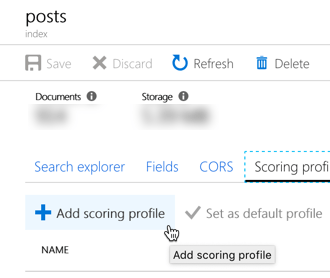
After creating a scoring profile, start with defining the weights for the given fields. For example for a blog, you could use:
- title: 5
- tags: 3
- content: 1
Such configuration means, that whenever there is a match in the title, it’s 5 times more important than a match in the content. The 5 and 3 values for title and tags are arbitrary and based on what’s working for my content. You can tweak them to what works best for your blog.
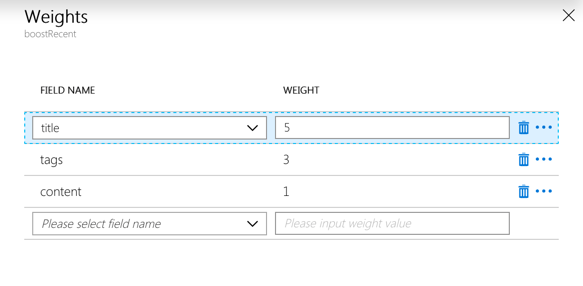
This change by itself should already help you show better results to your users. But we can do even better.
Optimization 2: configure functions
While using Azure Search on my blog, I would often see older results first. Apparently, my older articles were a better match from the keyword perspective. But I knew I had more recent articles on my blog that would be more relevant.
While defining field weights can help you optimize your results for keywords, you can use functions to influence the content ranking through other properties of your content such as its date or rating.
For my blog, I defined the following function:
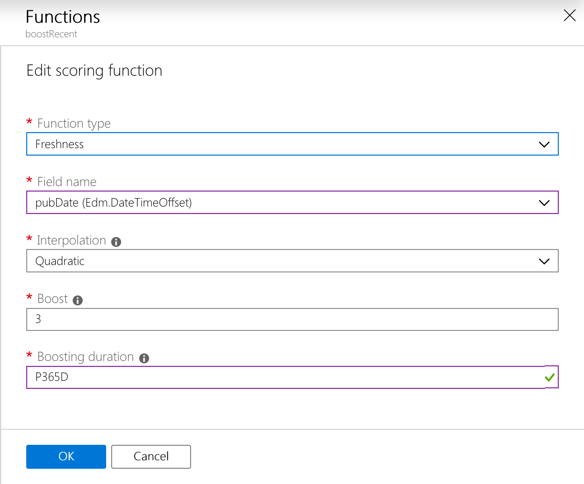
This function increases the relevance of content from the last year. The more recent the content, the more it will be boosted with a maximum of 3.
The more you know about your content, the further you could optimize its ranking. You could, for example, add functions for scoring based on the number of visits, comments or ranking.
There is one more thing that you can do.
Extra: show what’s matched
To help your visitors to understand how the displayed results match their search query, you can highlight how each result matches the query keywords. Azure Search already does that for you returning the @search.highlights property as a part of each result.
The
@search.highlightsproperty is not visible when testing queries using the Search explorer in the Azure portal, but it is returned when executing search queries against the Azure Search API.
The @search.highlights property contains a collection of properties that matched the query. For each property, it contains an array of fragments that matched the keywords from the query.
{
  "@odata.context":"https://mastykarzblog.search.windows.net/indexes('posts')/$metadata#docs(*)",
  "value":[
    {
      "@search.score":8.6638565,
      "@search.highlights":{
        "content":[
          "There is a <em>Flow</em> for that \n Microsoft <em>Flow</em> is the Office macros for Office 365.",
          "Start with creating a <em>Flow</em> that will run daily.",
          "From now on, all you have to do is to delete unwanted messages and the <em>Flow</em> that you have just built will clean up your deleted items daily for you, without you having to think about it ever again."
        ],
        "title":[
          "Remove deleted e-mails with <em>Flow</em>"
        ]
      },
      "title":"Remove deleted e-mails with Flow",
      "content":"    With this simple trick, ...",
      "url":"https://blog.mastykarz.nl/remove-deleted-emails-flow/",
      "pubDate":"2019-08-22T16:55:59Z"
    },
    // ...
  ]
}
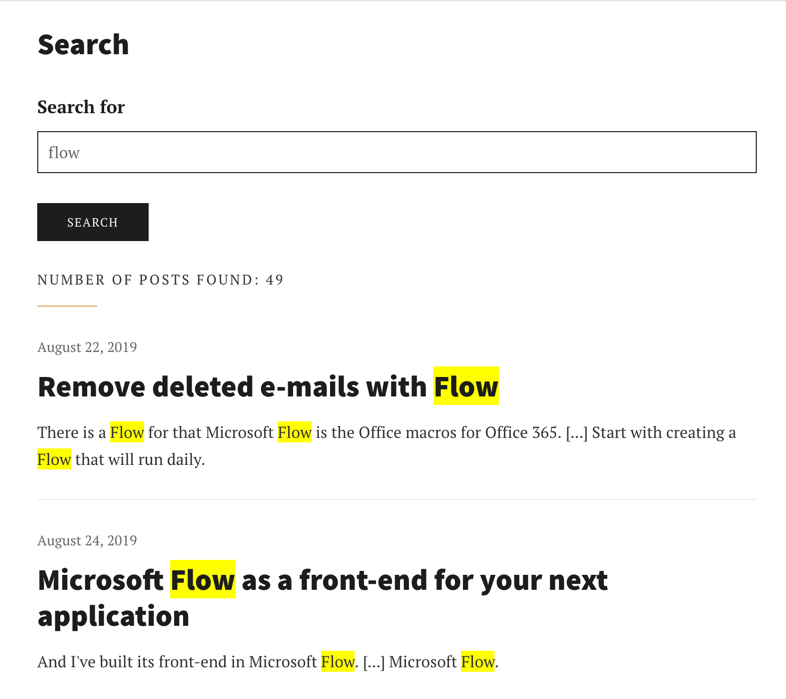
As you can see, three fragments match the keyword flow in the content and one fragment in the title. The keywords are already marked with <em></em> which you can style using CSS, for example like:
Summary
That’s it! With just two simple adjustments you have significantly improved the relevance of the search results on your blog. With the extra step, you made it clear which keywords have been found in your articles. If you want to easily create the search index that I have described earlier, you can use a Node.js script that I have built, which includes fields, weights, and ranking functions.