Preparing your public-facing website for multichannel publishing (SPC14)
SharePoint 2013 offers new capabilities for publishing web content to multiple channels. While configuring it on your website isn’t that complex, planning for it upfront will save you time and rework afterwards. This article describes steps and considerations that you need to take to ensure that you will be able to publish your web content to multiple channels.
This article accompanies my presentation from the SharePoint Conference 2014. The presentation video is available on Channel9 at http://channel9.msdn.com/Events/SharePoint-Conference/2014/SPC388.
Building public-facing websites with SharePoint
When the ability to build public-facing websites was introduced in SharePoint 2007, the only way to build them was to use a page-centric approach where the content would be tied to a particular page created in a specific location in your website. Reusing the content in other locations in your website, or publishing it to another website or app, was challenging to say the least, and often required custom development effort. The release of SharePoint 2010 didn’t change much in this regard and the same publishing approach along with its challenges applied.
SharePoint 2013 offers new capabilities for reusing web content and publishing it to multiple channels. Although the old page-centric model is still available, and is a valid choice for some scenarios, the new content publishing model offers new opportunities for centralizing web content management in your organization and reusing it across the different channels.
Cross-site publishing with SharePoint 2013
SharePoint 2013 introduces a new cross-site content publishing model. In this publishing model content is stored in one or more centralized content repositories, referred to as catalogs, and is made available for publishing through SharePoint 2013 Search. You can have as many catalogs as you need in your environment and each catalog can be published to as many channels as necessary. With the new cross-site publishing model SharePoint 2013 not only allows you to centralize your content management process but it also makes it possible to truly integrate the published content with your website providing your visitors with a seamless experience.
Whereas the traditional page-centric content publishing model was all about creating and managing complete web pages, the new cross-site publishing model shifts to content item management instead. If you are used to working with previous versions of SharePoint or other content management systems that use a similar content publishing model, it takes a while to understand the difference: after all when authoring catalog content there is no notion of a page (your content might for example be published as a part of a mobile app) and previewing your web pages becomes slightly more challenging. In reality however, once you get used to the new publishing model, even though it offers less flexibility on the page level, it allows you to be more efficient in the long run and ensure that all content is published consistently across all of your publishing channels.
Configuring cross-site publishing in SharePoint 2013
Enabling cross-site publishing in SharePoint 2013 isn’t complex and takes only a few steps. Probably the most important part is including cross-site publishing as a part of your design process and planning for a separate authoring website, where all of the content is maintained, and one or more publishing sites where the content will be made available to your target audience.
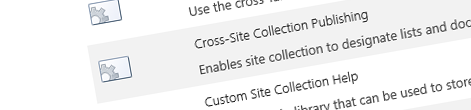
Using the Pages Library as a catalog
Every SharePoint List can be published as a catalog in cross-site publishing scenarios. Personally however, I prefer to use the Pages Library provided with Publishing Sites, as it offers a number of benefits above regular Lists.
When using the Pages Library as a catalog, each content item will be represented by a Publishing Page. As you know, each Publishing Page is tied to a Page Layout which offers great opportunity for optimizing the editing surface. Whereas customizing a List Form for a regular List is rather inconvenient, you can really easily create a new Page Layout for your catalog pages and use them to optimize the editing experience for your content managers.
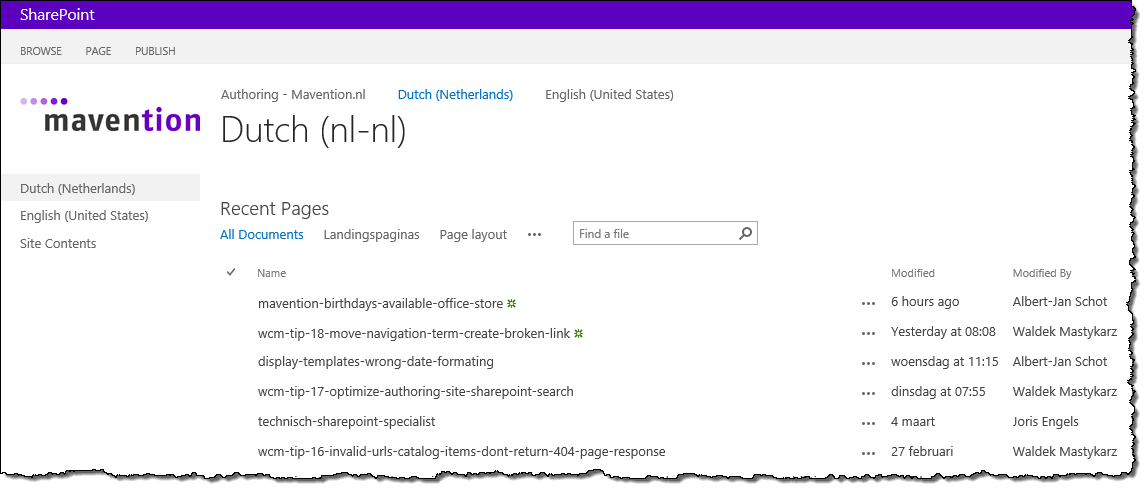
Using the Pages Library as a catalog on mavention.com
When building mavention.com we have used exactly the same approach to solve a number of content publishing-related challenges. Just to give you an idea of what can be achieved, following is an overview of the improvements we have implemented on mavention.com.
Following is the screenshot of one of the Page Layouts that we used with the content catalog on mavention.com:
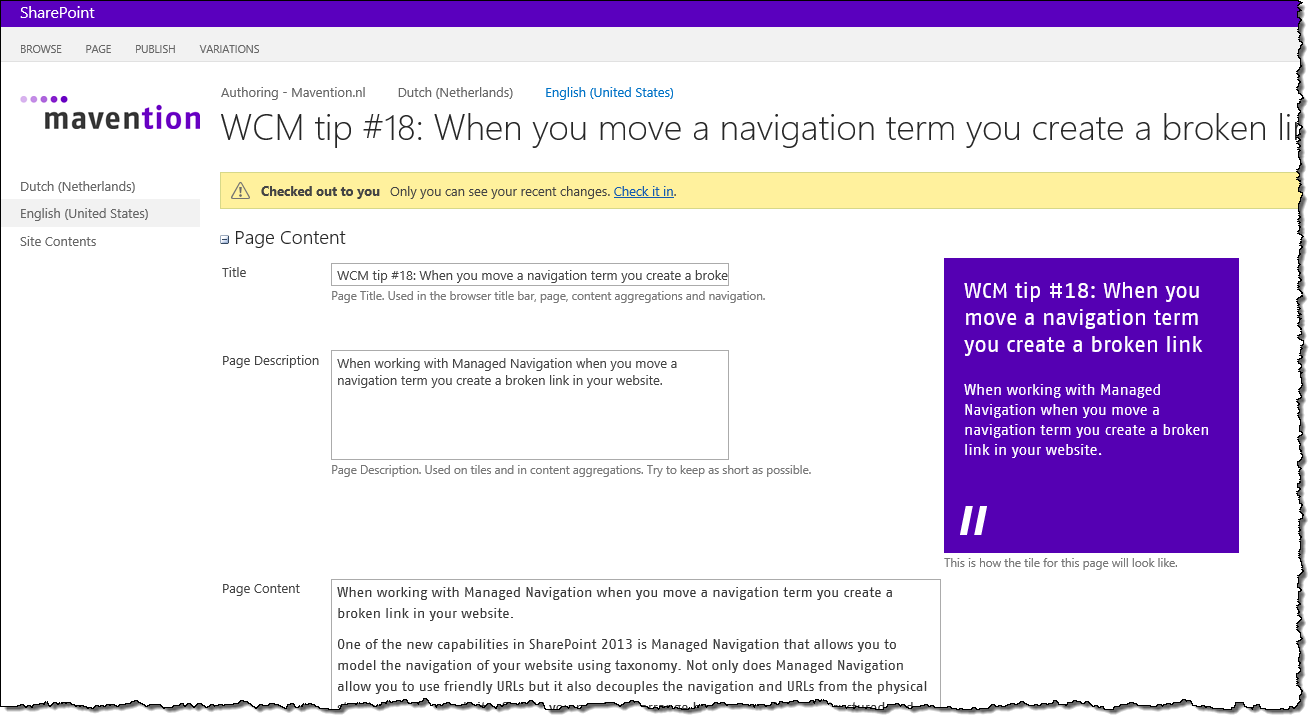
Avoiding UI clutter with collapsible sections
To simplify the editing process we started with grouping different fields into sections. By making the sections collapsible content managers can choose which sections they want to work with. Collapsing unused sections helps them focus on their task and avoid UI clutter.
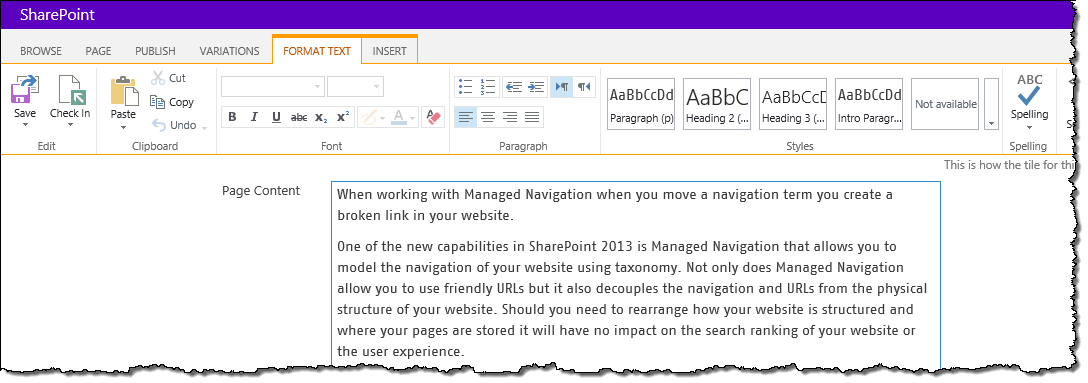
Previewing tiles before publishing a content item
One of the elements of the new user experience for mavention.com are tiles.
One of the consequences of using tiles is that they have limited screen estate. Depending on how long the title of the particular item is, the room for the description varies. Shortly after publishing mavention.com we found ourselves blindly publishing content hoping that it would be properly displayed. Often we had to go back, fix the content and republish it. To simplify this process we decided to add a preview capability to our Page Layouts. Whenever we change anything about the title or the description of the particular item, the preview tile will refresh showing how the content fits into the available space.

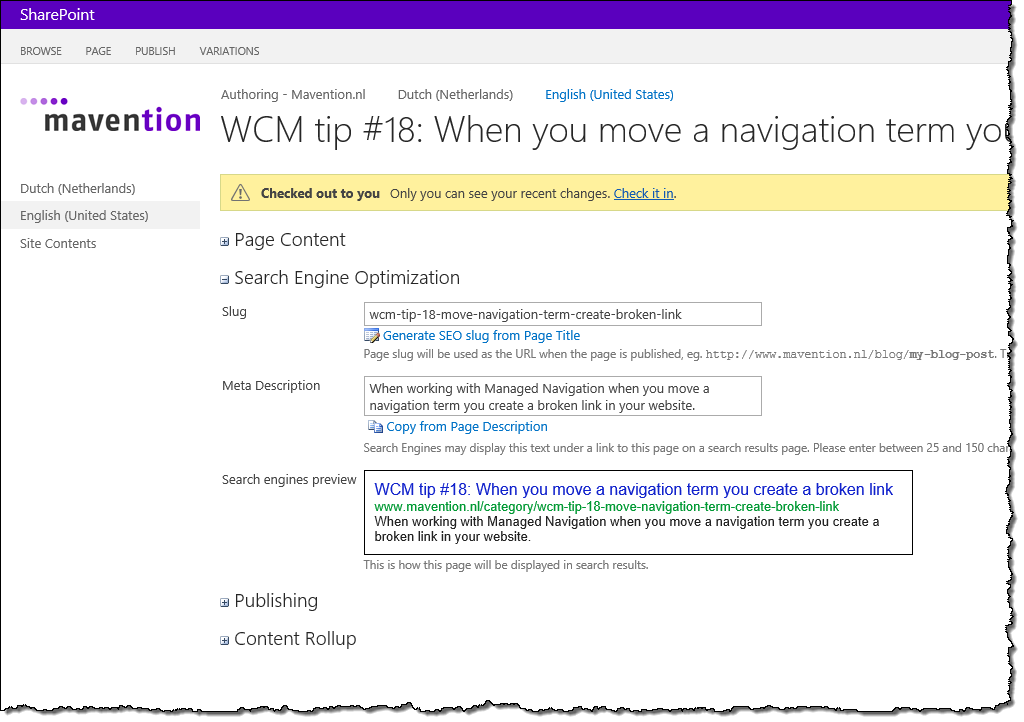
Generating SEO-optimized slugs
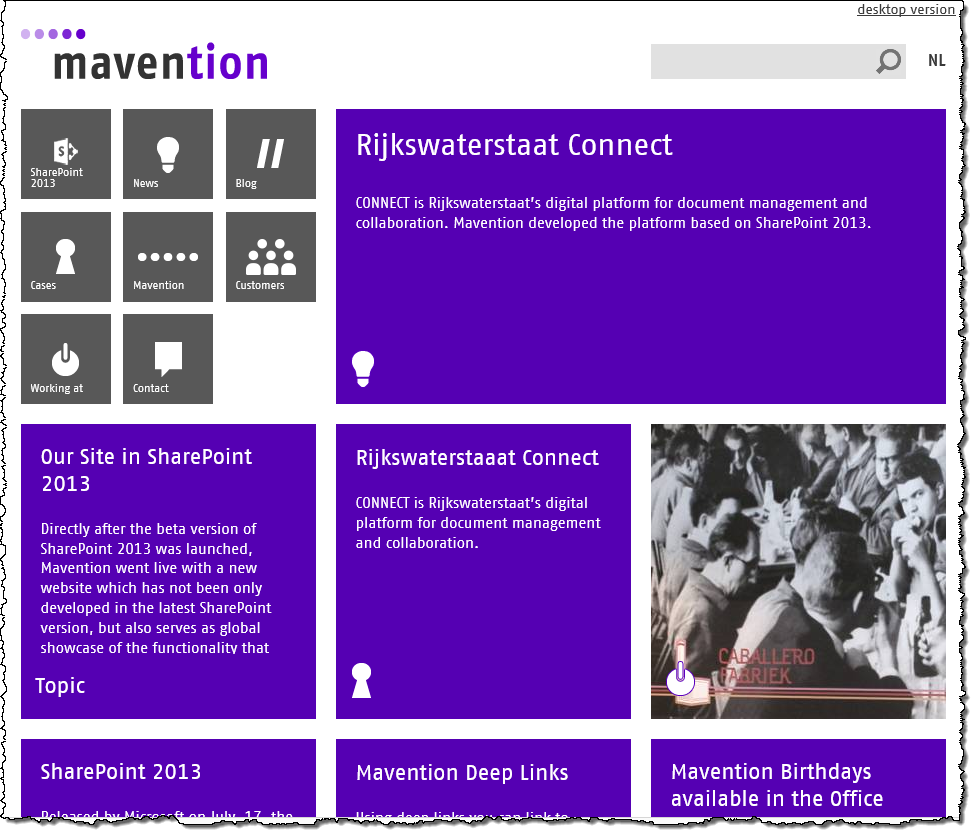
The main publishing channel for our web content is the web and therefore we want to ensure that all of our content is optimized for Internet search engines. One part of this optimization process is generating proper URLs, often referred to as slugs, for our content items. The URLs that we use don’t contain spaces, special characters or noise words. To simplify the process of crafting those URLs we added a slug generator to our Page Layouts that automatically generates a slug based on the item’s title.
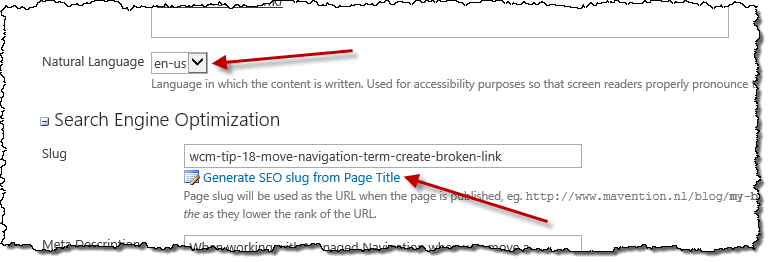
The clever thing about it is that the slug generator that we use is language-aware and so it detects the noise words based on the natural language selected for the particular content item.
SEO preview
Another part of the SEO optimization process is crafting item description for use by Internet search engines. Those descriptions are often limited in length and so it is good to keep that length in mind when crafting the description text. To simplify the process of writing the search description text we included a search engine result preview in our Page Layouts.
Even though this is merely a preview and it doesn’t guarantee how the particular item will look like on search results pages, it gives a pretty good impression of it and is found helpful by content managers.
As you have seen, those are pretty useful customizations of the content editing surface that are easily to be done in a Page Layout but rather hard to get in a List Form. The benefits of using the Pages Library with Page Layouts don’t end here however.
Previewing content before publishing
When using cross-site publishing content is indexed only after it has been published. Unless you have implemented some mechanism to delay the publication of content on your public website, publishing a content item will make it visible on all your publishing channels for everyone to see. The fact that the publishing process is driven by SharePoint 2013 Search, and that it might take a moment for the content to become visible on your website for you and everyone else to preview makes the content management process challenging. As a result the ability to preview the content in one or more publishing channels before publishing it becomes invaluable.
One of the new capabilities that SharePoint 2013 offers for building public-facing websites are Device Channels. With Device Channels you can optimize how your content is rendered on different devices. What you can also do however, from the cross-site publishing perspective, is to use Device Channels to provide content managers with a preview capability for the unpublished content. By building different Master Pages that correspond to the different publishing channels that you have, and associating them with different Device Channels, content managers will be able to preview how the content will look like on the particular channel before even publishing it!
On mavention.com we used this mechanism with an unbranded authoring site:

Using the Device Channels drop-down we can preview how the particular page will look like on our website before publishing the page:
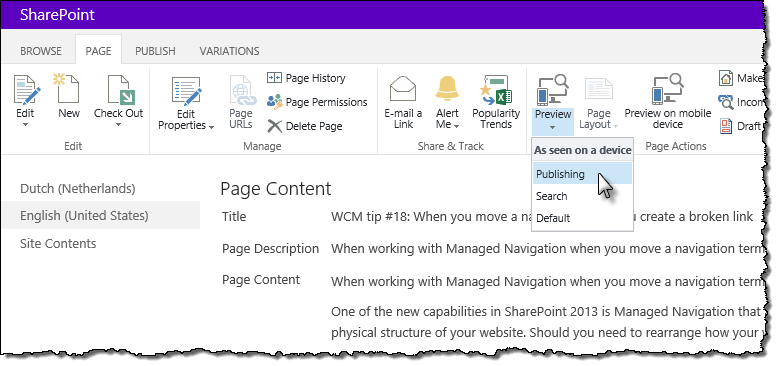
By selecting the preview Device Channel we can see how the page will look like once available on our website:

Notice how some pieces of the user interface, such as the menu and tiles, are replaced by placeholders. Because some of the information on our pages is dynamic, and depends on the contents of the particular item, we cannot include it in the preview. Instead we render static placeholders that give the impression of how the content of the particular item will be laid out on the page once published what allows content managers to verify that everything will work as expected.
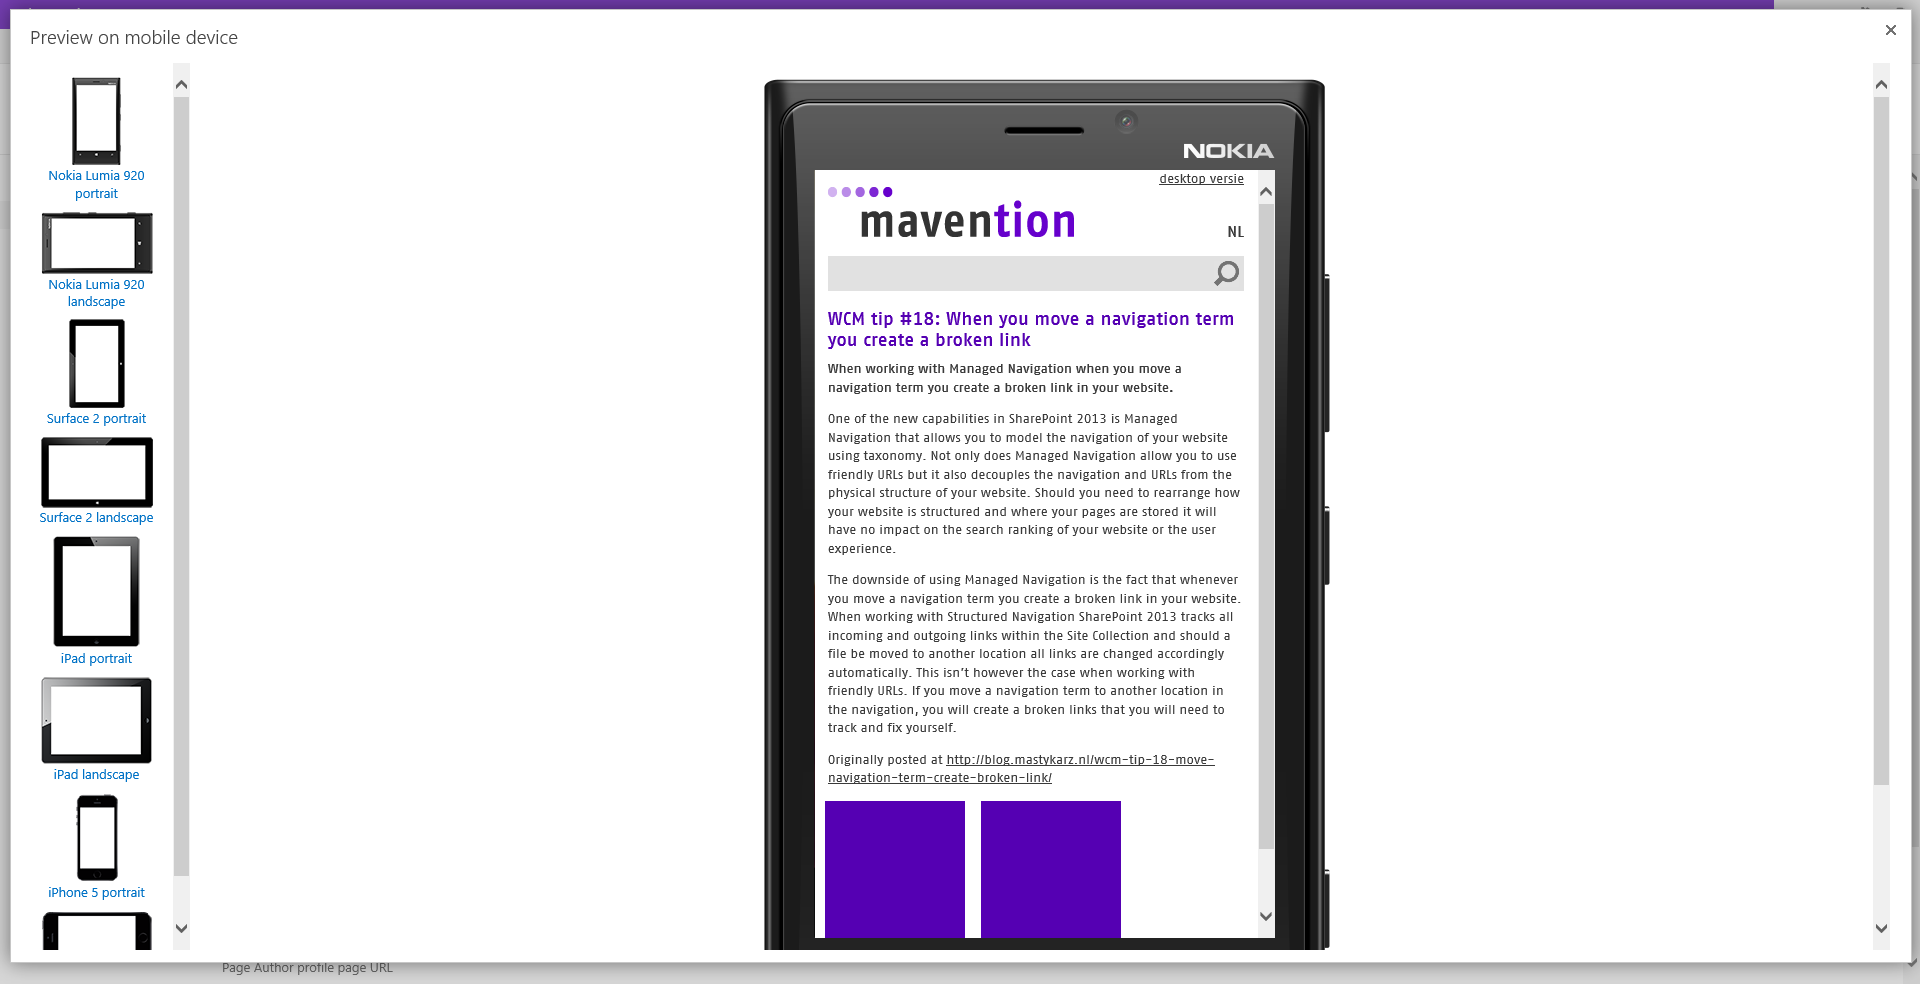
Previewing content on mobile devices
With the continuously growing market share of mobile devices on the web, content managers often want to ensure that the particular content item will work correctly on mobile devices when published. When using the Pages Library as your catalog you can provide them with such verification capability using the free Mavention Mobile Preview app for SharePoint available in the Office Store.
Whenever you are editing a Publishing Page, you can click the Preview on mobile device button from the Ribbon to see how your page will be displayed on a number of different mobile devices.
Configuring Rich Text Editor for multichannel publishing
One of the challenges when publishing the same content to multiple channels is to ensure that it will be displayed consistently with the user experience of the particular channel. For this to work as expected the content shouldn’t use any in-line styles and should use semantic style references instead. Each publishing channel can then decide how the particular semantic markup reference should be rendered.
Although not using in-line styles cannot be enforced with technology using the standard SharePoint 2013 functionality, it can be discouraged by disabling the different formatting options in the Rich Text Editor. Following is the screenshot of the Rich Text Editor for the blog post Page Layout on mavention.com.
Note how we have disabled the different text-formatting options that would produce in-line styles and how we replaced the standard formatting styles with the ones that we use in our user experience.
Now that you know what the benefits are of using the Pages Library, over a regular List, as a catalog let’s take a look at how you can publish a standard Pages Library as a catalog.
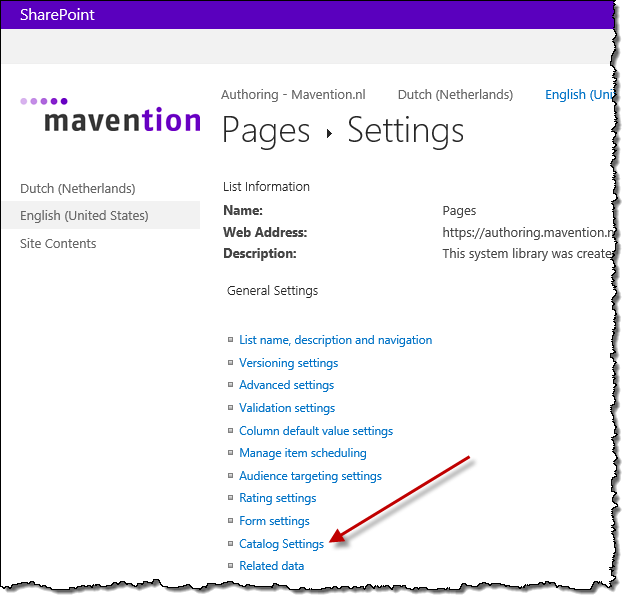
Publishing a Pages Library as a content catalog
Promoting a Pages Library to a content catalog doesn’t differ from promoting any other List to a catalog. Assuming that you have enabled the Cross-Site Collection Publishing Site Collection Feature, all you need to do is to go to the settings of your Pages Library and from the General Settings group click the Catalog Settings link.
When publishing a catalog for a public-facing website you should enable the Anonymous Access for the catalog content to become available on your website. Next you need to choose which columns will construct the item’s URL and which column defines the content hierarchy for your catalog.

No matter if you are using a Pages Library or a regular List as a catalog all of those fields should be a part of the Content Type(s) used with your catalog content. If you are publishing your content on the Internet, you should also consider using a separate field for the item’s slug which will allow you to optimize your content for Internet search engines.
Once your catalog is crawled its contents will become available for you to publish on one or more websites.
Publishing content catalog on a website
When building a website using the cross-site publishing model, there is an authoring site, where the content catalogs are located, and there is the publishing site on which the content from catalogs is published for everyone to see. Although you can have multiple catalogs in your environment which are published on multiple websites, it’s important to distinguish between the different types of websites and their corresponding roles.
In general, in cross-site publishing scenarios all of the content is stored in one or more catalogs. Publishing sites contain little to no content of their own and only publish the content from content catalogs. Such configuration simplifies maintaining web content and allows to benefit from the centralized content management process.
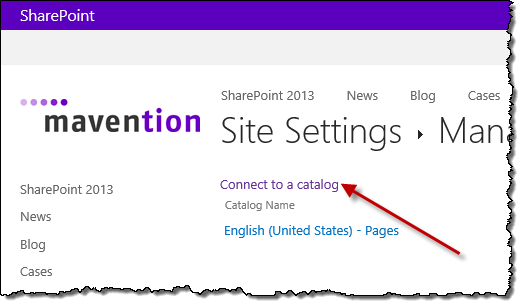
In order to publish content from a catalog on a website you need to connect to that catalog. This can be done by navigating on the website where you want to publish the content to Site Settings and from the Site Administration group clicking the Manage catalog connections link.
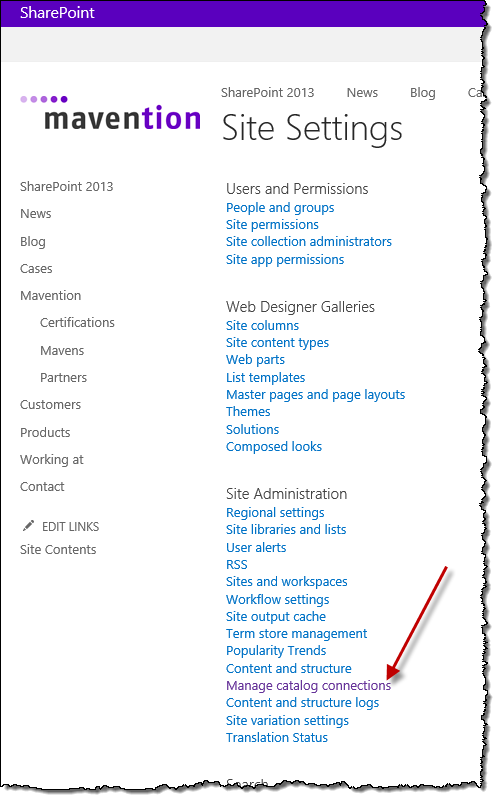
On the Manage catalog connections page SharePoint will provide you with a list of all catalogs that are already connected to your website. Initially this list will be empty and each catalog to which you connect will be added to this list. To connect to a catalog click the Connect to a catalog link.
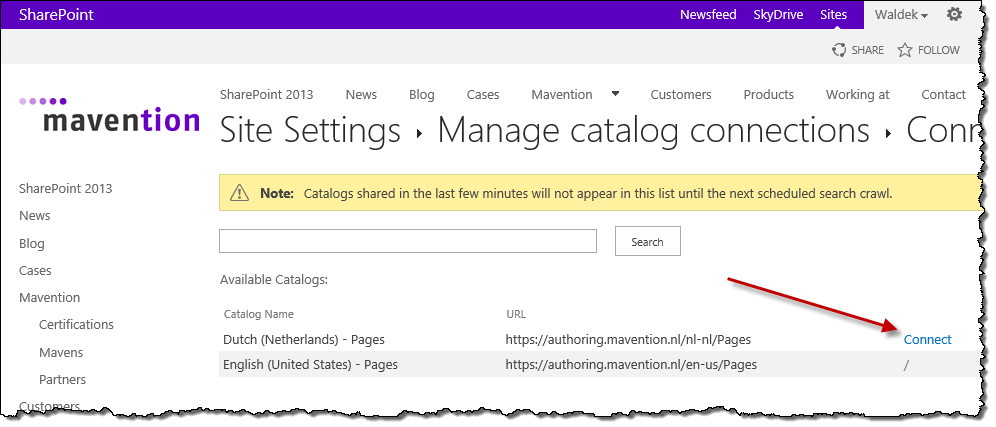
On the Connect to a catalog page SharePoint will display a list of all catalogs available in your environment. You can connect to a catalog by clicking the Connect link corresponding to the particular catalog.
When connecting to a catalog there are a number of options that you can choose from which determine how the content should be published. You can for example decide whether you want to point to the original content or integrate the content with the publishing site. Although the exact configuration of a catalog connection will vary per scenario, it’s essential to understand that how you configure the catalog connection will impact how your visitors and your website’s companion apps will interact with the published content.
Once the catalog connection configuration is completed the content from catalog will be published on your website. It will however not yet become available for companion apps that you might have for your website.
Publishing catalog content to companion apps
Although you could publish the content from the catalog directly to your app it might be a better idea to put your publishing site in between and use it instead as the content source for your app. This will for example make it possible for the users of your app to share content with other users. No matter whether the person who receives the shared item will be on a desktop computer or will be using the app they will be able to open the content item shared with them, rather than getting the internal link to where the particular catalog item is stored.
In cross-site publishing scenarios you will be very likely using the SharePoint 2013 Search REST API to publish the contents of your website to the companion app. In order to use any of the standard REST APIs offered by SharePoint 2013 you need to authenticate first. From the perspective of a companion app, this would mean that your app needs to contain some kind of credentials in it in order to access the API. Because however all of the content is publicly available on your website anyway, why not allow for anonymous access to the SharePoint 2013 Search REST API?
In the collection of REST APIs offered with SharePoint 2013, the Search REST API is an exception when it comes to anonymous access. Where all other APIs use the all-or-nothing approach, SharePoint 2013 allows you to not only allow anonymous access to the Search REST API only but also to choose which capabilities of the Search REST API should be available to anonymous users. Following is the exact description of how you can configure SharePoint 2013 Search REST API for anonymous users.
Once you enable Search REST API for anonymous users your companion apps will be able to issue REST request to publish content from your website. Following is a sample REST request that allows you retrieve the list of everyone who works at Mavention:
Putting things into perspective
Everything that we have discussed so far is a part of the standard content publishing capabilities offered with SharePoint 2013. If you are using a previous version of SharePoint achieving similar results would involve substantial development effort, not to mention that some things, such as friendly URLs, might not even be achievable at all.
Summary
SharePoint 2013 offers new capabilities for publishing web content to multiple channels including companion apps. Although the configuration process isn’t complex, there are a few considerations that should be taken into account already during the planning and design stage to ensure that you can leverage the multichannel publishing capabilities that SharePoint 2013 offers to their full potential.
This is the first of the articles accompanying my presentation on the SharePoint Conference 2014. In the next part we will discuss how to illustrate your app ideas using Microsoft Project Siena connected to SharePoint 2013 Search REST API with anonymous access.