SharePoint CRUD operations in SharePoint Framework client-side web parts
When building web parts on the SharePoint Framework you might need to interact with list items. To help you get started, SharePoint Patterns and Practices published a set sample Web Parts.
SharePoint list items CRUD operations
SharePoint lists are a convenient place for customizations to store their data. By using lists developers can simplify their solutions but also leverage SharePoint’s enterprise capabilities such as content policies or security and allow other solutions to leverage the data as well.
When building SharePoint client-side customizations using lists you might not only need to read data from the list but also create new and modify existing items. Often developers use REST APIs because they work the same way on every platform. But depending on how you’re building your SharePoint Framework client-side web parts there are some subtleties, that you have to keep in mind, particularly when performing operations other than read.
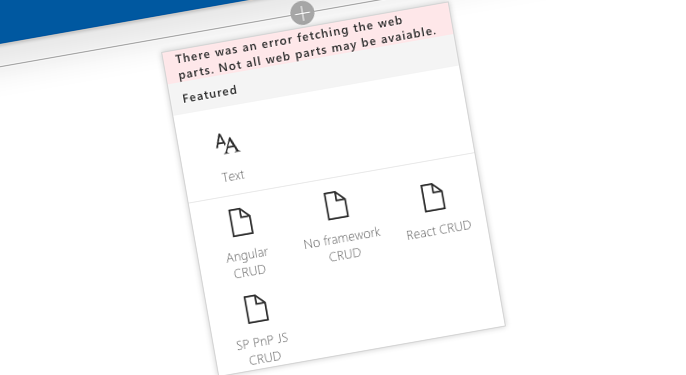
Sample SharePoint Framework client-side web parts performing SharePoint CRUD operations
To help you get started with performing CRUD operations in SharePoint Framework client-side web parts, through the SharePoint Patterns and Practices we published a set of sample web parts illustrating the different operations in React, Angular, the PnP JS Core library and without any particular JavaScript framework. Here are the key elements that you should have a closer look at before building your own web parts.
The source code of the sample web parts is available on GitHub at https://github.com/SharePoint/sp-dev-fx-webparts/tree/dev/samples/sharepoint-crud.
Get list item entity type name
When creating new and updating existing list items you have to specify the item object in the request’s body. One of the properties of the item object is the list item entity type which helps the REST API to map the list item properties to the item in the list. List item entity type follows a specific convention, like SP.Data.YourListListItem. One of the pieces of the list item entity type name is the name of the list but it’s error-prone to get right manually, particularly when dealing with lists using special characters in their name.
A better, and more secure way, is to get the list item entity type from the list itself by calling the REST API:
/_api/web/lists/getbytitle('My List')?$select=ListItemEntityTypeFullNameThe retrieved value is the full list item entity type name that you can directly use when creating and updating list items.
If you take a closer look at the sample web part using the PnP JS Core library you won’t see any references to the list item entity type in the create or update calls. The PnP JS Core library automatically retrieves the list item entity type for you and you don’t need to worry about it yourself. This is just one of the many examples of how the PnP JS Core library simplifies communicating with SharePoint in client-side solutions.
Minimize the REST response payload
By default, when issuing REST requests to SharePoint, you get more information than what you requested. The response for your request contains the data you requested along with some metadata. If you perform many requests or retrieve large data sets, the additional information can quickly expand the amount of data you download slowing down your application. If you don’t need the metadata, you can easily prompt SharePoint not to provide it by setting the Accept header of each request to application/json;odata=nometadata (View on GitHub).
When using the HttpClient available in every SharePoint Framework client-side web part or the Angular $http service, you have to manually set the Accept header on each request. If you’re using the PnP JS Core library however, you can configure it to automatically add the Accept header to every request unless specified otherwise. You can do this by calling the pnp.setup function:
pnp.setup({
  headers: {
    'Accept': 'application/json;odata=nometadata'
  }
});This is another example of how the PnP JS Core library simplifies client-side development.
Use ETag to ensure data integrity
When retrieving list items from SharePoint, next to the list item data you can request the ETag which denotes the version of the given item. When updating or deleting items, you can specify the ETag along with your request. The request will then execute only if the ETag you provided matches the ETag of the item on the server. Using ETags is not required, but it is a very good practice to ensure the integrity of your data.
When performing REST requests using the SharePoint Framework HttpClient you can get the ETag from the response headers:
etag = response.headers.get('ETag');It’s very similar to when using Angular’s $http service:
item.ETag = response.headers('ETag');When working with the PnP JS Core library things are a bit more complicated. The library simplifies working with list items so much, that it doesn’t give you access to the response headers. Luckily, you can still get the ETag from the item metadata:
etag = item["odata.etag"];If you configured the PnP library in your project to retrieve no metadata by default, then in order to get the ETag you have to override the Accept header:
pnp.sp.web.lists.getByTitle(this.properties.listName)
  .items.getById(itemId).get(undefined, {
    headers: {
      'Accept': 'application/json;odata=minimalmetadata'
    }
});Chain promises to simplify your code structure
Some operations require more than one REST request. In a complete update request for example, you would get the item, update its data, get the list item entity type, get the request digest token and finally update the item. Performing all these requests using nested callbacks or promises would make your code hard to read in maintain.
this.getListItemEntityTypeName()
  .then(() => {
    this.getLatestItemId()
      .then(() => {
        this.loadItem()
          .then((response) => {
            response.json()
              .then(() => {
                ...
              });
          });
      });
  });
Given that each of these requests returns a promise you can use chaining to keep your code structure flat and execute requests one after another.
this.getListItemEntityTypeName()
  .then(() => {
    return this.getLatestItemId();
  })
  .then(() => {
    return this.loadItem();
  })
  .then((response) => {
    return response.json();
  })
  .then(() => {
    ...
  });
While there are small differences between the ECMA Script 6 (ES6) promises used by the SharePoint Framework HttpClient, promises returned by the PnP JS Core library functions and Angular, the basic idea is the same: each piece of the chain returns a promise to the following piece. By following this pattern you ensure that each piece of the chain contains atomic operation and each of them returns a single value.
The update operation is a good example of implementing promises chaining in practice. Compare chaining of the update operation implemented based on the standard HttpClient, PnP JS Core library and in Angular.
Break a chain of promises
When performing a number of asynchronous operations it can happen that one of the first operations fails. In such case, other operations should be cancelled. When implementing asynchronous operations using promises chain this is tricky: because every promise is a function, simply returning a value will only exit that single promise rather than break the whole chain. The same applies to simply rejecting a promise: only that promise would be cancelled but all other promises in the chain would keep executing. While you could add a check to each promise verifying that the previous one has been executed correctly, it would unnecessarily complicate your code. There is a better way to break the execution of a chain of promises.
When implementing asynchronous operations using promises you can specify two callbacks: one for when the promise is fulfilled and one when it’s rejected:
this.getListItemEntityTypeName()
  .then((listItemType: string): Promise<number> => {
  }, (error: any): void => {
  });
With a chain of promises it would look like:
this.getListItemEntityTypeName()
  .then((listItemType: string): Promise<number> => {
    return this.getLatestItemId();
  }, (error: any): void => {
  })
  .then((latestItemId: number): void => {
  }, (error: any): void => {
  });
While the rejected callback is meant to do good and help you handle errors gracefully, when it comes to chains of promises it does more harm actually. If the first promise would fail, the failure would trigger the rejected handler of the first promise to handle the failure. Having handled the failure, the chain of promises would continue as if nothing happened. To break the chain of promises on a failure the chain should implement only one error handler for the whole chain in the last promise instead:
this.getListItemEntityTypeName()
  .then((listItemType: string): Promise<number> => {
    return this.getLatestItemId();
  })
  .then((latestItemId: number): void => {
  }, (error: any): void => {
  });
That way, when a promise fails, the chain of promises skips promises until it finds an implementation of the reject callback. Since it’s at the end of the chain, all other operations are skipped, which is exactly what we wanted to achieve.
Despite the small differences between how promises in the different frameworks are implemented they work the same. You can compare the implementations based on the standard HttpClient, PnP JS Core library and in Angular.
Not CRUD but still noteworthy
The sample web parts provided with the SharePoint CRUD solution focus on illustrating performing CRUD operations on SharePoint list items. Next to being a valuable reference for implementing SharePoint CRUD operations in your own web parts, there a few other things that these web parts show how to do.
Bind event handler to HTML control
When you scaffold a new web part using the SharePoint Framework Yeoman generator, the created web part contains a button but there is no event handler attached to it. You could waste quite some time trying to figure out how to properly handle clicking the button in your Web Part class or React component. When building web parts with Angular it’s easy, as the click is handled by the controller, just as in any other Angular application, but what about React or when using no particular JavaScript framework?
When using no particular JavaScript framework one way to register an event handler for an HTML control is by querying the DOM for the control and using its addEventListener function to register the handler:
public render(): void {
  this.domElement.innerHTML = `<div class="${styles.noFrameworkCrud}">
    <button class="ms-Button create-Button">
      <span class="ms-Button-label">Create item</span>
    </button>
  </div>`;
  const webPart: NoFrameworkCrudWebPart = this;
  this.domElement.querySelector('button.create-Button').addEventListener('click', () => { webPart.createItem(); });
}

private void createItem(): void {
  ...
}First, on the web part’s DOM element you use the native browser’s querySelector function to retrieve the particular HTML element. Once you have it, you call the addEventListener function, specifying the event (click) and the event handler. When specifying the event handler you have to keep in mind that the event handler is executed from HTML and therefore you cannot simply use the this. modifier as it would execute in the wrong scope. By wrapping the event handler in a lambda function you can ensure it will be called in the context of the web part.
In React, assigning an event handler is somewhat similar:
<Button onClick={() => this.createItem() }>Create item</Button>The main difference here is that you can benefit of how React registers event handlers and you don’t need to lookup the component first. Also here you need to ensure that the event handler is executed in the correct scope and this is done by assigning it through a lambda function.
Use Office UI Fabric React components
Microsoft encourages us to use Office UI Fabric when building customizations for the Office and SharePoint platform. Office UI Fabric helps you ensure that your customization looks and feels as if it was an integral part of Office/SharePoint rather than a customization. Additionally, Office UI Fabric simplifies adoption of your solution because it works the same way as other, similarly looking elements in the application.
To further simplify using Office UI Fabric in SharePoint Framework client-side web parts, Microsoft released Office UI Fabric React implementation which consists of styles and ready-to-use components. When you create a new SharePoint Framework project using React this is however what you will see in the generated HTML:
public render(): JSX.Element {
  return (
    <div className={styles.myWebPart}>
      <div className={styles.container}>
        <div className={css('ms-Grid-row ms-bgColor-themeDark ms-fontColor-white', styles.row)}>
          <div className='ms-Grid-col ms-u-lg10 ms-u-xl8 ms-u-xlPush2 ms-u-lgPush1'>
            <span className='ms-font-xl ms-fontColor-white'>
              Welcome to SharePoint!
            </span>
            <p className='ms-font-l ms-fontColor-white'>
              Customize SharePoint experiences using Web Parts.
            </p>
            <p className='ms-font-l ms-fontColor-white'>
              {this.props.description}
            </p>
            <a
              className={css('ms-Button', styles.button)}
              href='https://github.com/SharePoint/sp-dev-docs/wiki'
            >
              <span className='ms-Button-label'>Learn more</span>
            </a>
          </div>
        </div>
      </div>
    </div>
  );
}
See how the button is implemented as raw HTML? Instead it could have been done like this:
public render(): JSX.Element {
  return (
    <div className={styles.myWebPart}>
      <div className={styles.container}>
        <div className={css('ms-Grid-row ms-bgColor-themeDark ms-fontColor-white', styles.row)}>
          <div className='ms-Grid-col ms-u-lg10 ms-u-xl8 ms-u-xlPush2 ms-u-lgPush1'>
            <span className='ms-font-xl ms-fontColor-white'>
              Welcome to SharePoint!
            </span>
            <p className='ms-font-l ms-fontColor-white'>
              Customize SharePoint experiences using Web Parts.
            </p>
            <p className='ms-font-l ms-fontColor-white'>
              {this.props.description}
            </p>
            <Button elementType={ElementType.anchor}
              href="https://github.com/SharePoint/sp-dev-docs/wiki"
              className={styles.button}>Learn more</Button>
          </div>
        </div>
      </div>
    </div>
  );
}Notice how the Office UI Fabric implementation is encapsulated in the Button component. Should the internal structure of the Office UI Fabric button change one day, if you use a component instead of the raw HTML markup, you can be sure that your button will keep working as expected.
Use HttpClient in React component
When building SharePoint Framework client-side web parts using React, the web part is nothing more than a wrapper for the React component, which contains the actual implementation of the web part’s functionality. If your web part needs to retrieve data from an external repository, then it needs to be able to issue a web request. To support communication with APIs, SharePoint Framework offers the HttpClient class. But here is the catch: how do you get the instance of the HttpClient in a component, given that it’s accessible through the web part’s context?
One way to do it, is by passing it to the component using its properties. For this you would first add HttpClient to the component’s properties:
import { HttpClient } from '@microsoft/sp-client-base';

export interface IReactCrudProps extends IReactCrudWebPartProps {
  httpClient: HttpClient;
  siteUrl: string;
}In the web part, when creating the component, you would pass the instance of the HttpClient along with the URL of the site, both of which you need to perform a web request to SharePoint REST APIs:
public render(): void {
  const element: React.ReactElement<IReactCrudProps> = React.createElement(ReactCrud, {
    httpClient: this.context.httpClient,
    siteUrl: this.context.pageContext.web.absoluteUrl,
    listName: this.properties.listName
  });

  ReactDom.render(element, this.domElement);
}Please note that using this approach tightly couples your component with SharePoint Framework client-side web parts. If you want to prevent it, then you would need to use a custom interface in the component’s properties and create an implementation of that interface based on the standard HttpClient for use with web parts.
Communicate the state of your React web part
A web part has, generally speaking, three states: it can either be loading data, showing data or it could have encountered an error. In React components you handle these states by using component’s state. Similarly to component’s properties, state in a React component is defined using an interface and specified as a type in the base class. However, whereas component properties are passed from the outside, component state is managed within the component. Here is how a sample implementation of state in a React component could look like:
export interface IReactCrudState {
  status: string;
  items: IListItem[];
}

export default class ReactCrud extends React.Component<IReactCrudProps, IReactCrudState> {
  constructor(props: IReactCrudProps, state: IReactCrudState) {
    super(props);

    this.state = {
      status: this.listNotConfigured(this.props) ? 'Please configure list in Web Part properties' : 'Ready',
      items: []
    };
  }
}It’s up to you to choose if you want to have a generic-purpose property like the status property used above, or to track information messages and errors separately.
When working with component’s state it’s essential that you set the initial component state in the component constructor by directly assigning a value to the this.state property. While you should always use the this.setState() function to update component’s state, initially you have to assign it directly to the this.state property. Without it, you will get an error if you try to render the contents of your state.
Whenever the state of your component changes, you can track it by calling the this.setState() function:
this.setState({
  status: 'Creating item...',
  items: []
});The setState function can be called in two ways: you can either pass the complete new state or only modify a piece of it:
this.setState((previousState: IReactCrudState, currentProps: IReactCrudProps): IReactCrudState => {
  previousState.status = error;
  return previousState;
});
Which one you use depends a bit on the use case: if you track many different properties and you want to update only one of them, using the incremental state change is a good idea. If you on the other hand want to reset the whole state to a specific value then you should use the shorter notation passing the complete state object.
Calling the this.setState() function updates the state of the component and triggers the component’s render() function. This is why using state is an easy way to communicate changes in your component to users.
Get a sorted set of items using the PnP JS Core library
The PnP JS Core library simplifies communicating with SharePoint in client-side solutions. The great advantage of using it instead the raw REST APIs is the type safety that you get during development. Raw REST requests are just strings and the only way to catch the error is on runtime. The PnP JS Core library infers type safety design-time making it easier for you to verify that your requests are composed correctly.
Compare for example the following request used to retrieve the Id of the last item added to the list:
this.props.httpClient.get(`${this.props.siteUrl}/_api/web/lists/getbytitle('${this.props.listName}')/items?$orderby=Id desc&$top=1$select=id`, {
  headers: {
    'Accept': 'application/json;odata=nometadata',
    'odata-version': ''
  }
})
See the error? With the PnP JS Core library the same request looks like:
pnp.sp.web
  .lists.getByTitle(this.properties.listName)
    .items.orderBy('Id', false).top(1).select('Id').get()
As you can see, the whole request is expressed using a strongly typed API and there is far less room for error than when constructing the request manually.
Summary
When building web parts on the SharePoint Framework you might need to interact with list items. To help you get started, SharePoint Patterns and Practices published a set sample Web Parts. These web parts illustrate how to perform CRUD operations on SharePoint list items in React, Angular, using the PnP JS Core library and using no particular JavaScript framework. Additionally, these web parts contain implementation reference for patterns such as promises chaining or working with state in React components.
Check out the sample web part on GitHub at https://github.com/SharePoint/sp-dev-fx-webparts/tree/dev/samples/sharepoint-crud.