What I learned working on the Office 365 CLI
For the last few months I’ve been leading the community effort to build a cross-platform CLI for managing Office 365. Here are a few things I learned along the way.
What is the Office 365 CLI
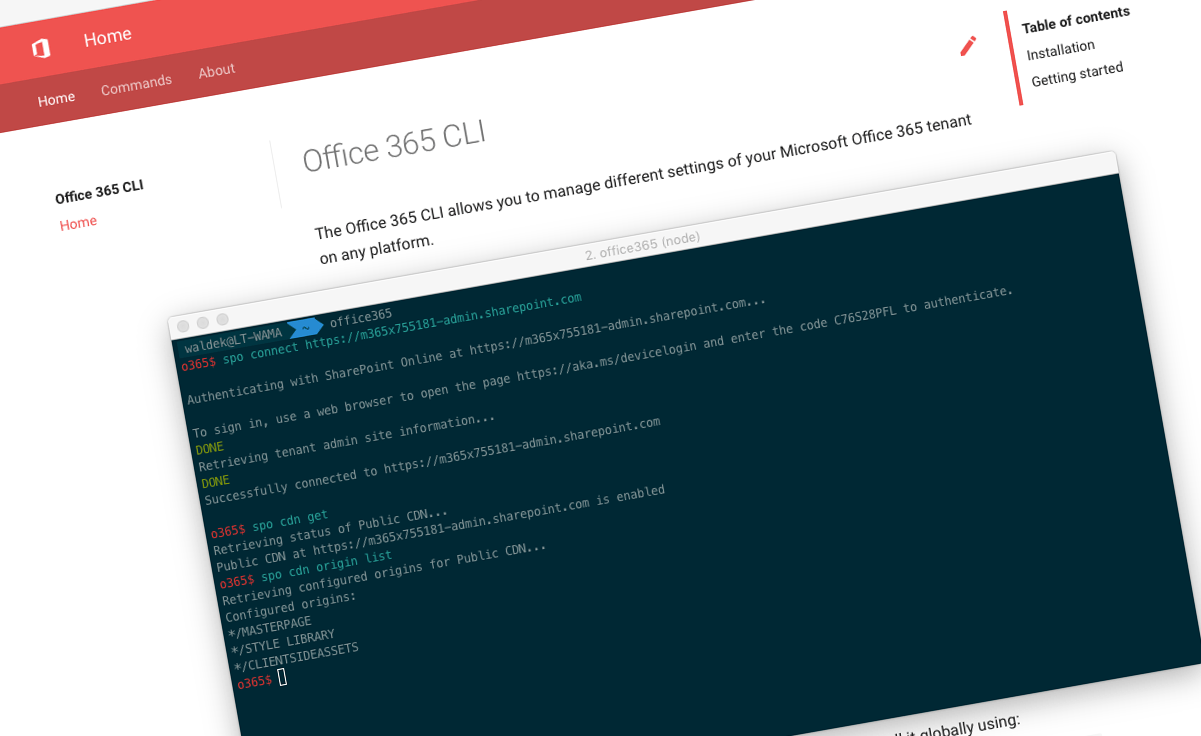
Office 365 CLI is a cross-platform command line interface, that you can use to manage the settings of your Office 365 tenant and your SharePoint Framework projects. It works with any shell on any operating system, including the Azure Shell.
Why Office 365 CLI
With the introduction of the SharePoint Framework, for the first time Microsoft introduced a cross-platform development model for building SharePoint solutions. When building solutions for SharePoint and Office 365, you often need to configure your tenant, like enabling the Office 365 CDN, setting tenant properties or site designs and site scripts. Before the Office 365 CLI, you could manage these settings only through PowerShell on Windows or through the CSOM/REST APIs. Office 365 CLI allows users on any platform to easily manage the settings of their Office 365 tenant completing the cross-platform SharePoint capabilities.
I use a Mac. After having to yet again start a Windows VM to change the settings of my Office 365 tenant I decided to build a CLI that I could use directly on the macOS. And so I started building the Office 365 CLI. Here are some things I learned along the way.
What are some of the tech things I learned working on the Office 365 CLI
Office 365 CLI is built on Node.js using TypeScript. It uses Vorpal as a foundation for defining and executing commands. It communicates with Office 365 using its REST APIs where possible, and by mimicking the SharePoint CSOM API where it isn’t. It authenticates with Azure AD using OAuth device code flow through the ADAL JS library. To help you use the CLI, we implemented autocomplete of commands using Omelette. The CLI’s documentation is written in Markdown , generated into a static web site using MkDocs and published on GitHub pages. We have unit tests built using Mocha , mock objects using Sinon and we keep track of the coverage using Istanbul. We setup continuous integration using CircleCI for validating pull requests and automatically releasing betas and full releases and their documentation. The whole project is built and managed publicly on GitHub.
How many of these things do you think I knew when I started working on the Office 365 CLI?
Developing on Node.js
I first got to work with Node.js a few years back, when I contributed to the Office add-in Yeoman generator. Back then already I was working on a Mac and I liked a lot the idea of being able to build solutions for Office 365 natively on the macOS without having to run a VM. Node.js intrigued me with the promise of being able to build solutions using nothing but JavaScript. No matter if I was building the front- or the back-end I could use the same language. I also liked how simple Node.js feels comparing to ASP.NET. Node.js might be more verbose than ASP.NET, but in case there are any issues, I find it easier to trace them back to my code than to the implicit configuration and decorators in ASP.NET.
When building solutions on Node.js, there seems to be a package for everything. In fact there are over 750.000 of them. It’s tempting to use whatever is out there and build your solution by gluing the different packages together. But it comes with a price and a risk. How likely are any issues in a dependency to be fixed? Will the package be maintained 6 months from now, a year, two years? Could someone sneak in some malicious code to it affecting your solution? How likely are others, who could contribute to your solution, know that other package and be able to use it easily without a significant learning curve? In the end, will you truly benefit of your dependencies or will you end up with 100 forks for fixing issues specific to using that particular dependency in your solution?
From the start, I wanted to keep the number of dependencies in the Office 365 CLI to the absolute minimum. The ones that we use, solve specific niche problems we have, like command completion in Bash, removing comments in JSON strings or authentication to Azure AD. All of which are a part of the base functionality of the Office 365 CLI which you are unlikely to come across when contributing new functionality. Regularly, I verify if any of the dependencies has been changed and if so, what has changed since the version we’re using at the moment. Each time there is an update, I test it to verify that we can upgrade without any issues. Already once a patch update to one of the type definitions required us to refactor all web requests, because it broke them. There is no such thing as a free ride.
The Office 365 CLI doesn’t use Node.js that extensively. Sure, with a few exceptions, all commands issue web requests. A few of them also read files from the file system, but that’s about it. The biggest benefit of using Node.js is that the CLI works on any platform. Additionally, many developers who know SharePoint, and could contribute to the CLI, also know JavaScript/TypeScript. This wouldn’t be the case if we chose to build the CLI using let’s say Python or Go.
Using TypeScript
When it comes to TypeScript I was a laggard. I’ve heard about it first while attending Matt Bremer’s session about TypeScript for SharePoint developers during one of the Evolutions/ICS conferences in London a few years back. Unfortunately, it didn’t click with me back then, and I didn’t get to using it only until I got invited to participate in the SharePoint Framework Developer Kitchen in early 2016. Since the Dev Kitchen I’ve been working with TypeScript regularly, building different kinds of solutions.
In the Office 365 CLI, TypeScript helps us ensure consistency and deal with refactoring code. One thing that took me a moment to figure out is the difference in resolving dependencies design- vs. runtime. In most cases, we use the typical import statements you will see in the most TypeScript projects. In a few places however, we resolve dependencies on runtime (like dynamically loading commands) which require require constructs. In a few places, we also had to add TypeScript type definitions to ensure that we can benefit of TypeScript design-time code features when working with third party libraries. One thing that we consciously try to avoid is using any or implicit types in favor of explicit types and clarity.
Building a cross-platform CLI on Node.js
Before I started building the Office 365 CLI, I’ve never built a CLI in Node.js. I had to start from scratch researching how to build a CLI, what libraries are already out there and what other CLIs are built that I could learn from. Eventually, I settled on using Vorpal as the foundation for the Office 365 CLI, because it matched the requirements the most. But I had to learn its API, command structure and intricacies from scratch. And not always from its documentation.
Node.js works on any platform. But the cross-platform support doesn’t quite come for free. It turns out that building a solution that works on any operating system, even on Node.js, requires some considerations: from your npm scripts, to the code that makes up your solution. Each shell for example, requires escaping quotes differently, and each operating system has its way of storing credentials. In Bash there is also a limit how long a string variable can be, which is by the way less, than the information about the Microsoft Graph Azure AD app you can retrieve in JSON format using the Office 365 CLI. For some things like EOL characters or path separators, there are Node.js variables that you should use instead of hard-coded values. And these are just a few things I’ve found out about along the way.
Authenticating to Office 365 using Azure AD OAuth device code flow
When thinking about the hardest part about development I’m still not quite sure whether it’s authentication or time zones. Having built Office add-ins and apps using the Microsoft Graph in the past, I had the head start in understanding what OAuth is and how Azure AD authorization works. It wasn’t always like that. I still remember how clueless I was when I saw OAuth for the first time, back in 2010. Despite my previous experience, I was however up for a surprise.
Typically, when you use OAuth, you use it in a web- or a native application. In a web application, you redirect the user to the identity provider to sign in with their account and complete the OAuth flow. In a native application, you display a web browser control of some sort and capture the OAuth response code after the user signed in with their credentials (which you don’t get the access to). Neither approach works in a command-line tool. Luckily, there is a third option, called device code flow, which provides users with a code that they need to enter on a special login page in Azure AD. The thing is, that they can do that on any device and all the command line does is to display the login code and check if it’s been used or not. There is very little documentation on using the device code flow and it took me a bit to figure it out, finally realizing that I should’ve been using the ADAL JS library all along.
Communicating with Office 365 using its REST API, mostly
Even though I’ve worked with the SharePoint APIs in the past, and I knew about the intricacies in the different parts of it, I didn’t get to fully experience it. While working on the Office 365 CLI, I’ve found out, that sometimes GET operations, must be performed using POST requests. Sometimes POST requests must include the request digest, sometimes they don’t. Sometimes you need to include specific request headers. Sometimes the operation must be performed on a specific site. Sometimes the API follows the OData convention, sometimes it doesn’t. Some API operations are exposed to client calls using CSOM only. More than often the errors you get leave you clueless. The worst of it all is, that there is very little documentation available.
In comparison, using other APIs exposed through the Microsoft Graph or the Azure AD Graph is significantly easier. It’s not flawless, but the API is consistent and the documentation explains which permissions you need to perform which operation and how to structure your requests.
Automatically completing commands
When you use PowerShell or standard Bash commands, I bet you never stand still and realize the work that went into the shell completing your input after you press TAB. It’s just there helping you to use the shell efficiently. When you build PowerShell cmdlets, PowerShell automatically completes your input for you. This isn’t the case with Bash and other shells. Each shell has its own way to implement command completion and they’re all non-trivial for a CLI like Office 365 CLI where you have many subcommands with different level of nesting and each command accepting different parameters.
I learned about all this on the job, when building the Office 365 CLI. I’m yet to crack Bash compdef for the CLI and meanwhile settled on Omelette doing that automatically for us (albeit with some performance cost). On Windows, we generate a static clink definition for use with cmder and we’re yet to implement completion for PowerShell.
Documentation
One thing that was clear to me right from the start, that if we ever wanted the Office 365 CLI to be useful for anyone else than ourselves, we had to have documentation. Not only we had to explain each and every command in the CLI, what it does and what arguments it uses, but also the very basics, like how to install the CLI and keep it up-to-date, how it works and what you have to know before you start using it. You’re the best to judge how well we’ve done it.
The documentation for all commands is available both directly inside the CLI. Additionally, we have a few extra pages available on the Office 365 CLI web site at aka.ms/o365cli. To simplify maintaining the documentation and ensure its consistency, we chose to use Markdown for editing. To offer a richer experience of consuming the documentation, we chose MkDocs which compiles .md files to a complete website with navigation, local table of contents, search, code highlighting and theming.
The first time I used MkDocs was when working on documentation for the Office 365 CLI. Using MkDocs to build the documentation is pretty self-explanatory and the documentation provides sufficient information how to build and configure the website generated by MkDocs. The downside is, that MkDocs is based on Python and if you haven’t worked with Python in the past, you will spend some time installing just the right combination of prerequisites. Still, the result is absolutely worth the setup effort.
Tests and code coverage
Back, when I was working on the Office add-in Yeoman generator, we were building tests for the different parts of scaffolding projects. For us, it was a kind of insurance policy, that each time we would change something about the generator, we could easily verify, that everything was still working as expected.
There is nothing cool about writing unit tests. At some point, after you wrote hundreds of them, you get fed up. You’d rather write new functionality than tests. After all, you’ve just checked that your code is working as expected, right? Until one day you change something somewhere. Only then you will appreciate being able to press a button, wait a few seconds and get confirmed that everything is still working as expected. Or not.
I’ve been through some refactorings both in the Office 365 CLI and in the solutions I build at Rencore. Each time, being able to quickly find any issue in code I wrote a while back, turned out to be invaluable and worth the time I spent writing the tests tenfold.
Writing unit tests isn’t hard and requires simple discipline. Until you get to a point where you need to mock complex objects like HTTP requests, time outs or callbacks. That will test your perseverance. Figuring out how to mock things is specific to the solution you’re building and often takes way more time than you thought initially. The good news is though, that once you’ve done it, you can reuse the constructs to build new tests for your code in a matter of seconds.
As a part of building tests for the Office 365 CLI, we keep track of the code coverage for the commands. We strive to keep the coverage at 100%, not for the sake of it being 100% but to ensure that we haven’t missed something, that could lead to potential issues later. We keep track of the coverage using Istanbul, which isn’t entirely flawless either. In some cases it incorrectly detects coverage for constructors and the only way to work around it, is to suppress the analysis of the constructor altogether.
Continuous integration
When I was planning how I wanted to setup the Office 365 CLI project, I wanted us to be able to release often, quickly and preferably with no manual intervention. For everyone involved, Office 365 CLI is a side-project and if we have any time to spend on it, I’d rather have us spend it on building new functionality than on releasing a new version. I’ve seen a similar setup based on CircleCI being used in the ngOfficeUiFabric project to which I contributed and thought it was a good starting point for what I wanted for the Office 365 CLI.
While implementing the CI setup for the Office 365 CLI, I used the v2.0 version of the CircleCI specification which is slightly different than the v1.0 used in ngOfficeUiFabric. It took me a while to figure out how to run different builds for different branches and differentiate between releasing beta versions from the dev branch, releasing final versions including documentation from tags on the master branch and building PRs on the dev branch.
In order to automatically publish the CLI to npm, we need to store the npm token in the CircleCI environment variables, but since we’re building PRs too, we need to ensure that environment variables are not exposed when building PRs. If someone submitted a PR with a modified CircleCI config, they could get hold of our npm token. There is a configuration setting to prevent this from happening in CircleCI, but you need to enable it.
Office 365 CLI documentation is published on GitHub pages. While MkDocs automatically takes care of the publishing process, it requires write access to the GitHub repo. By default, when you setup CircleCI with GitHub, your project is setup with a read-only token and you have to explicitly remove it and setup a write token yourself both in GitHub and CircleCI or publishing the documentation will fail.
One thing I really like about CircleCI is that the whole build setup is based on Docker containers and implements a clever caching mechanism. For example, if you have a PR with a new npm dependency and merge that change into your branch, CircleCI will reuse the cached layer with npm dependencies generated when building the PR, instead of pulling the dependencies down from the internet again. The same happens, if your dependencies haven’t changed. Reusing the cached layer speeds up your build process significantly. Additionally, if there is ever anything wrong with your build, you can debug it locally, by pulling the Docker image you’re using in your CI setup. I needed exactly that when the build would hang on calculating the code coverage. The reason for it turned out to be a few occurrences of if (somestring.indexOf()) instead of if (somestring.indexOf() > -1) which are apparently handled differently in Node.js v8 and v6.
Git
I’ve been working with git for a while, but only when I started managing the Office 365 CLI initiative, I understood some of the most powerful concepts of git.
In the past, I’ve been working primarily with TFS. When I got to work with git first, I would primarily stick to pushing commits to branches and merging the changes between them. While you could argue, that that’s enough to manage a decentralized open source project, git offers you some powerful tools, to keep your code well-organized.
From the start of the Office 365 CLI project, I wanted its git history to be clean and meaningful. Whereas the changelog/release notes tell end-users what has changed in which version, the git history tells contributors what has changed in the code. Clean history is invaluable when you want to track changes in the code over time, for example to see what has changed since you worked with the project the last or whe you try to figure out where a specific bug has been introduced. But the history is useful only if the commit messages reflect commit contents. Things like merge- or work-in-progress commits clutter the view and make it harder to see what matters.
When working on open source projects, that accept public contributions, it’s impossible to avoid personal preferences of the different contributors. Luckily, as a project coordinator, you can use git rebase to restructure commits to and ensure consistency throughout the project.
Another benefit of using git rebase, is that you can avoid merge commits and keep the git history a single thread making it easier to track what has changed where. Fellow-MVP and member of the Office 365 CLI team Andrew Connell, wrote a detailed article about this a while back.
Rebasing is also invaluable in cases where you got a PR and there is a typo in the documentation or something you’d like to add. With rebase, you can add the changes and make them be a part of the PR as if they were there from the start. Sure, your change won’t be visible in the history, but it’s irrelevant in the grand scheme of things.
When contributing to an open source project, it’s essential to keep your fork in sync with the upstream. Otherwise, every PR you submit, will be a nightmare for the project coordinators to merge. While I’ve been using it in the past when contributing to the Office add-in Yeoman generator and ngOfficeUiFabric, the concept truly clicked after I started using it a lot when working on the Office 365 CLI.
Summary
When I first thought of building a cross-platform CLI for managing Office 365, I had no idea how many new things I’d get to work with. Before I opened the project to the public, I had to learn how to set up a complete Node.js project with TypeScript, configure CircleCI, build docs or work with Vorpal - all things I’ve never done before. I knew SharePoint, Azure AD, TypeScript and a bit of Node.js. That’s it. Everything else, I learned on the job. The whole process would’ve been harder if not for some great advice I got from Andrew Connell and Vesa Juvonen. And even though I can’t reuse everything I’ve built in my current job, I still benefit of all the concepts I’ve learned as they are universal.
I would highly recommend you to start a project of your own and experiment with some new technology. There is no risk in doing it and the only cost is your time. Even if in the end, the thing that you built would turn out to be less useful than you thought, you will learn a lot and that’s invaluable. Don’t get discouraged by what you don’t know. Think of what you want to achieve and start doing it, one step at the time. And don’t forget to ask for help or advice. There are other people, just like you, who went through the same and can help you when you’re stuck.