Fool-proof consistent content authoring in SharePoint 2010 Rich Text Editor
In my previous article I showed you how you can configure the SharePoint 2010 Rich Text Editor to help you do content authoring in a consistent fashion. We discussed what a Rich Text Editor should and should not allow to support consistent user experience within a website and how it can be done in SharePoint 2010. Although the configuration options of the Rich Text Editor in SharePoint 2010 allow you to achieve some neat results, it isn’t fool proof and this is exactly what we will discuss in this article: how to not only configure the RTE’s UI for consistent content authoring but also how to ensure that the authored content is consistent.
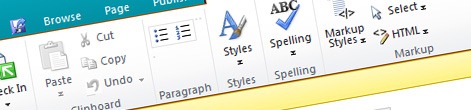
Let’s start with reviewing our previous result.

First of all we disabled the Font group to disallow in-line formatting and some presentational markup. Then we disabled the paragraph formatting options. Finally we created our own list of Markup Styles. Configuring the Rich Text Editor resulted in a lot of disabled options on the Ribbon that clutter the UI. Additionally, many of the settings apply to the UI only and if you add presentational markup in the HTML source, the RTE will allow you to save the page. It would be great if we could clean up the UI by removing disabled options and perform some kind of check to verify that the RTE contains no invalid markup.
Extending the SharePoint 2010 Rich Text Editor
The SharePoint 2010 Rich Text Editor for Publishing Pages is represented by the RichHtmlField class in the Microsoft.SharePoint.Publishing.WebControls namespace from the Microsoft.SharePoint.Publishing assembly. Since it’s a public class it can be extended to add some functionality.
using Microsoft.SharePoint.Publishing.WebControls;

namespace Mavention.SharePoint.Controls
{
    public class ConsistentRichHtmlField : RichHtmlField
    {
    }
}
Decluttering the UI
The first thing that we want to do is to remove all Ribbon elements that are disabled. We can do this using the SPRibbon.TrimById method. In order to use this method you have to add a reference to the Microsoft.Web.CommandUI assembly located in C:\Program Files\Common Files\Microsoft Shared\Web Server Extensions\14\ISAPI. Once we have the reference in place we can proceed with removing Ribbon elements. Let’s start off with the Fonts group:
public class ConsistentRichHtmlField : RichHtmlField
{
    protected override void OnLoad(EventArgs e)
    {
        base.OnLoad(e);

        if (SPContext.Current.FormContext.FormMode == SPControlMode.Edit ||
            SPContext.Current.FormContext.FormMode == SPControlMode.New)
        {
            SPRibbon ribbon = SPRibbon.GetCurrent(Page);
            if (ribbon != null)
            {
                ribbon.TrimById("Ribbon.EditingTools.CPEditTab.Font");
            }
        }
    }
}
If we now replace the standard RichHtmlField control with our ConsistentRichHtmlField we should get the following result:

As you can see the Fonts group has been removed from the Ribbon. Let’s do the same for the disabled buttons in the Paragraph group:
public class ConsistentRichHtmlField : RichHtmlField
{
    private static string[] hiddenRibbonElements = new string[]
    {
        "Ribbon.EditingTools.CPEditTab.Font",
        "Ribbon.EditingTools.CPEditTab.Paragraph.Outdent",
        "Ribbon.EditingTools.CPEditTab.Paragraph.Indent",
        "Ribbon.EditingTools.CPEditTab.Paragraph.LTR",
        "Ribbon.EditingTools.CPEditTab.Paragraph.RTL",
        "Ribbon.EditingTools.CPEditTab.Paragraph.AlignLeft",
        "Ribbon.EditingTools.CPEditTab.Paragraph.AlignCenter",
        "Ribbon.EditingTools.CPEditTab.Paragraph.AlignRight",
        "Ribbon.EditingTools.CPEditTab.Paragraph.AlignJustify"
    };

    protected override void OnLoad(EventArgs e)
    {
        base.OnLoad(e);

        if (SPContext.Current.FormContext.FormMode == SPControlMode.Edit ||
            SPContext.Current.FormContext.FormMode == SPControlMode.New)
        {
            SPRibbon ribbon = SPRibbon.GetCurrent(Page);
            if (ribbon != null)
            {
                foreach (string ribbonElementId in hiddenRibbonElements)
                {
                    ribbon.TrimById(ribbonElementId);
                }
            }
        }
    }
}
This will clean up the Paragraph group and will leave only two buttons for creating ordered and unordered lists:

Using the above approach you can easily remove unused elements from the Ribbon which will make the UI more user friendly.
Validating RTE markup
One more thing on our to-do list for a Rich Text Editor that supports consistent user experience is implementing some kind of validation mechanism that will ensure that there is no unwanted markup in the RTE before saving the page. Most of the configuration options on the RTE apply to the UI only, so extending the RichHtmlField control is the only way to validate the HTML.
SharePoint 2010 Rich Text Editor Validation 101
The SharePoint 2010 RTE ships with quite a complex validation model based on COM components. And although it’s not something you can easily hook up to, it’s definitely something you can reuse in your custom validation solution.
The RTE’s validation magic happens in the RichHtmlField.Validate() method. If you want to implement custom validation that’s the method that you have to override.
The Validate method doesn’t return any result. Instead two things should be done if any validation errors occurred in the validation process. First you should set the IsValid property to false. Second you should report the error to the user by setting the value of the ErrorMessage property. Keep in mind that since we can’t implement the Auto Correct logic, the error message must be clear enough so that the user is able to fix the error himself.
Validating RTE content for consistency
When validating the contents of a Rich Text Editor there are three things you want to check for. First of all the presence of an H1 tag: as mentioned before it is reserved for the title of the page and it shouldn’t be used in the RTE itself. The next thing is in-line styling – something that can easily break the designed user experience and make reusing content impossible. Finally there is the presentational markup, such as b, i, font, etc.
While there are many ways of parsing an HTML string, probably the easiest way for us to perform the validation is by using Regular Expressions. Since we don’t have to manipulate the HTML and all we need to do is to match the RTE’s contents against the rule, Regular Expressions should do the job.
Let’s start off with creating a rule for H1:
private static Regex h1Regex = new Regex("<h1[^>]*>", RegexOptions.Compiled | RegexOptions.IgnoreCase);All we have to do now is to add it to the validation logic of our RTE:
public override void Validate()
{
    base.Validate();

    if (IsValid)
    {
        string value = Value as string;

        if (h1Regex.IsMatch(value))
        {
            IsValid = false;
            ErrorMessage = "Content contains an 'h1' tag which is reserved for the page title. Remove the tag and try again.";
        }
    }
}
First we use the standard validation mechanism that ships with the SharePoint 2010 Rich Text Editor. Only if it passes, we will proceed with our custom validation logic. If the content contains an H1 tag, the validation will fail and the user will see the error message:

We can use the same approach for checking for usage of in-line styling:
private static Regex styleRegex = new Regex(@"style=""[^""]*""", RegexOptions.IgnoreCase | RegexOptions.IgnoreCase);The above Regular Expression will match all style attributes in the content of the Rich Text Editor.
The last validation rule that we need is one to check for usage of presentation markup:
private static Regex presentationTagsRegex = new Regex("<(font|sup|sub|u|b|i|strike|s|big|small|center|blink|marquee)[^>]*>", RegexOptions.Compiled | RegexOptions.IgnoreCase);The only way to get this done is to include a list of all presentational HTML tags. Over the years quite a few presentational tags have been included in various HTML specifications so it’s important that you verify on regular that this list is complete and sufficient for your website.
Once the rules are in place the last thing remaining is to add them to our custom validation logic in the Validate method:
public override void Validate()
{
    base.Validate();

    if (IsValid)
    {
        string value = Value as string;

        if (h1Regex.IsMatch(value))
        {
            IsValid = false;
            ErrorMessage = "Content contains an 'h1' tag which is reserved for the page title. Remove the tag and try again.";
        }
        else if (presentationTagsRegex.IsMatch(value))
        {
            IsValid = false;
            ErrorMessage = "Content contains one or more of the following presentation tags: font, sup, sub, u, b, i, strike, s, big, small, center, blink, marquee. Replace those tags with CSS classes and try again.";
        }
        else if (styleRegex.IsMatch(value))
        {
            IsValid = false;
            ErrorMessage = "Content contains a 'style' attribute which is not allowed. Remove the attribute and try again.";
        }
    }
}
And that’s all: our fool-proof consistent Rich Text Editor is finished!

There are some limits
In my previous article, while discussing setting the AllowTextMarkup attribute, I showed you how the Rich Text Editor validates the HTML markup and how it automatically comes up with auto correction suggestions if invalid markup is found. It would be great if we could not only report invalid markup but also come up with suggestions to automatically correct it. This would make it easier for content authors to work with HTML markup. Unfortunately the Auto Correct capability of SharePoint 2010 Rich Text Editor is based on internal API that cannot be used in custom solutions. The only thing we can do is to report invalid markup and hope that content editors will be clever enough to figure out what the error applies to.
Summary
Consistent content authoring is something that should be implemented in every website, since it allows you to provide a consistent user experience and to reuse the content within the website or even beyond it. SharePoint 2010 ships with improved Rich Text Editor that allows you to support consistent content authoring through configuration. Since most of the configuration options disable the presentational functionality in the UI only, you should consider extending the standard Rich Text Editor and add validation rules that will enforce markup consistency in the content on your website.
Technorati Tags: SharePoint 2010,Web Content Management